Assembly Guide: Flexx Shelving
This guide covers all aspects of assembly for products in our Flexx Wall Shelving & Hanging Rail range:
- Shelving Systems
- Clothes Rails Systems
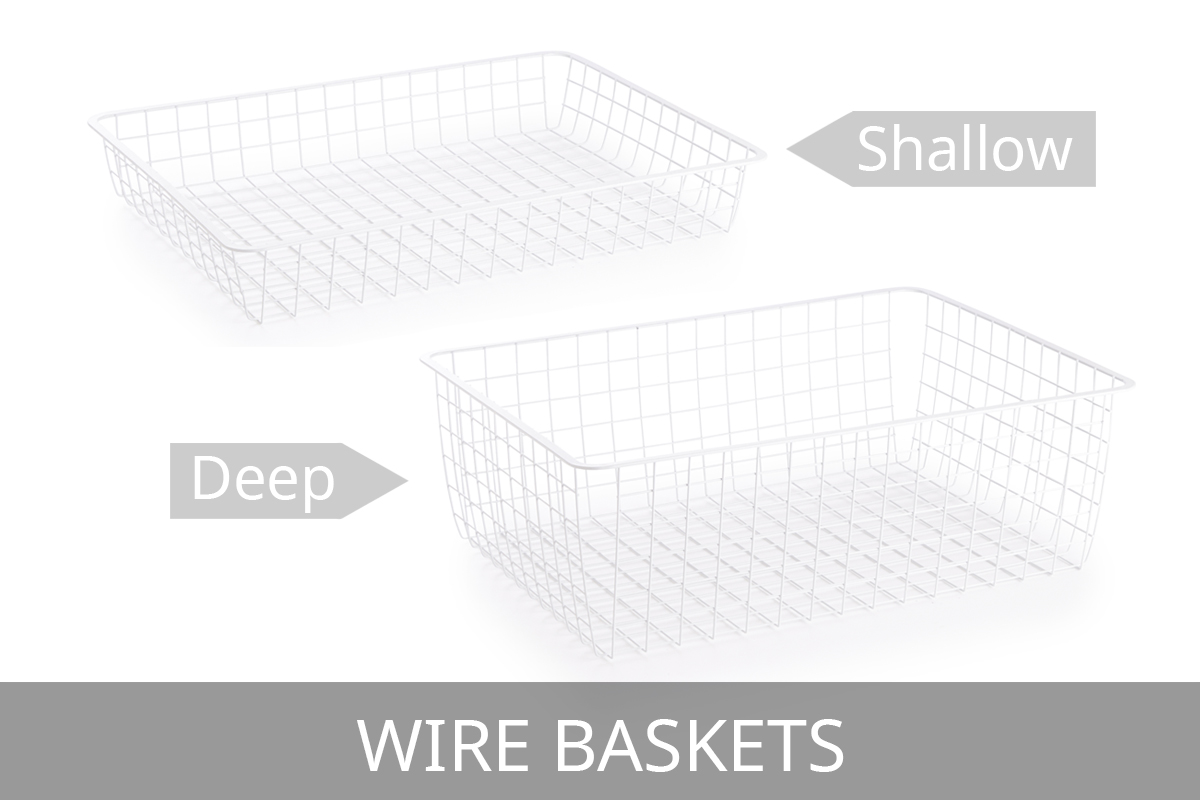
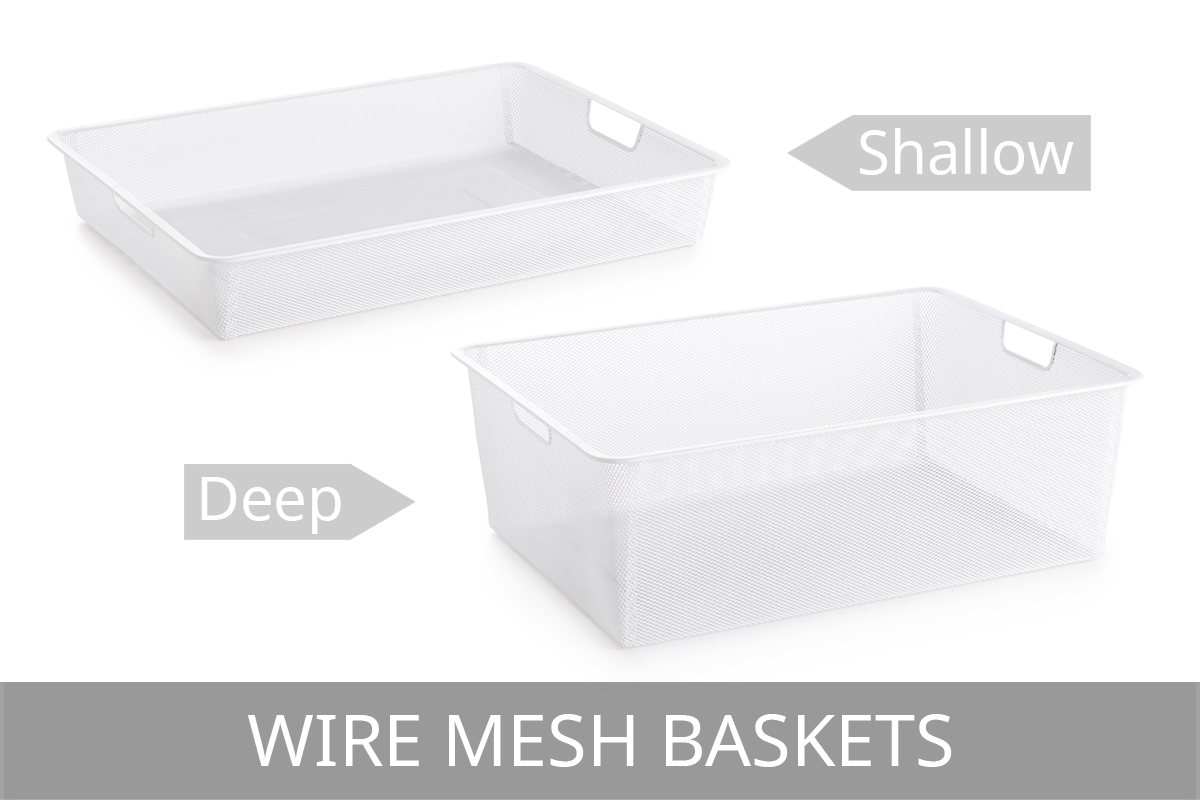
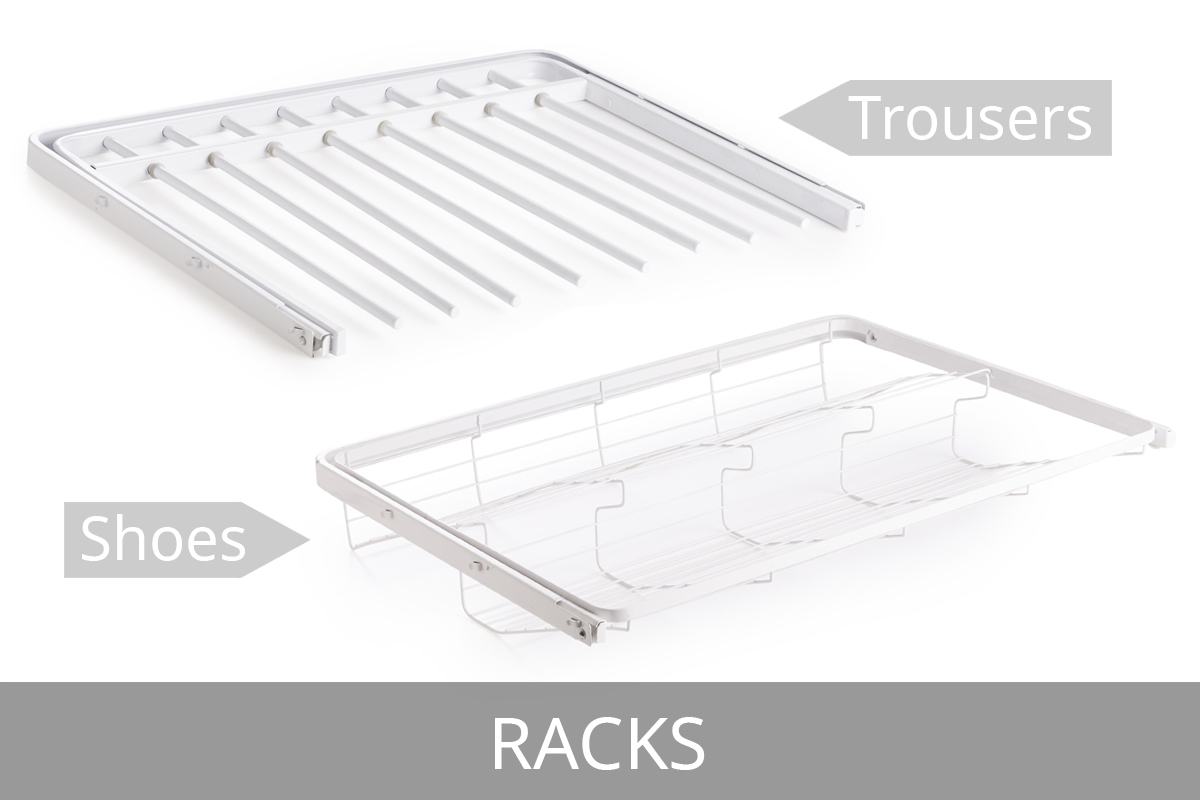
- Basket Systems
- Rack Systems
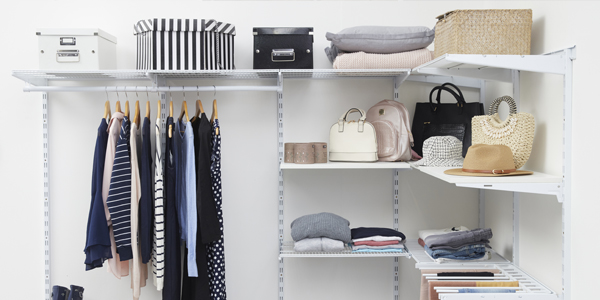
Flexible Shelving System: Layouts shown in the product images are just a suggestion. Flexx is a modular system, designed so that you have the freedom to adjust and position your Shelves, Clothes Rails and other accessories to suit your needs. Easily expand and rearrange by adding individual components.
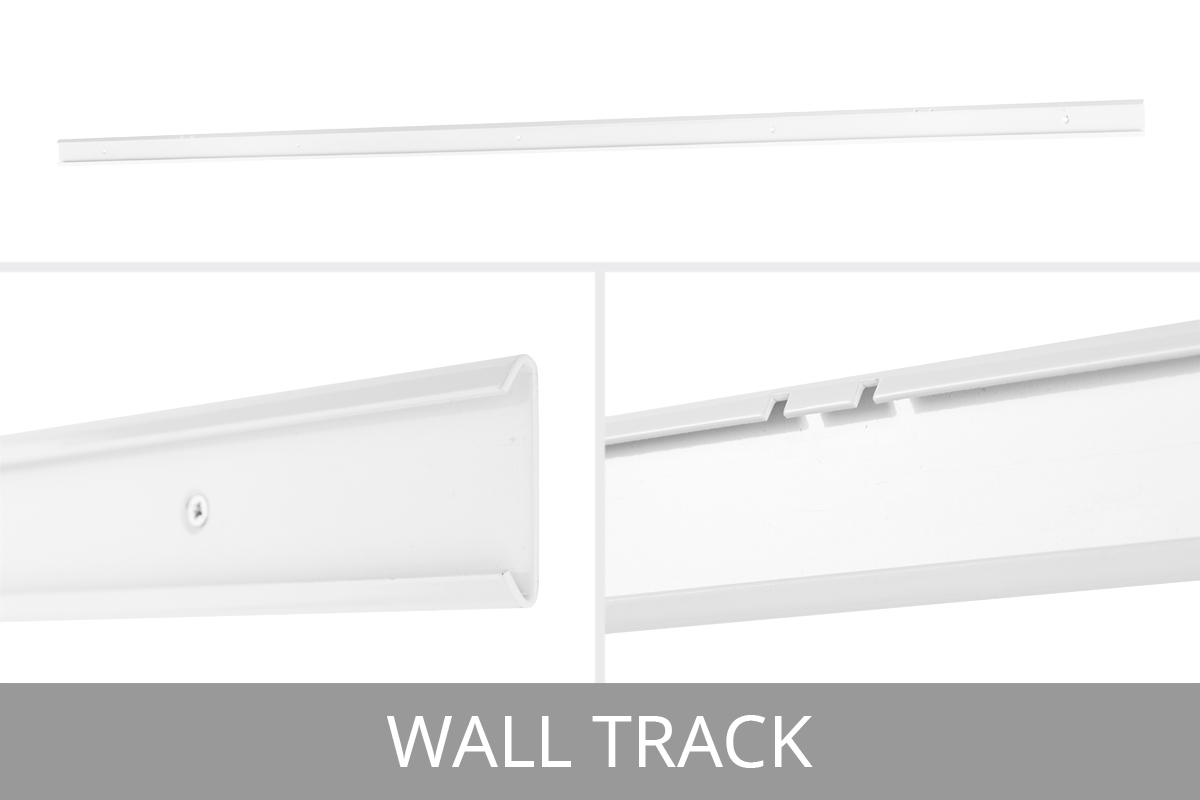
Wall Track & Uprights: It is simple to space your Uprights with the Wall Track. The Track is affixed first, which the Uprights are hooked onto and from there you can space them as required, depending on the width of Shelves and accessories.
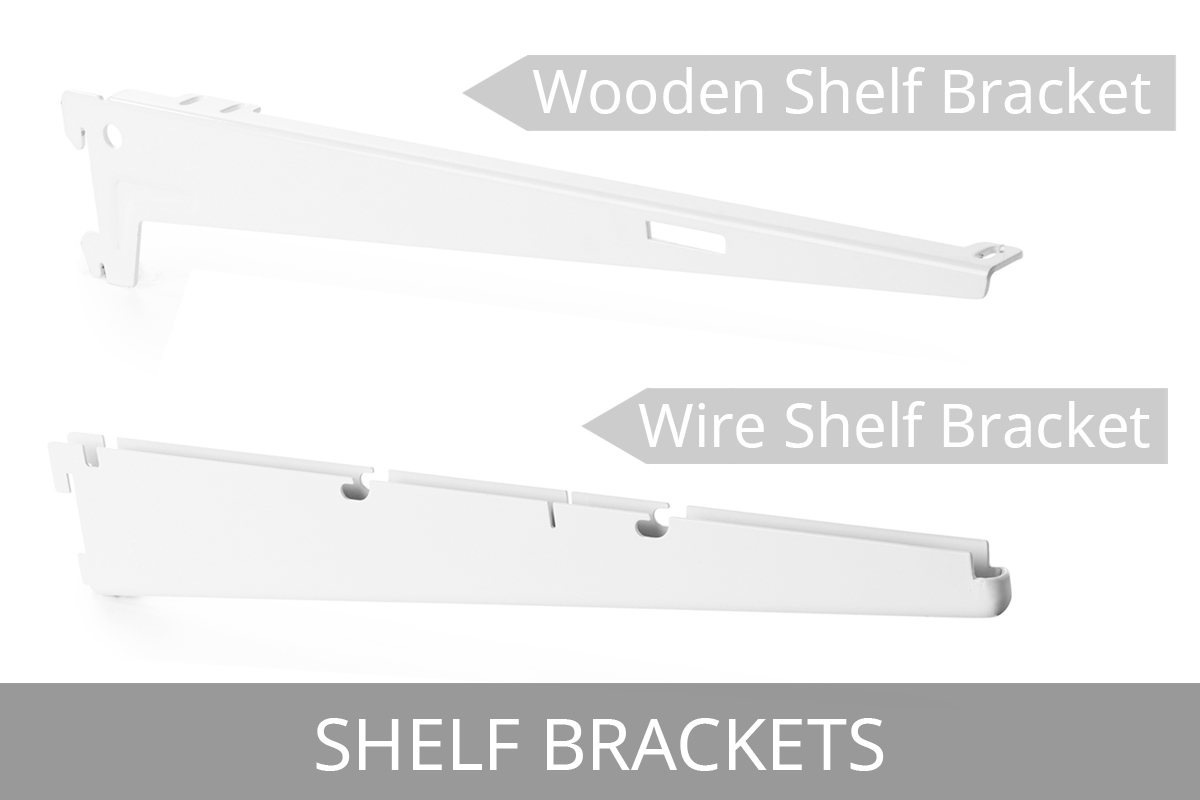
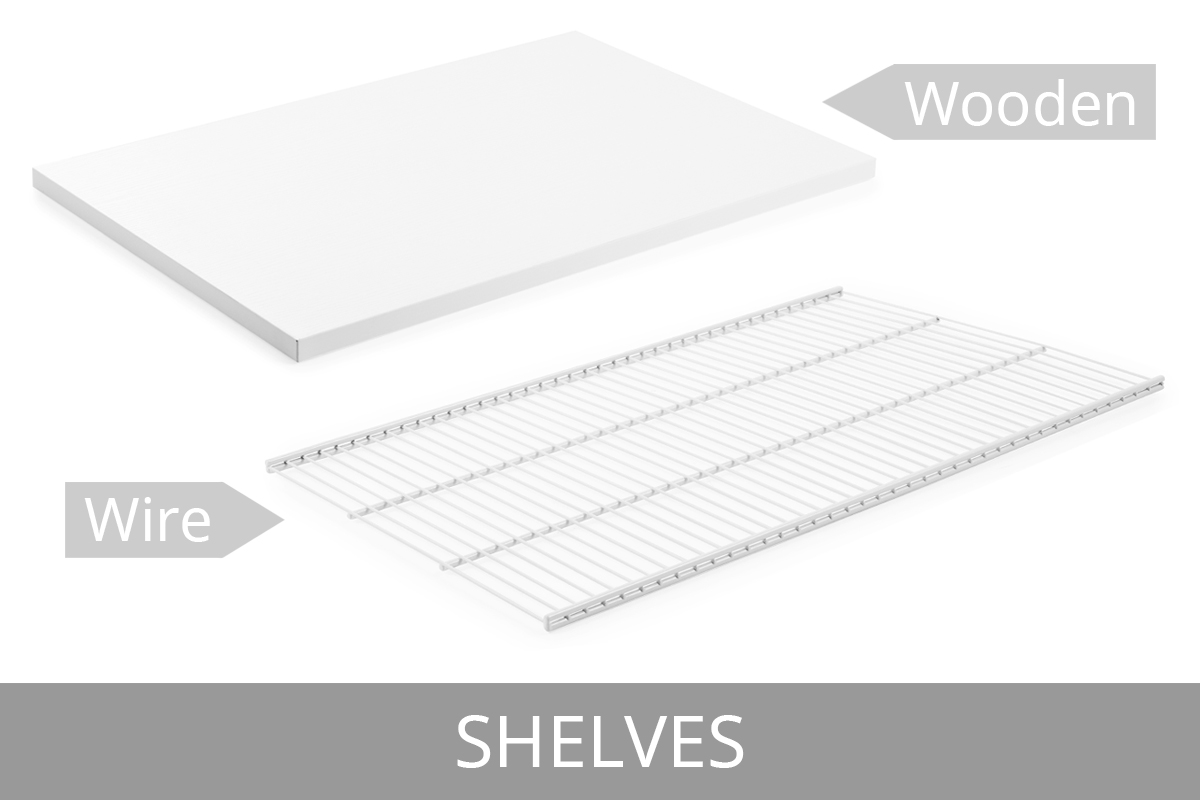
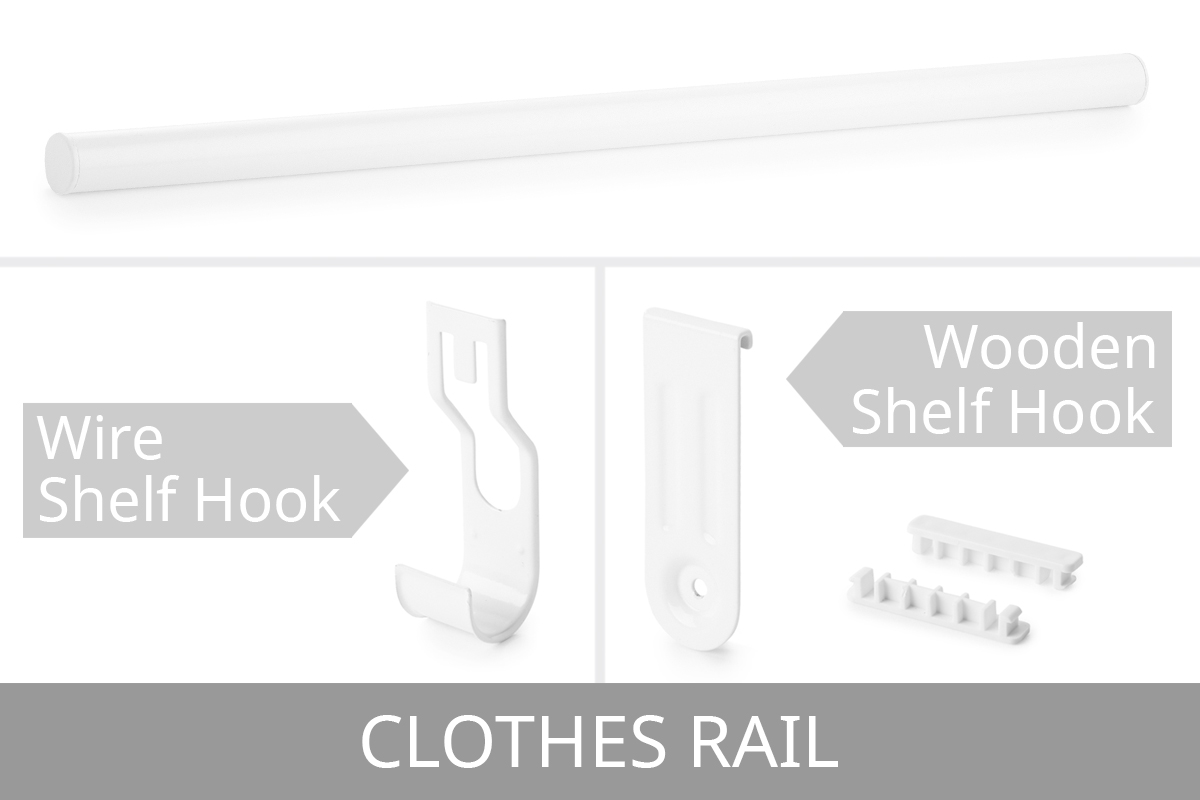
Accessories: Please note that there are specific Brackets and fitting components needed for different accessories e.g. a Clothes Rail with a Wire Shelf is fitted using a different Shelf Bracket and method compared to the Clothes Rail with a Wooden Shelf. See Components guide below.
Assembly Video (2m:51s)
Important Safety Information
- Read through all instructions on this page before beginning any assembly
- Before commencing assembly, unpack carefully and check you have all components
- If you think that you have received defective parts, please do not use and contact us
- Assembly will void returns, except if a manufacturing fault is found
- If you are unsure about assembly, please ask our team or a professional
- Your shelving must be fitted to a suitably strong wall surface
- You must use the appropriate wall fixings for your wall*
- Do not use on an uneven or curved wall
- Do not overload your shelving
- Assembly is done at your own risk
Tools Required
- Tape measure
- Spirit level
- Power drill
- Screwdriver
- Pencil
- Pilot drill bit
- Masonry drill bit
- Rawl plugs*
- Screws*
- Hacksaw (optional)
* Fixings are not included. The fixings you require may differ depending on the type of wall you are planning to fit this to. Please consult a professional for further advice if required
Components in your Box
Depending upon which model, or shelving arrangement you have purchased, these are some of the parts included - check your product’s page for a list of individual components on specific kits. Note that if you want to adapt or extend your shelving unit, you can do this by purchasing additional components from this website. If you need help selecting the right items, speak to us.

Fitting the Wall Track on the Wall
1. Measure and plan where to put Wall Track
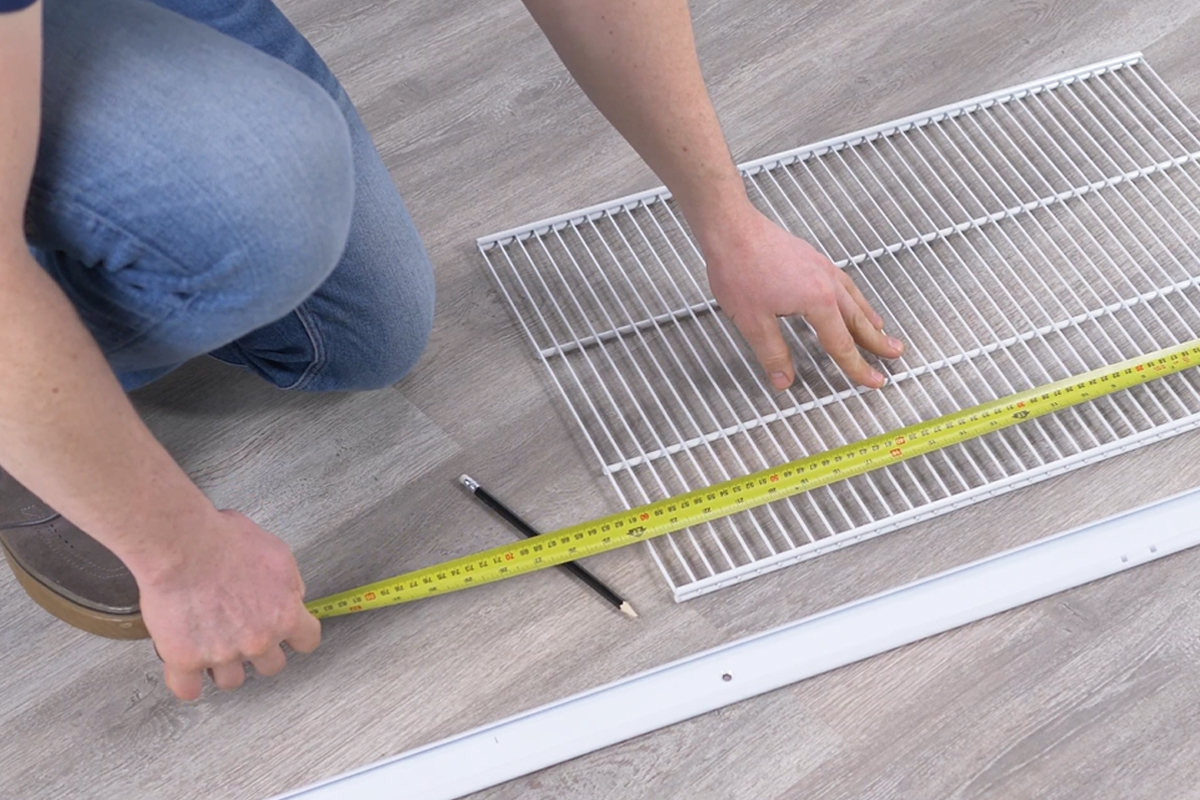
The Wall Track can be shortened if needed (skip to Step 3 if not required). To trim, measure up the desired length and measure the width of the Shelf you’re using against the Wall Track. Allow an extra 10-15% on to this measurement and mark with a pencil.
2. Cut Wall Track to length (optional)
If you are trimming your Wall Track, ensure entry tabs for your Uprights are included in your measured Wall Track section.
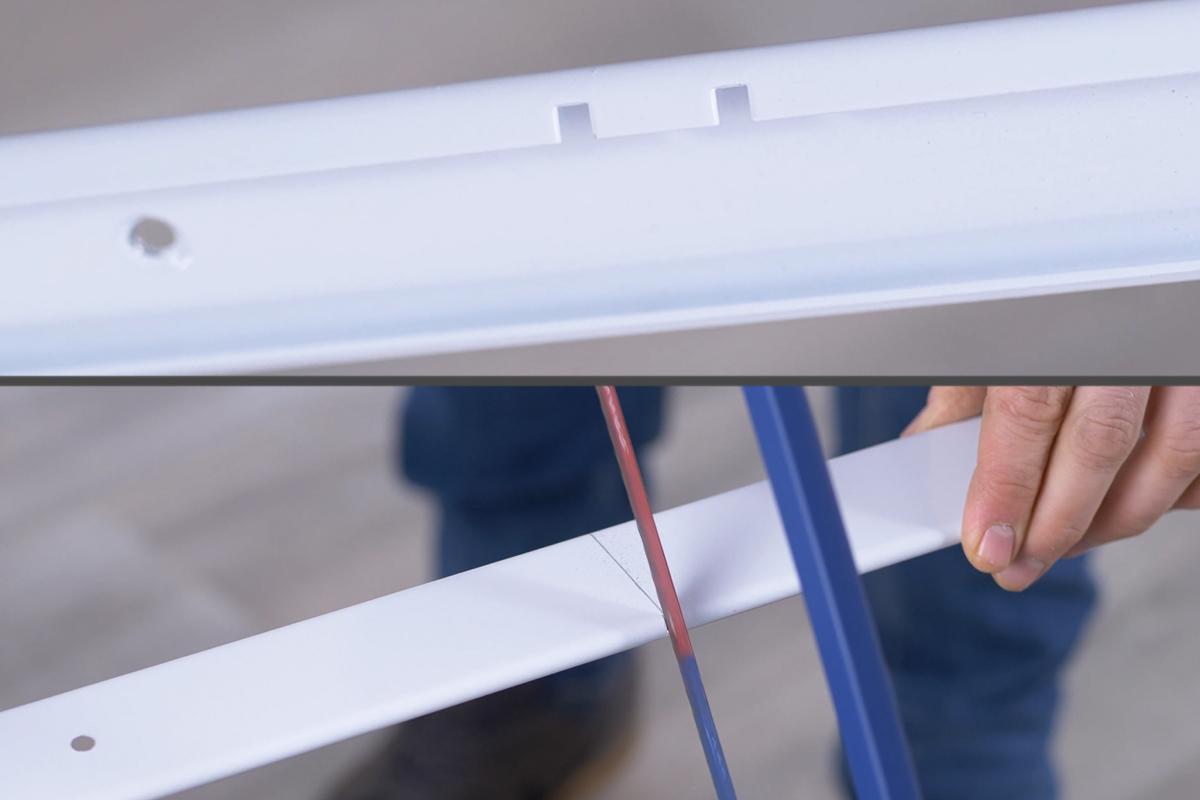
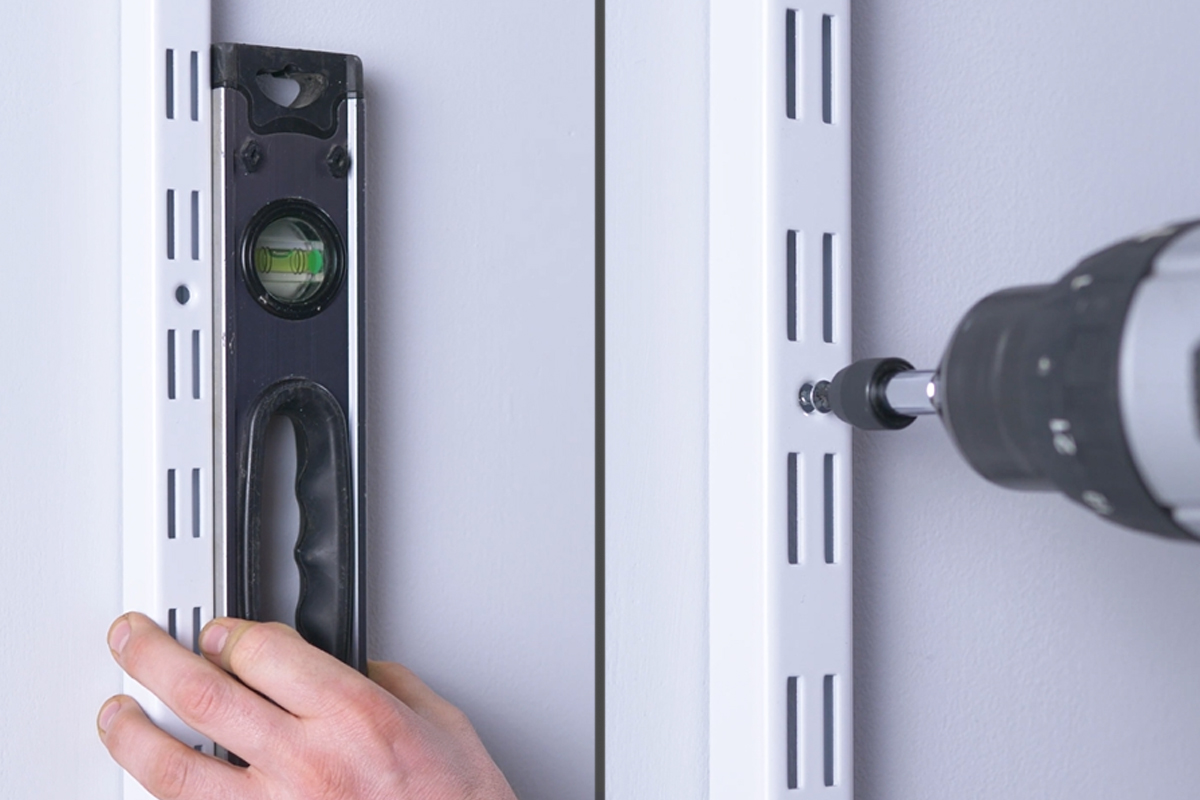
3. Measure the height of the Wall Track

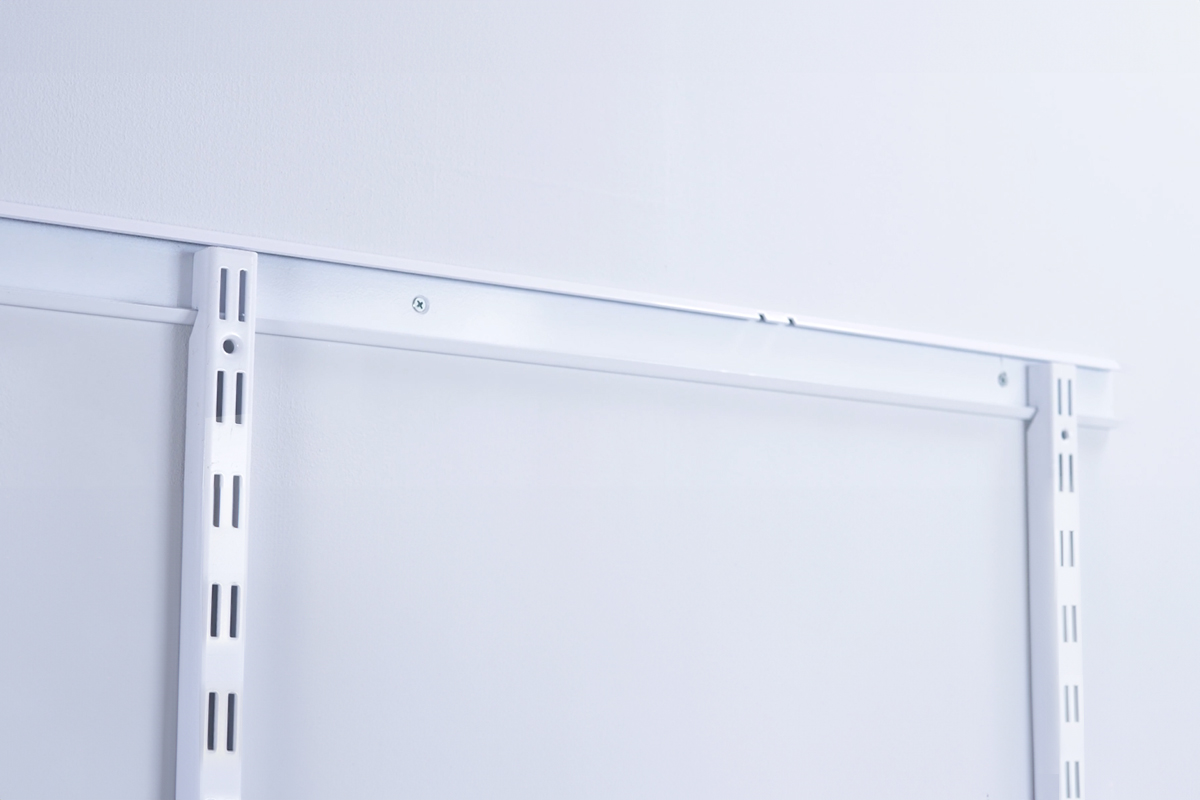
Next, measure your Wall Track for your chosen height. Place the Wall Track against the wall and check it’s horizontal with your spirit level.
4. Drill holes in wall for fixings
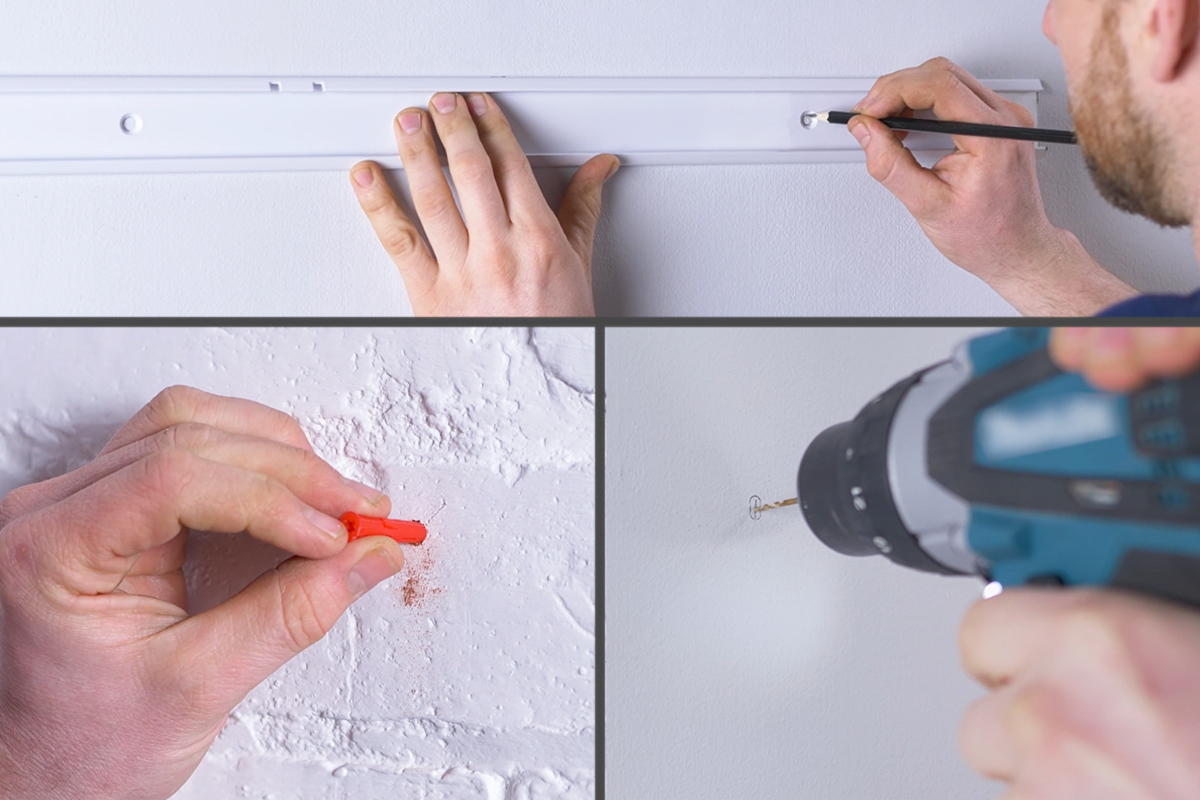
Mark the holes with a pencil. Drill a hole for each mark to insert rawl plugs.
5. Screw Wall Track to wall and add Uprights
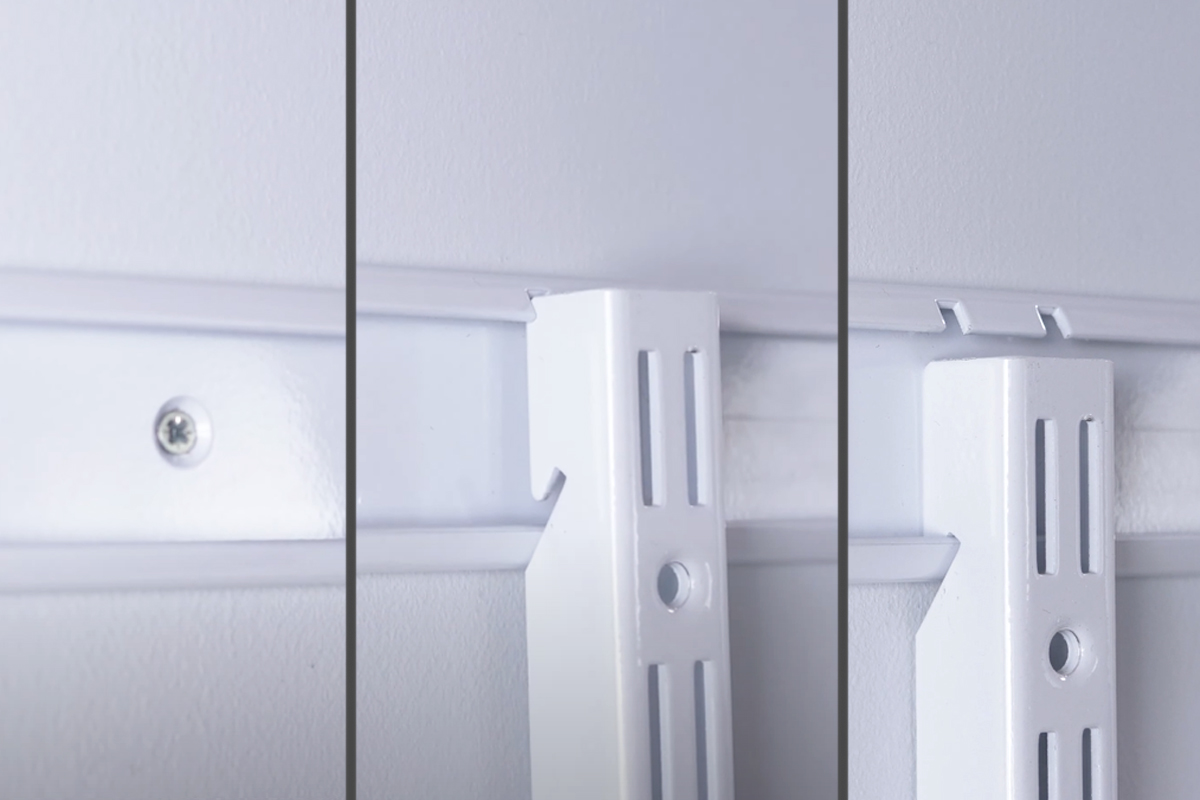
Screw Wall Track to the wall. You can now hook on and slide your Uprights.
6. Check Uprights spacing for accessories
Check that your Uprights are correctly spaced for your Shelves and accessories.
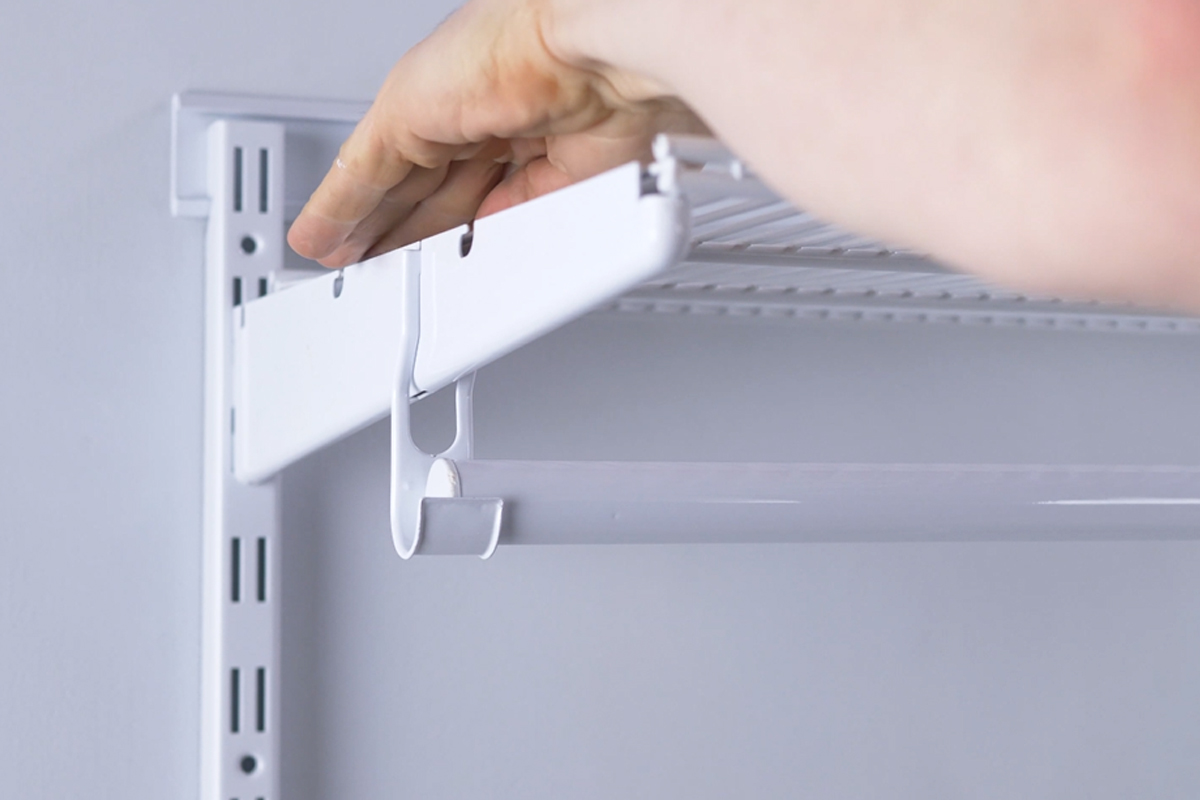
Fitting a Wire Shelf with a Clothes Rail
1. Drop Shelf Brackets onto Uprights
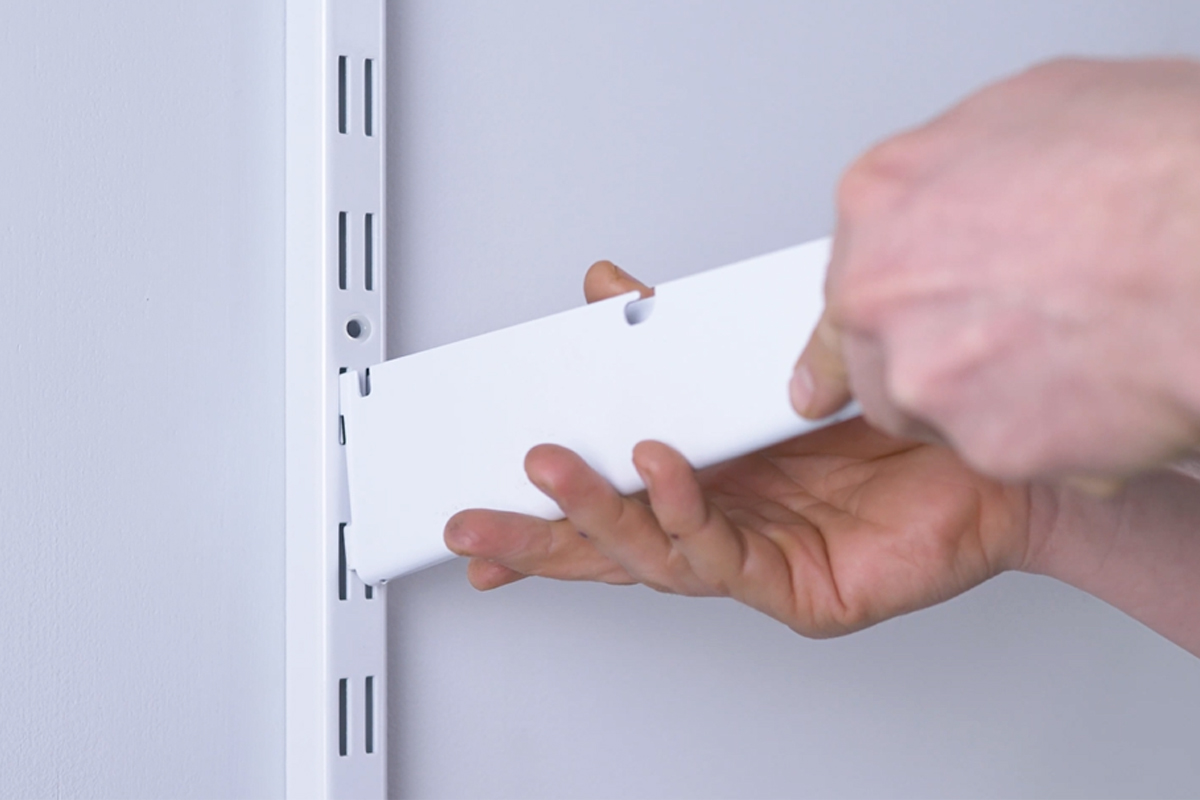
When fitting a Wire Shelf, lift and drop Wire Shelf Brackets onto Uprights, and make sure both align.
2. Add Clothes Rail to Shelf Bracket
House your Clothes Rail by slipping the hook onto the bracket and into its slot. Hang your clothes rail.
3. Add Clothes Rails first before Shelves
Add any Shelves after positioning your Clothes Rails first.
4. Add Wire Shelves onto Shelf Bracket
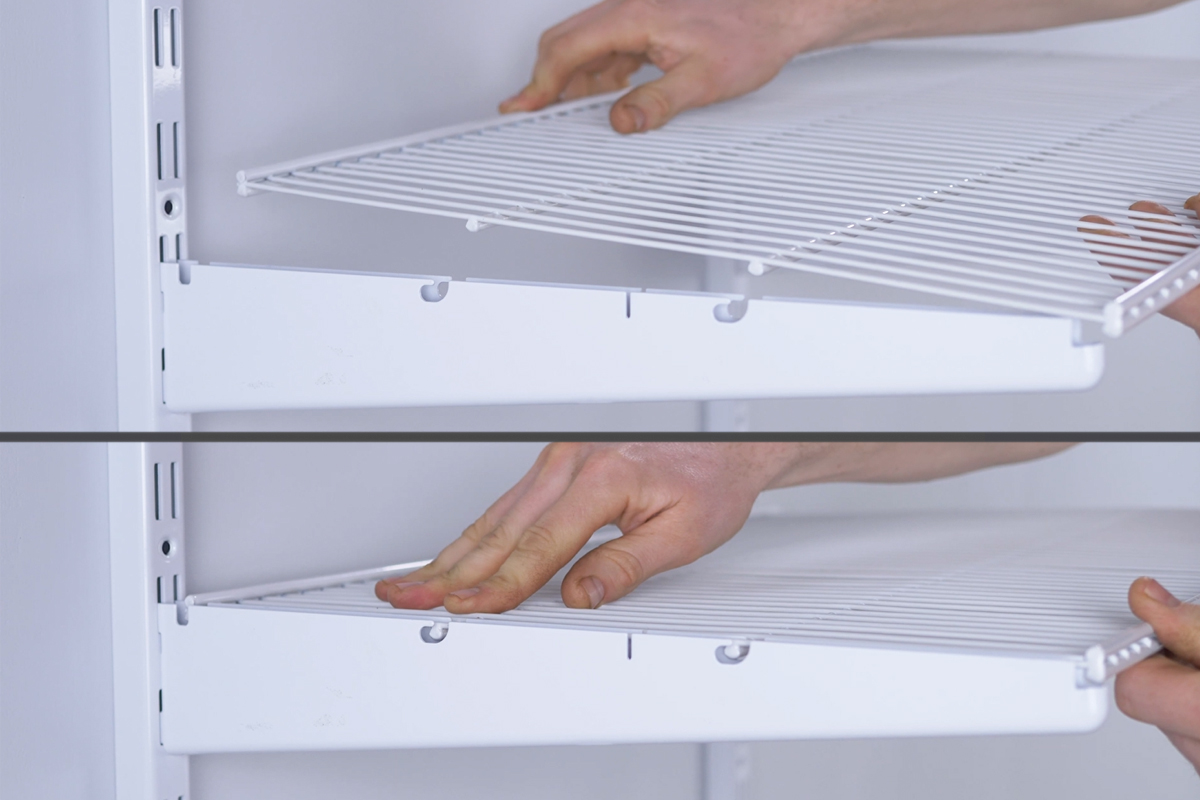
Position the Shelf into the two slots on both Brackets. Press the Shelf down as you push the shelf towards the wall and click into place.
5. Lift back of Shelf to remove

To remove, lift the back and pull the Shelf towards you.
6. Affix Uprights to wall (recommended)
For added security, we recommend that you secure the Uprights to the wall. If doing so, ensure Uprights are vertical and mark the screw holes. Affix Uprights to the wall.
Fitting a Wooden Shelf with a Clothes Rail
1. Add Brackets onto Uprights, then Shelves
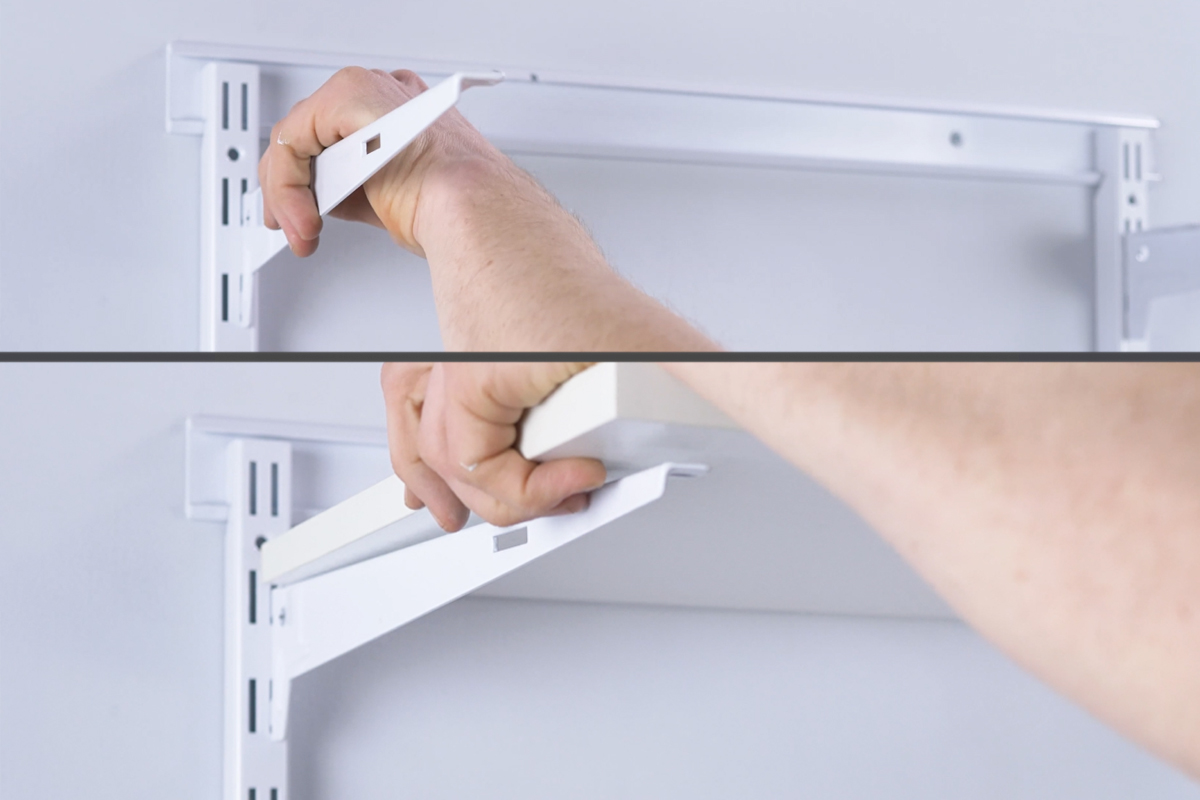
Lift and drop the Wooden Shelf Bracket onto both Uprights so they align. Simply place Shelf onto Brackets.
2. Align the Shelf to the Brackets
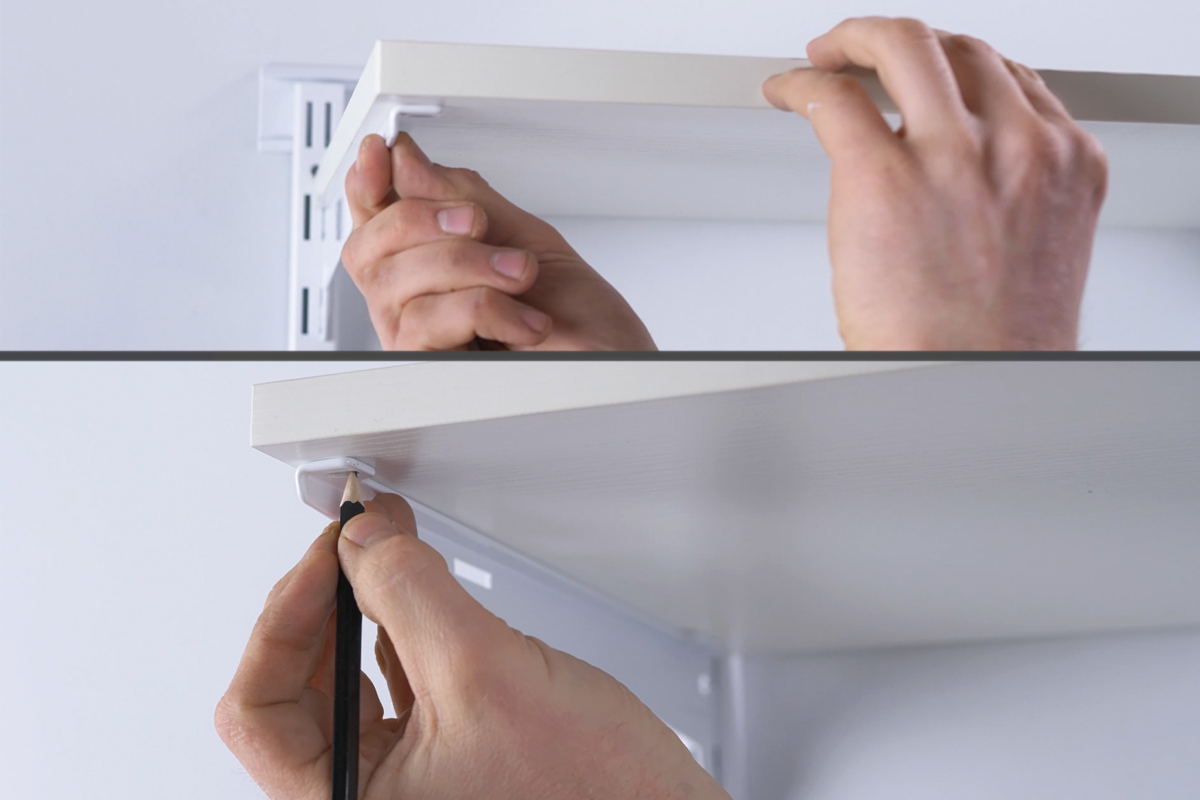
Line up the Bracket with the edge of the shelf. Mark corner holes with a pencil.
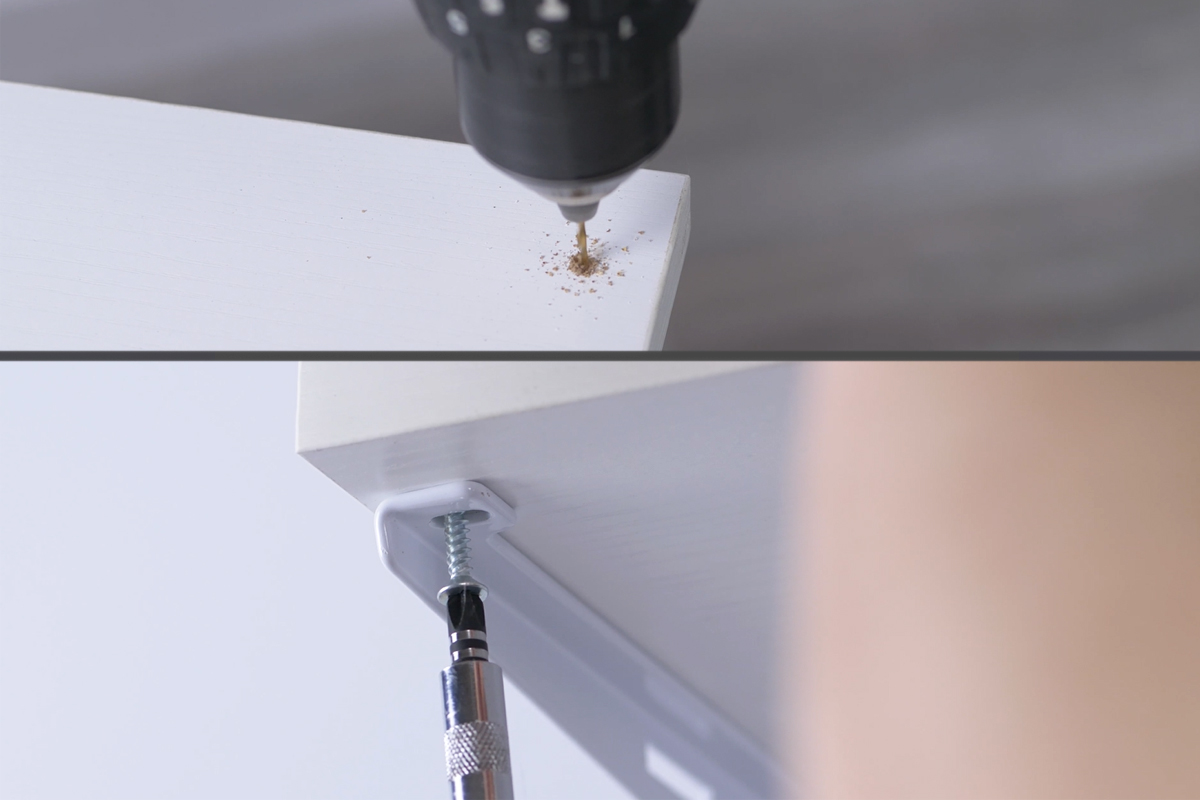
3. Drill pilot holes and secure Shelf with screws
Drill small pilot holes, do not drill completely through your shelf. Steady your Shelf to screw into the pilot hole.
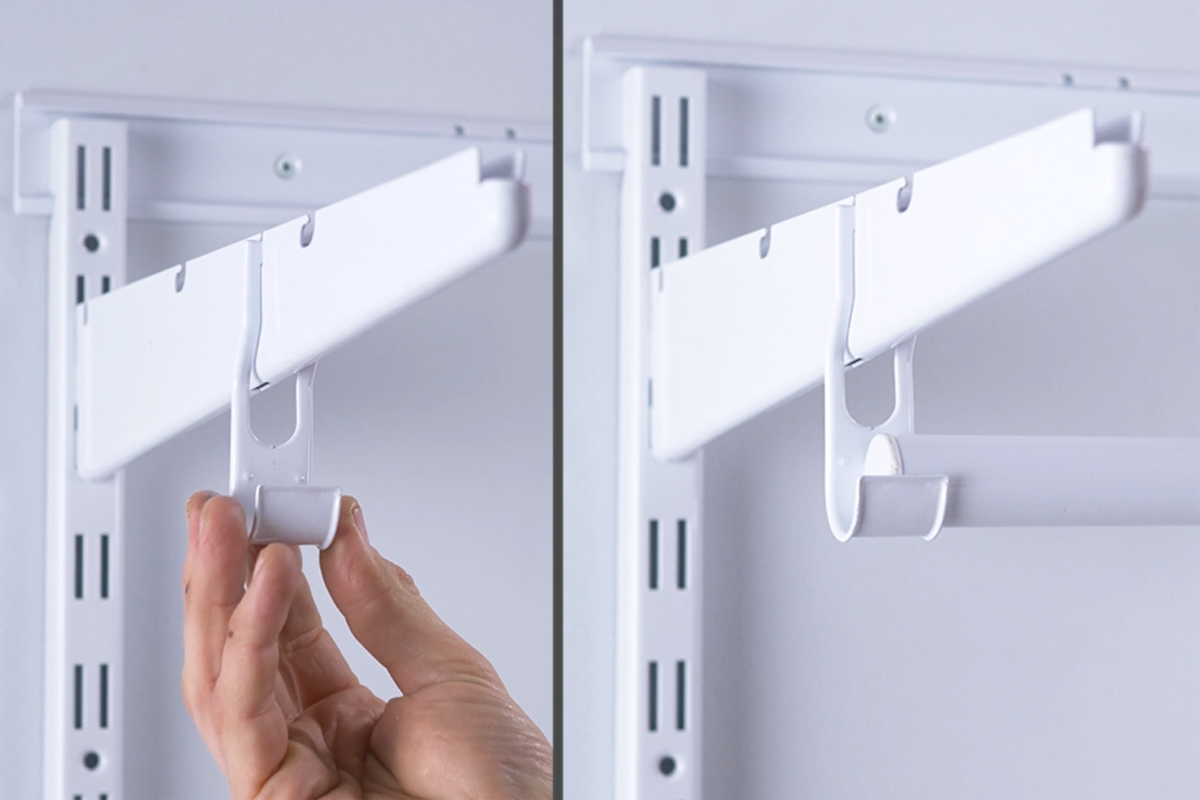
4. Affix mount hook to the Clothes Rail
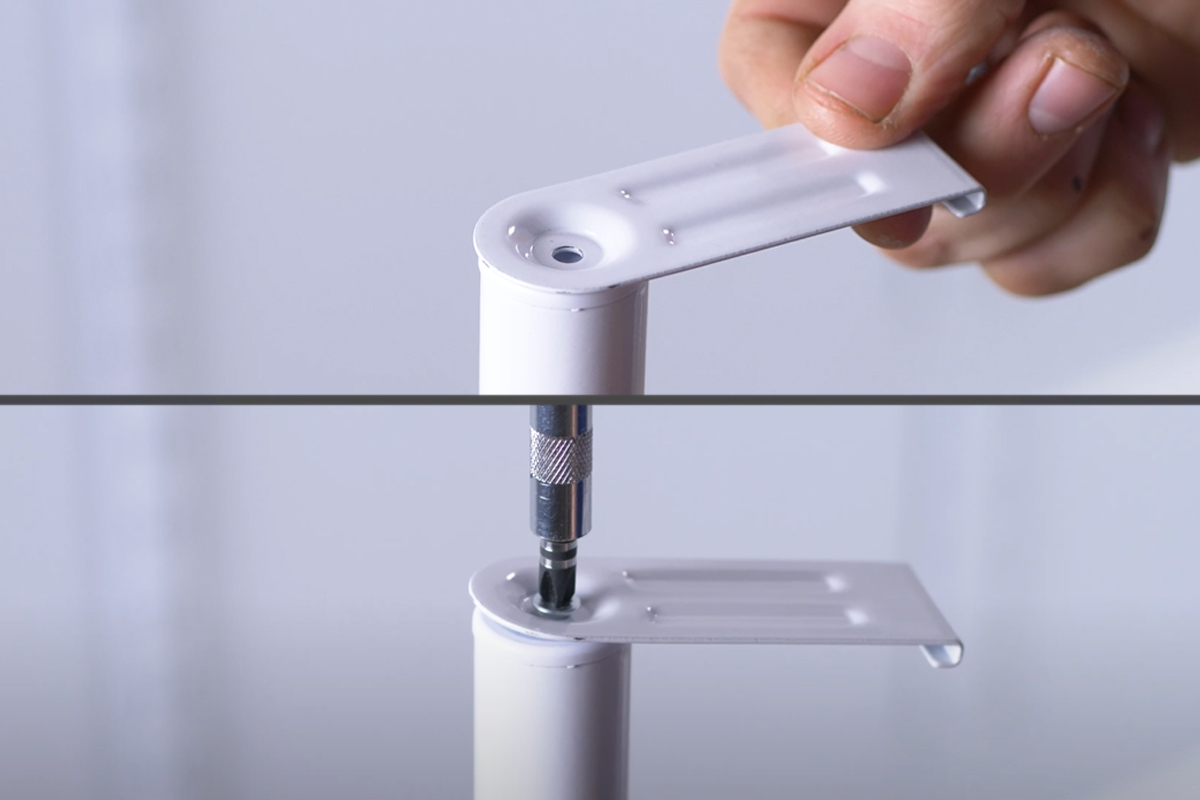
Clothes Rails can be added by firstly screwing the mount hook to each end of the rail.
5. Hook Clothes Rail onto Bracket
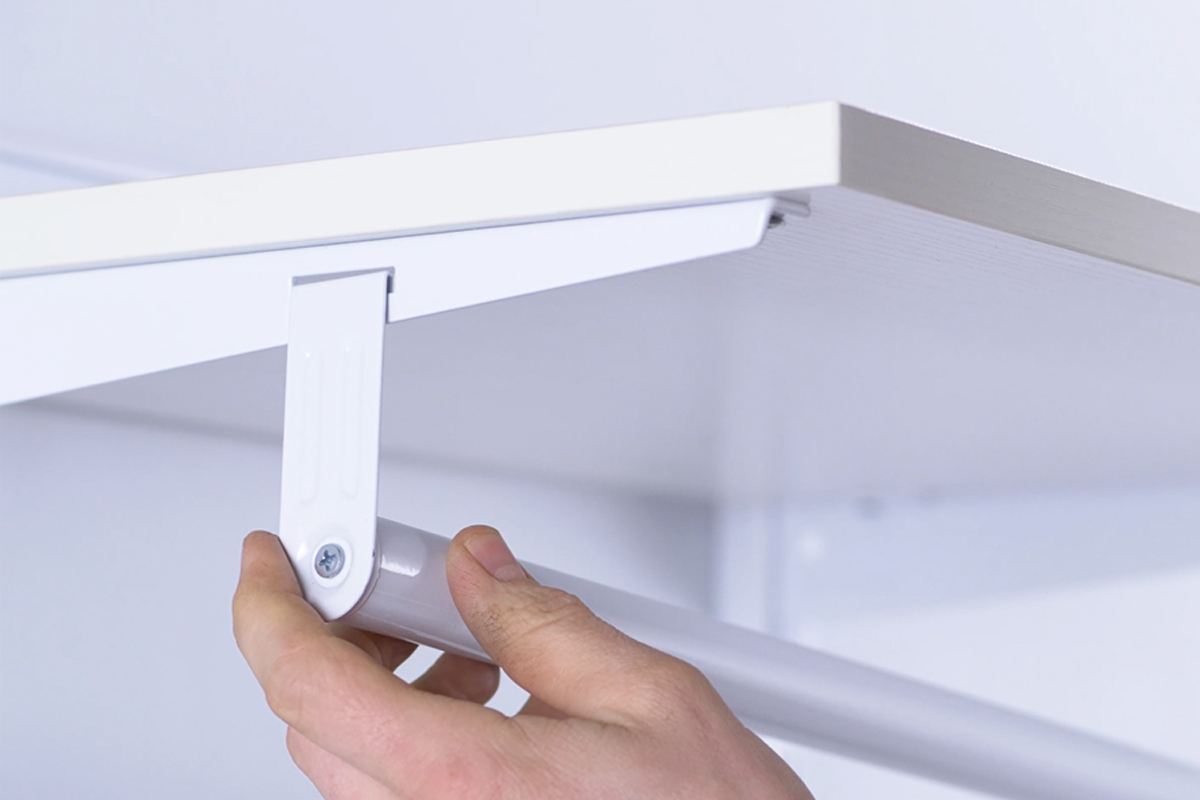
Each Bracket has an oblong hole to attach the hook onto.
6. Insert stopper
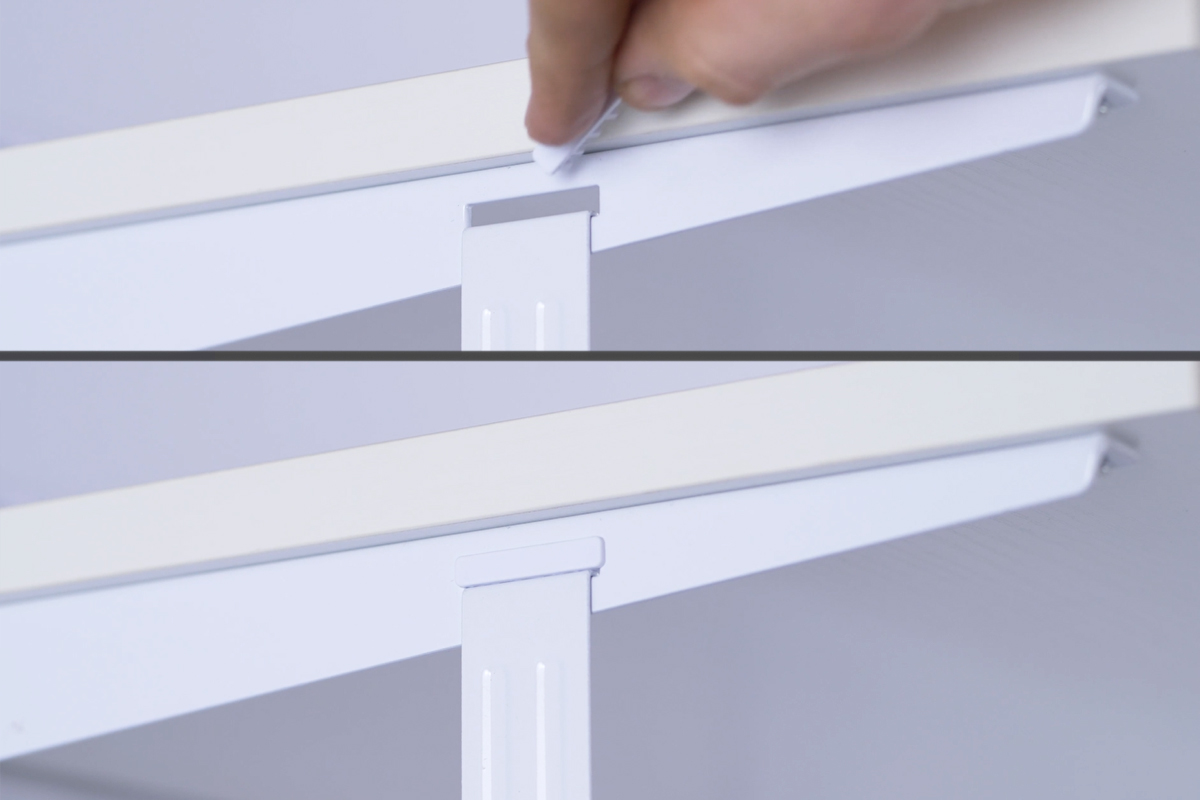
Finally, for a finishing touch, insert the stopper into the top of the hook hole to secure the rail.
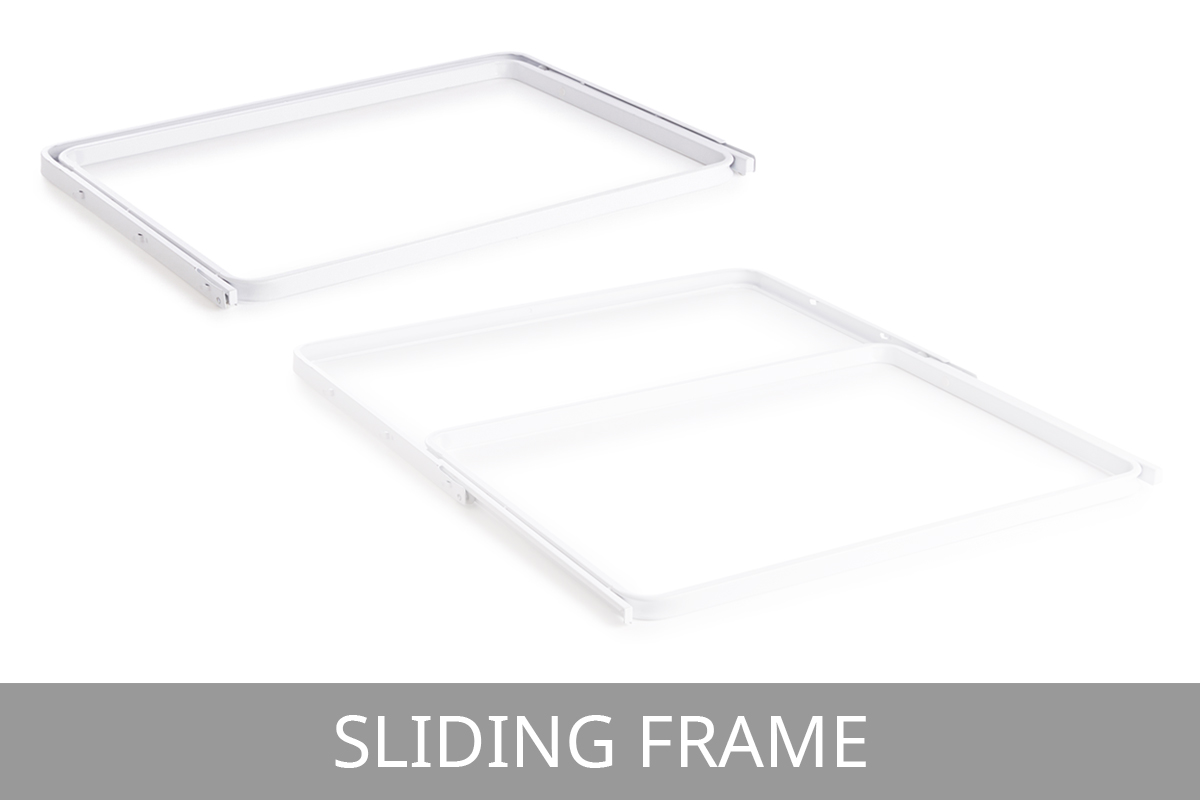
Fitting Sliding Frames (for Baskets and Racks)
1. Drop Shelf Brackets onto Uprights
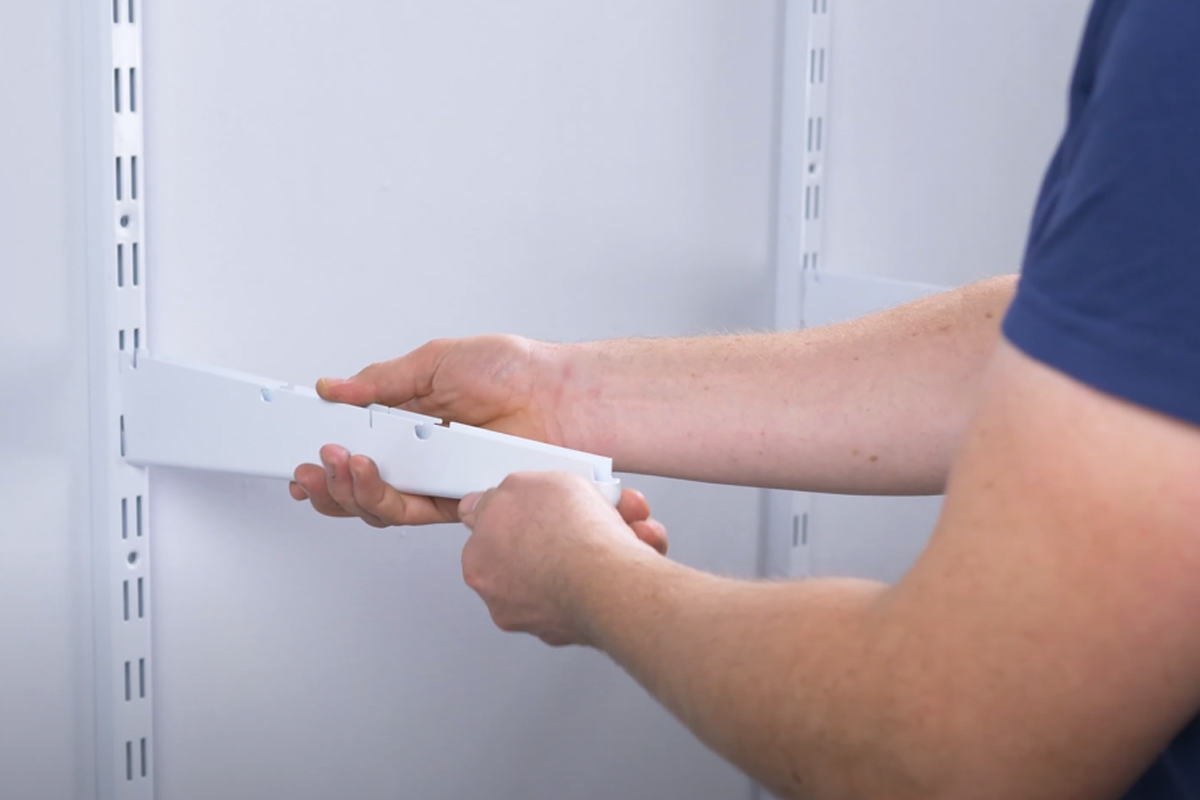
Lift and drop the Shelf Bracket onto both Uprights so they align.
2. Fit Sliding Frame into Brackets
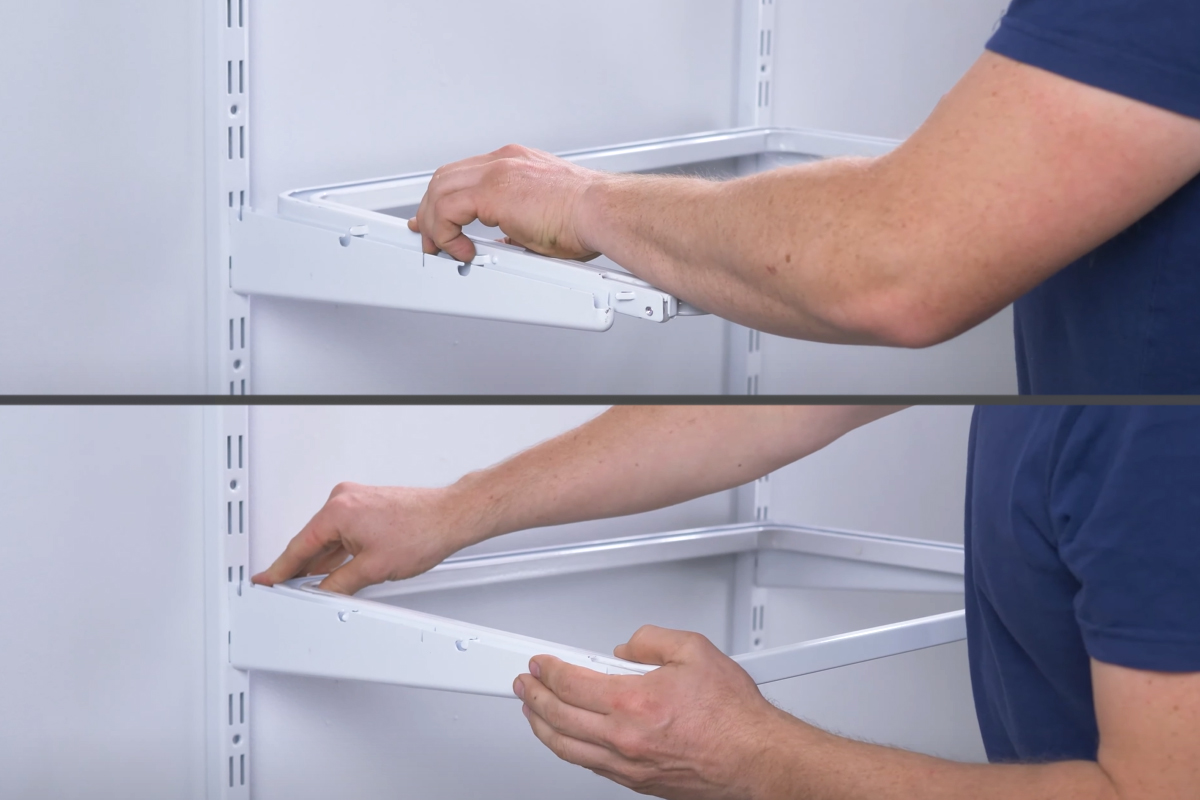
Line up the Frame onto the Brackets.
3. Secure Frame and Add Basket or Rack
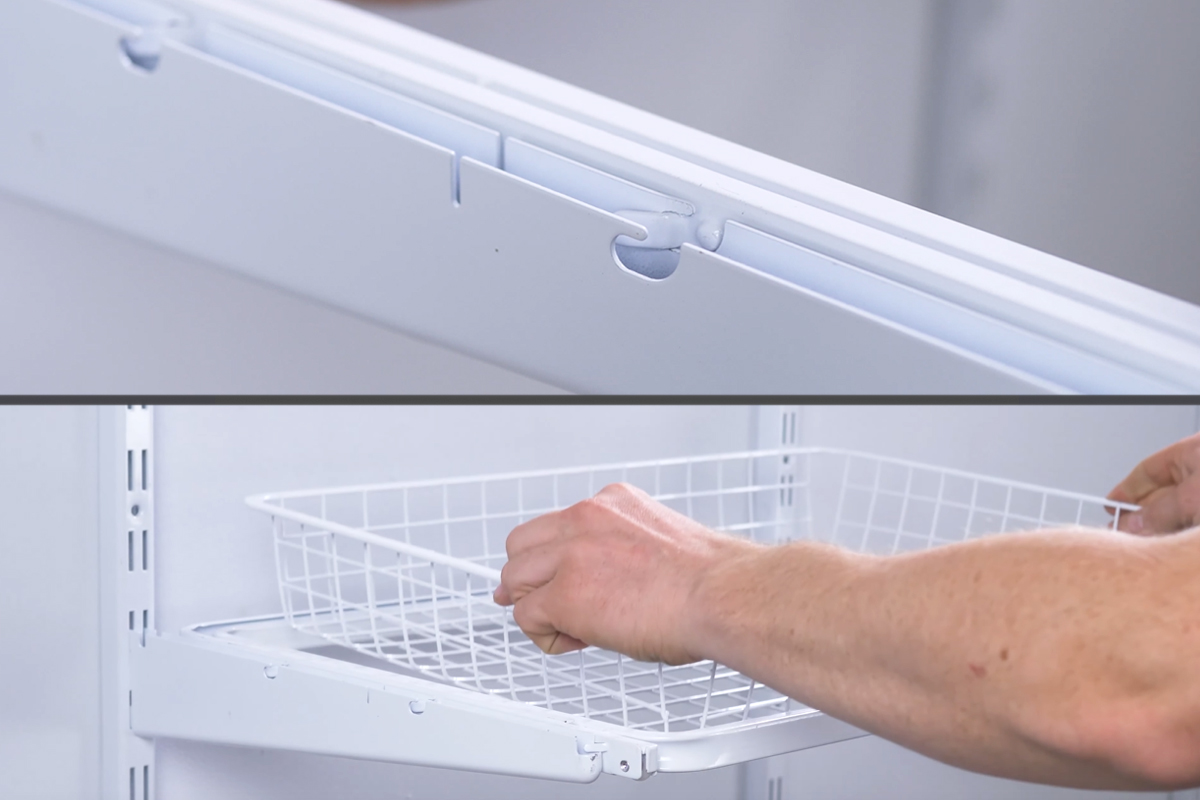
Click the Sliding Frame into place, ready to insert accessories.
We hope you found this guide useful and successfully assembled your Flexx Wall Shelving & Hanging Rail System.
If you have any questions, feel free to call us on 0800 834 782 or email sales@shopfittingwarehouse.co.uk and we will be happy to help.
Also, if you need any Clothes Hangers to go with your Flexx Hanging Rail system, check out our range.
If you have any feedback on this guide, please Email Support and let us know.
Related Knowledge Base Guides
-

Flexx Shelving & Hanging Rail:
Knowledge BlogView our blog explaining the Flexx range in further detail.
-

Flexx Shelving & Hanging Rail:
Assembly VideoView our Assembly Video page for all product video guides.
-
Clothes Hangers:
Knowledge & GuideAn article to help you choose the right clothes hangers - the ideal accompaniment to a Flexx Hanging Rail system.