Assembly Guide: Hanging Rail & Shelf Combo
This guide covers all aspects of assembly for products in our Hanging Rail & Shelf Combo range.
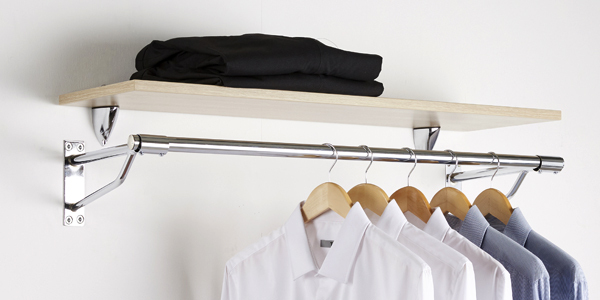
Bespoke Arrangements: Layouts shown in the product images and throughout the guide are just a suggestion. You could place the Hanging Rail next to the Shelf instead of over each other or have them off-centre for an interesting display. Assemble the Hanging Rail and Shelf to suit your space!
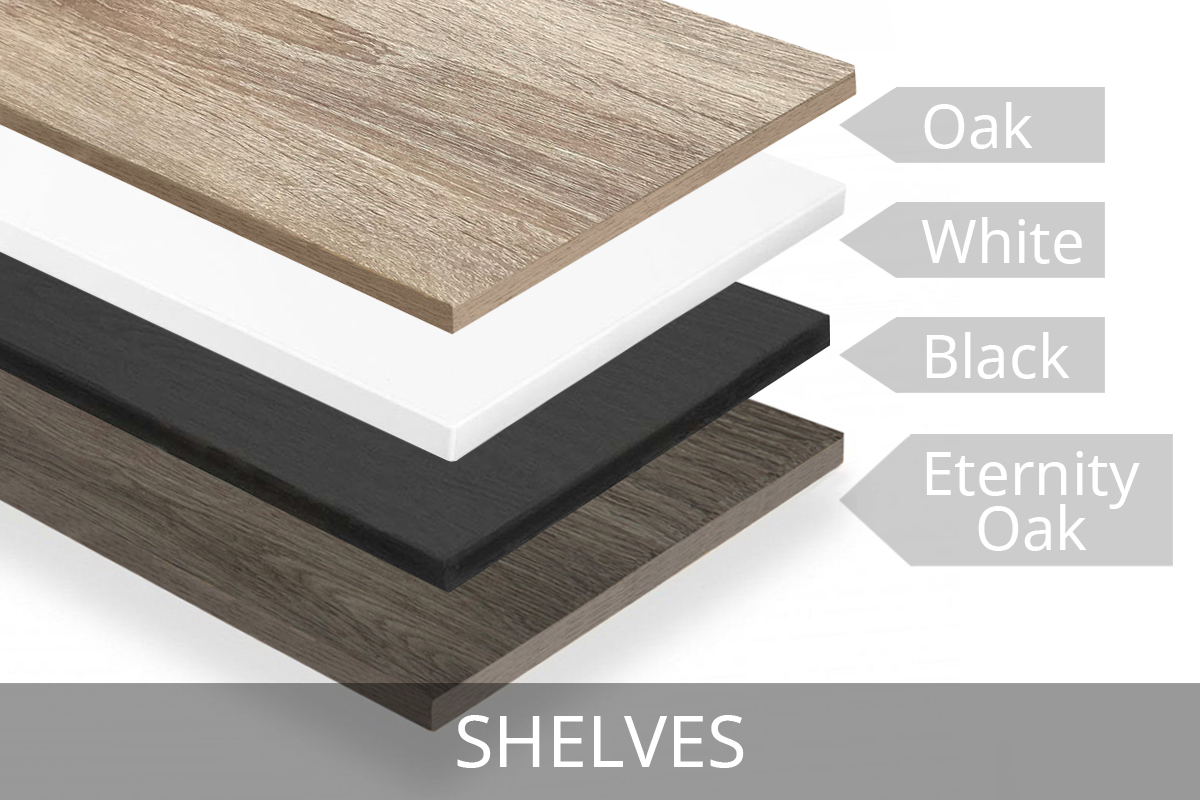
Customisable: Your Hanging Rail & Shelf system can always be extended or shortened in the future to suit your space. We offer components separately for this. For example, if you decide to change the Shelf to another colour/finish, you can choose from our selection of Wooden Shelves. You can also cut the tubes to suit your space but they are unable to be returned to us if they have been trimmed.
Complementary Products: We have a range of accessories and similar products to create a unique display and shelving unit. We also have a large variety of Clothes Hangers available to complete your clothes storage system and/or wardrobe.
Wall Fixings: Fixings for the Shelves ARE included but fixings for the Hanging Rails are NOT included. Review the wall which you'll be attaching the shelves to, to make sure that the fixings provided are suitable. You can order Masonry Fixings separately or for more information on wall fixings, view our Wall Fixings Guide.
Assembly Video (1m:47s)
Important Safety Information
- Read through all instructions on this page before beginning any assembly
- Before commencing assembly, unpack carefully and check you have all components
- If you think that you have received defective parts, please do not use and contact us
- Assembly will void returns, except if a manufacturing fault is found
- If you are unsure about assembly, please ask our team or a professional
- Do not overload your rails or shelving
- Assembly is done at your own risk
Tools Required
- Tape measure
- Spirit level
- Power drill
- Screwdriver
- Pencil
- 3mm Allen Key
- Pilot drill bit
- Masonry drill bit
- Rawl plugs*
- Screws*
* Fixings are NOT included for the Hanging Rail, as you may require different fixings depending on the type of wall you are planning to fit this to. Please consult a professional for further advice if required.
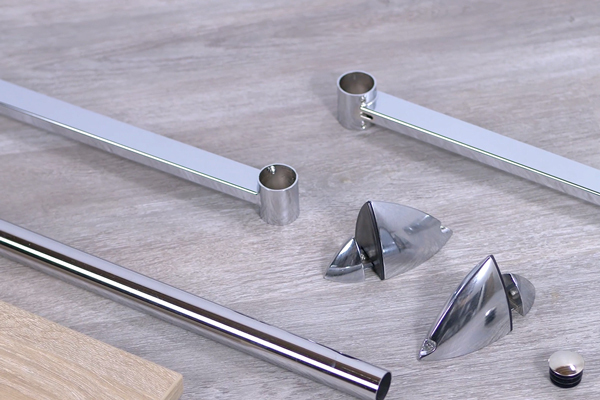
Components in your Box
Depending upon which arrangement you have purchased, these are some of the parts included - check your product’s page for a list of individual components on specific kits. If you need help selecting the right items, speak to us.
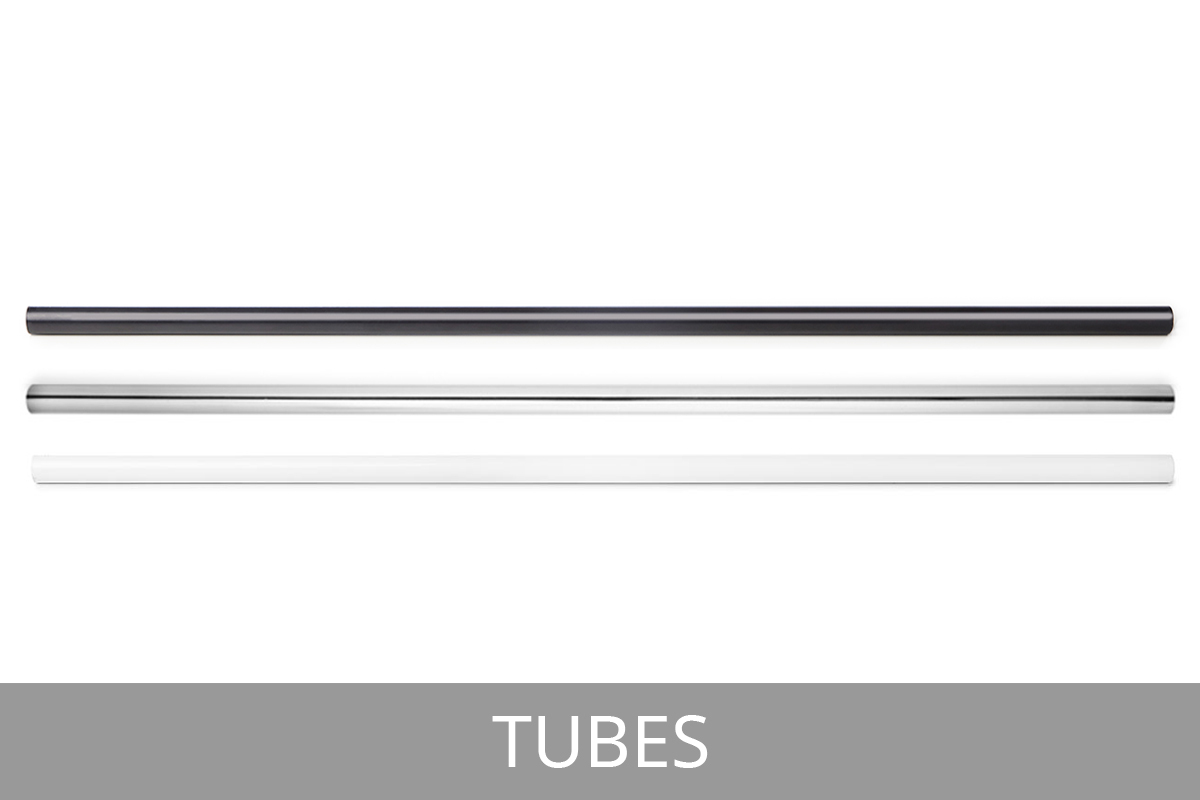
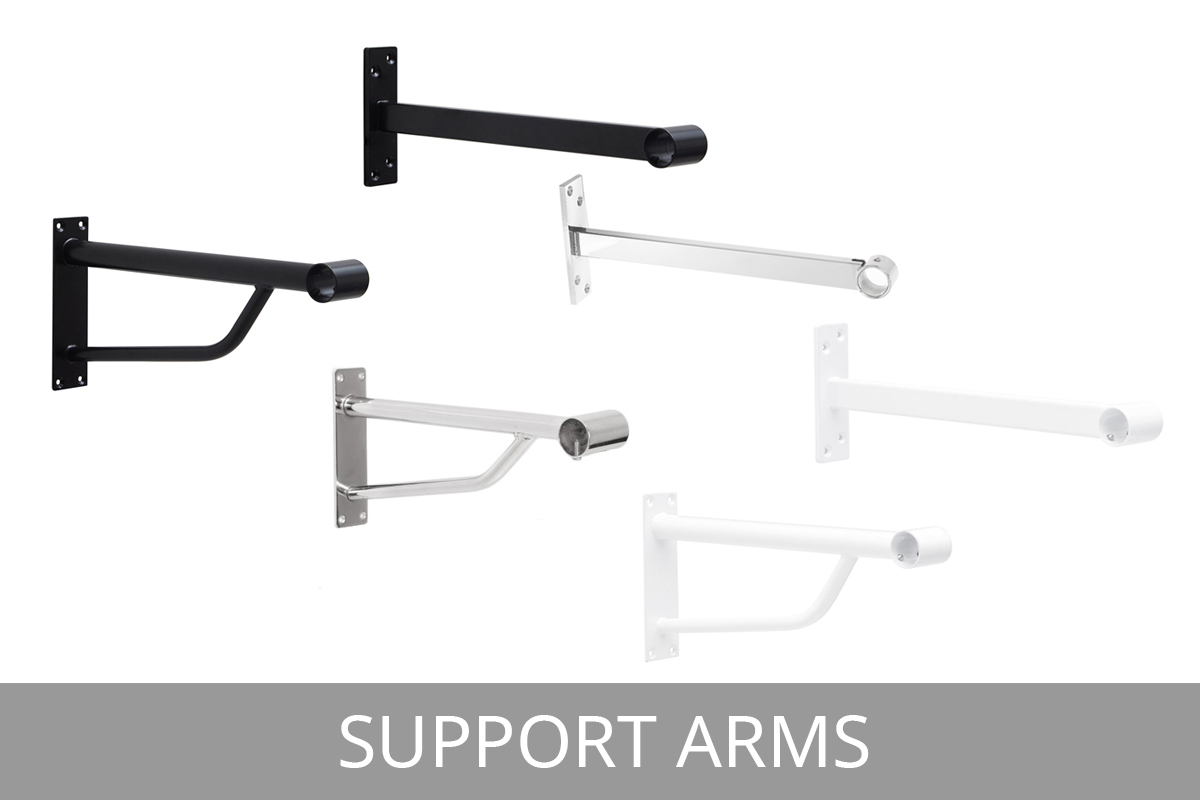
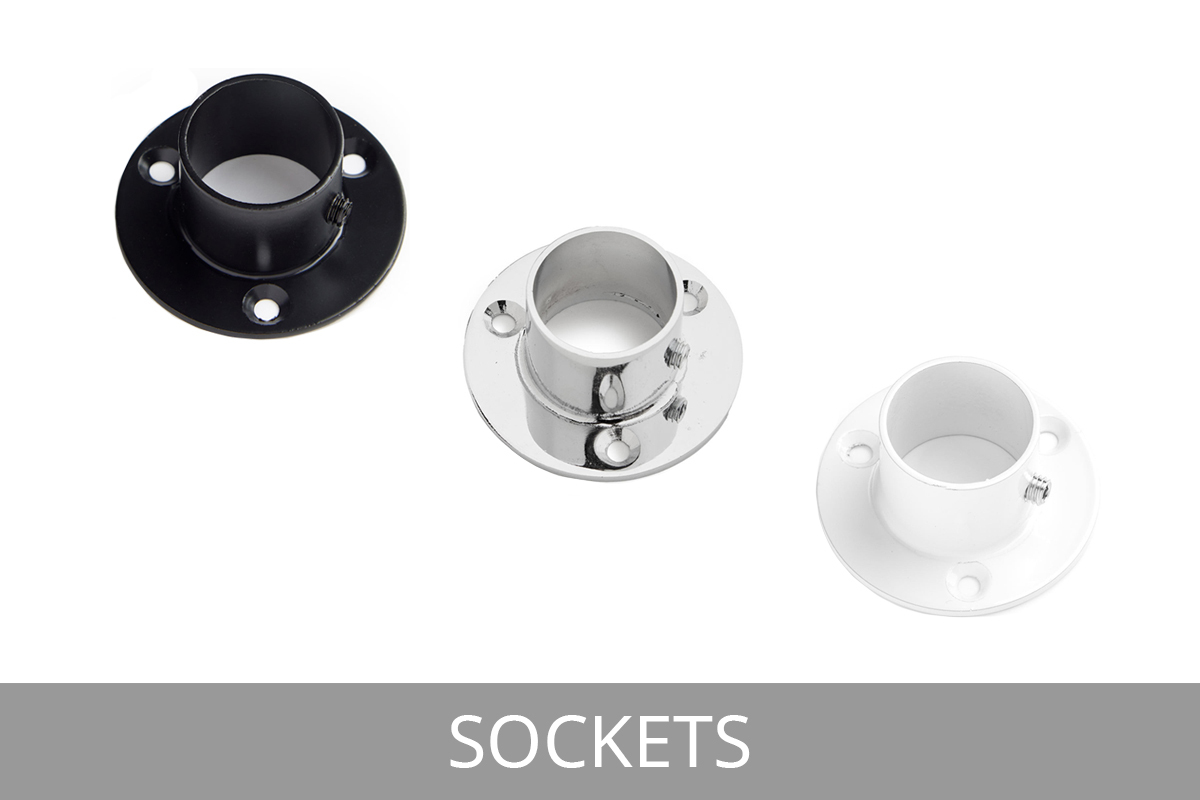
These are the most common components and parts we offer and that may be in your Hanging Rail & Shelf Combo Kit. There may be some variations and specific components, which are not shown below. To view our full selection of components, check out our Wall-Fix Hanging Rails Components and our Wooden Shelves Components section.
Hanging Rail
Wooden Shelf
Things to note before Assembly
Make sure you are using suitable fixings
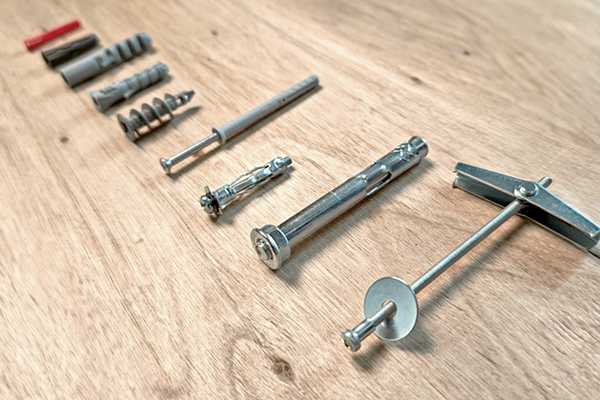
Different wall types will require different fixings, to ensure that anything mounted will stay safely secure. This is especially important if mounting anything that will be holding any type of loading.
View our Wall Fixings Guide for more information.
Tubes can overhang or be set flush
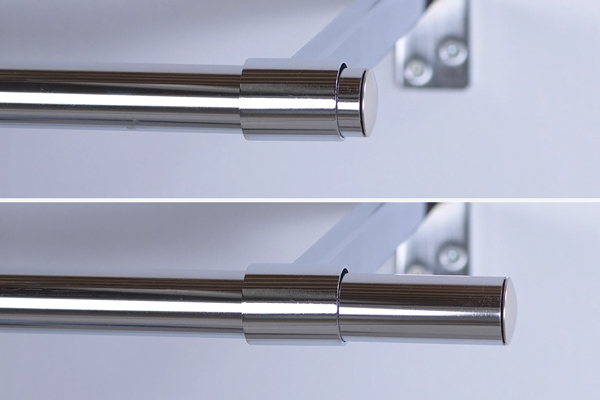
Tubes (also referred to as Poles or Rails) should meet equally in the middle of the brackets, if applicable, and the end of the Tubes can be set flush or so that they overhang by 10%.
Shelf Bracket Placement
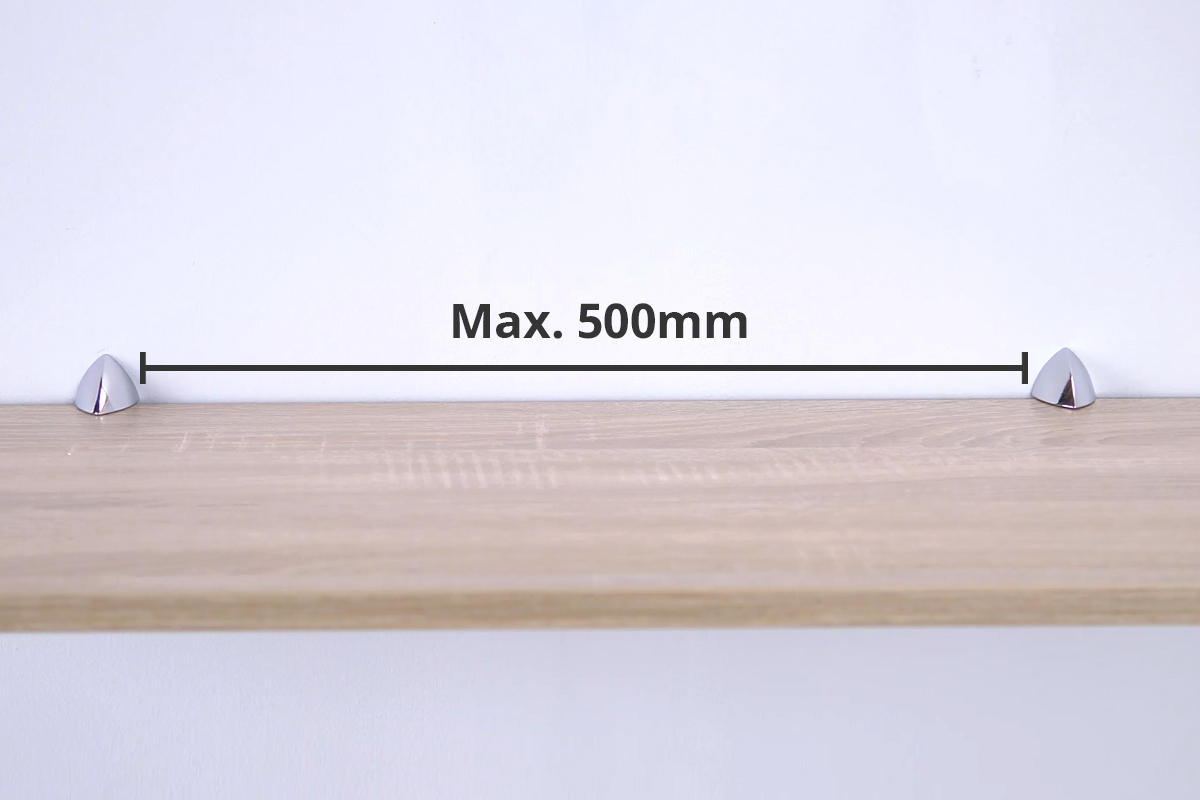
Shelf Brackets should be placed no further than 500mm apart for maximum security.
Starting of Assembly
Check your components
We recommend starting by setting out all components out in front of you, to make finding everything easy.
The components you have will vary depending on the unit. You can find detailed information on this on the product pages.
Work out spacing of Brackets/Arms
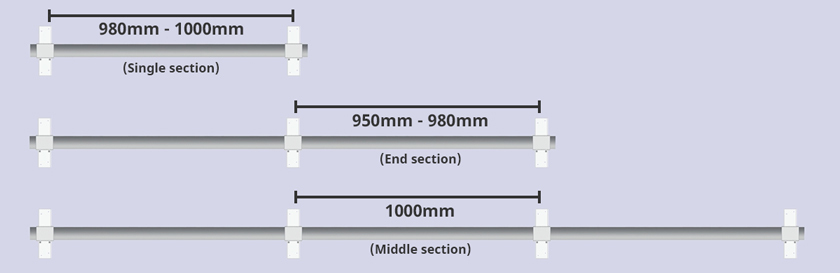
If you have multiple arms for a longer Hanging Rail, work out the spacing for the brackets on the wall, following these recommendations or in the video.
For a single section, we recommend allowing a space of 980mm - 1000mm between Arms.
For an end section, we recommend allowing a space of 950 - 980mm (depends on how much overhang you'd prefer).
For a middle section, we recommend allowing a space of 1000mm.
First Part of Hanging Rail Assembly
The following information is for Wall-Mounted Hanging Rails. For details on how to assemble an Alcove Rail, please refer to our Hanging Rails Assembly Guide.
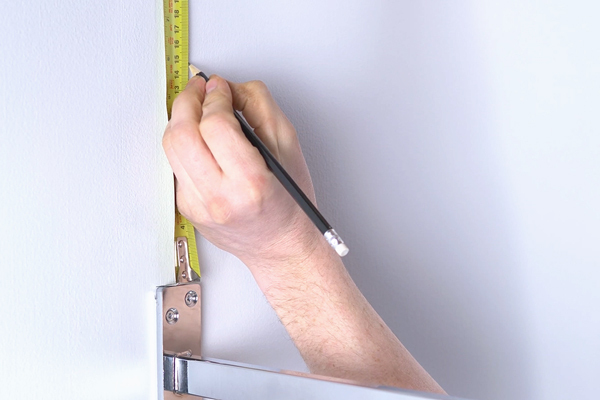
1. Begin marking up
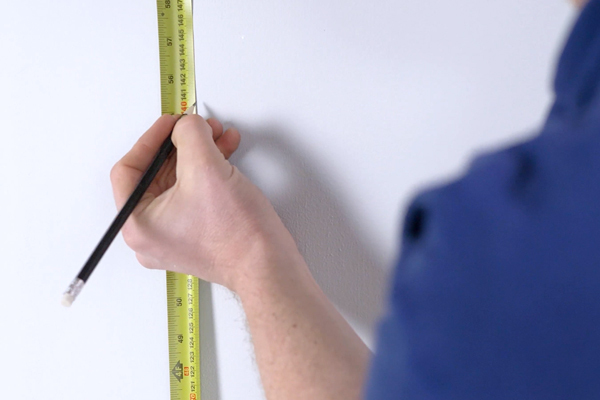
Measure and mark up where you want to place your rail and the Support Arm accordingly. Follow the guidelines in the previous step for suggested spacing.
2. Line up the first Support Arm
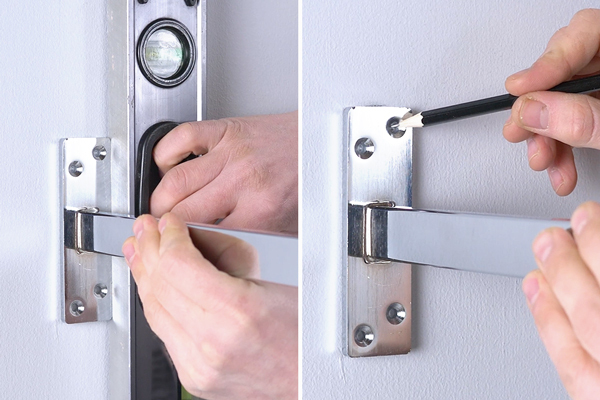
Take your first bracket (if you have multiple) and line it up with the mark. Using a spirit level, check your line is plumb and then mark bracket holes.
3. Drill holes
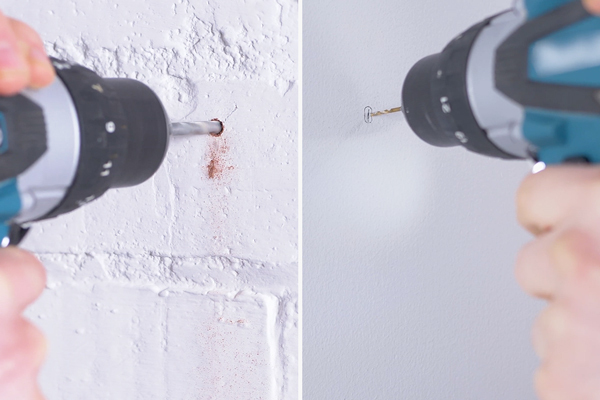
Drill a hole for each mark to insert rawl plugs (aka. wall plugs). Remember to use equipment and fixings suitable for your wall type.
4. Screw the Arm to the wall
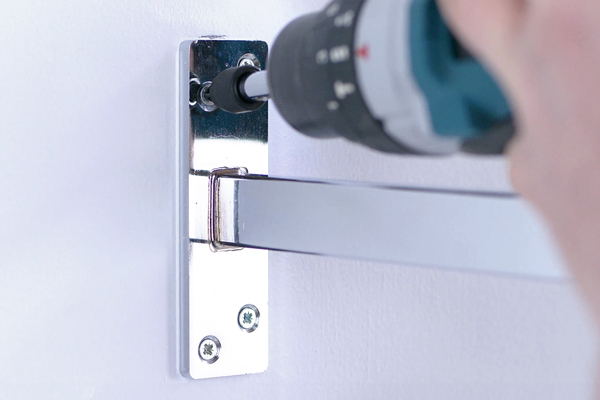
Secure the Support Arm to the wall.
5. Fit second Arm
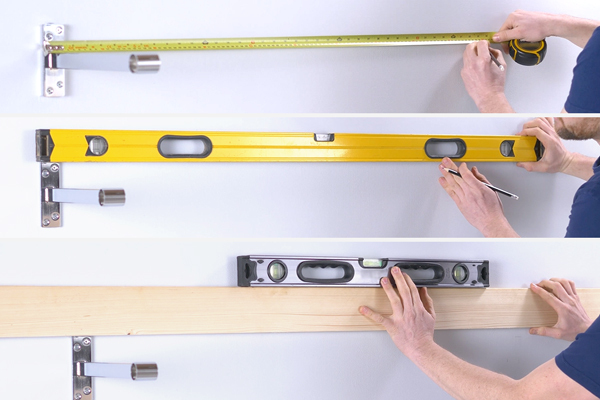
Measure up for the second Support Arm, using a spirit level to help mark the top of the Arm. If you don't have a long level, use a straight piece of wood.
Repeat previous steps as required.
Adding the Shelf
1. Measure up from the Support Arms
Measure upwards from the Support Arms you have affixed, to where you would like to place your Shelf.
2. Measure for the Brackets
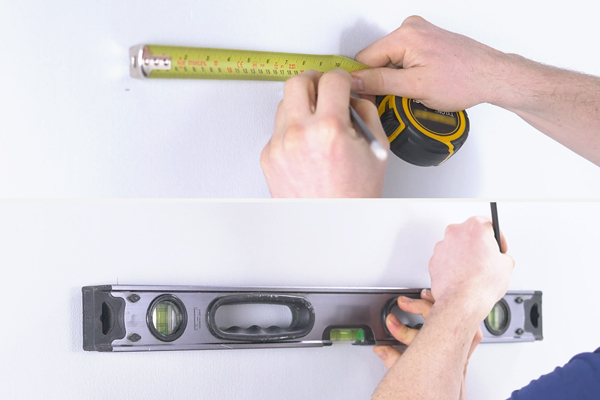
Measure and mark across for the Brackets (we recommend no further than 500mm in between). Put a level mark for both Brackets.
3. Affix both Brackets
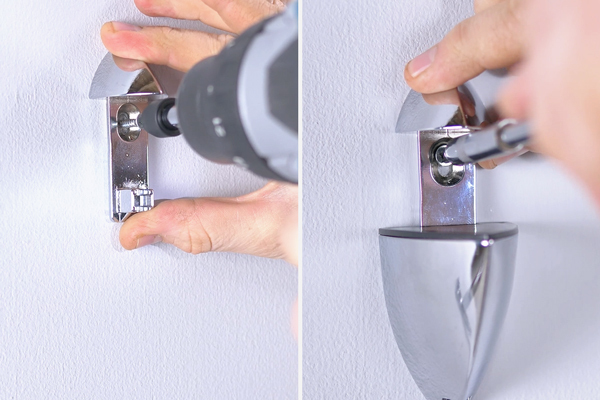
Drill holes for and secure both Shelf Brackets to the wall, following the marks.
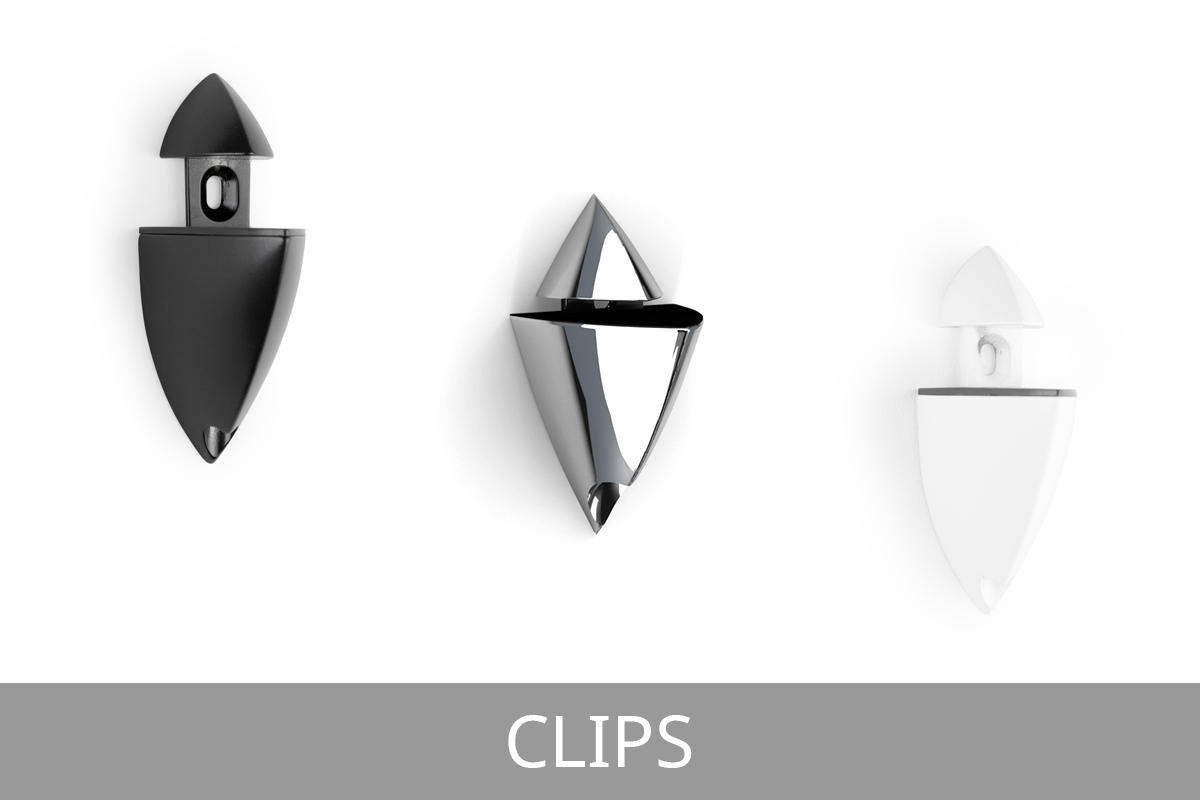
Attach the clip section to the Brackets and adjust the height if required.
4. Add Shelves to Brackets
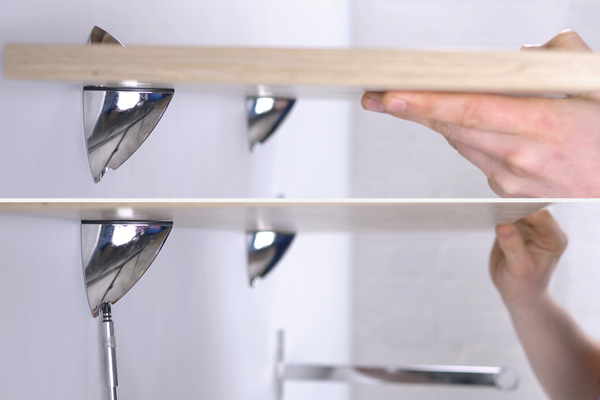
Place the Shelf onto the Brackets and tighten with a screwdriver to secure.
Last Part of Hanging Rail Assembly
1. Insert Tubes into Support Arms
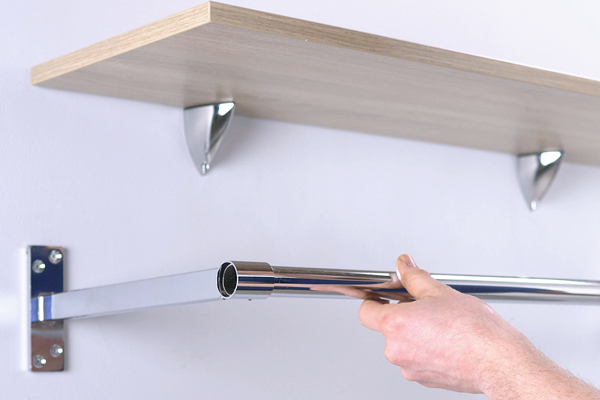
Thread the Tube/s through the Arms. Remember that if you have multiple rails, Tubes should meet equally in the middle of the brackets (if not on the end).
2. Tighten grub screws and add End Caps
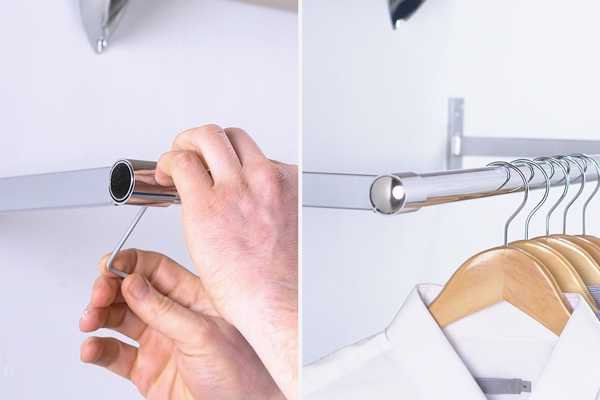
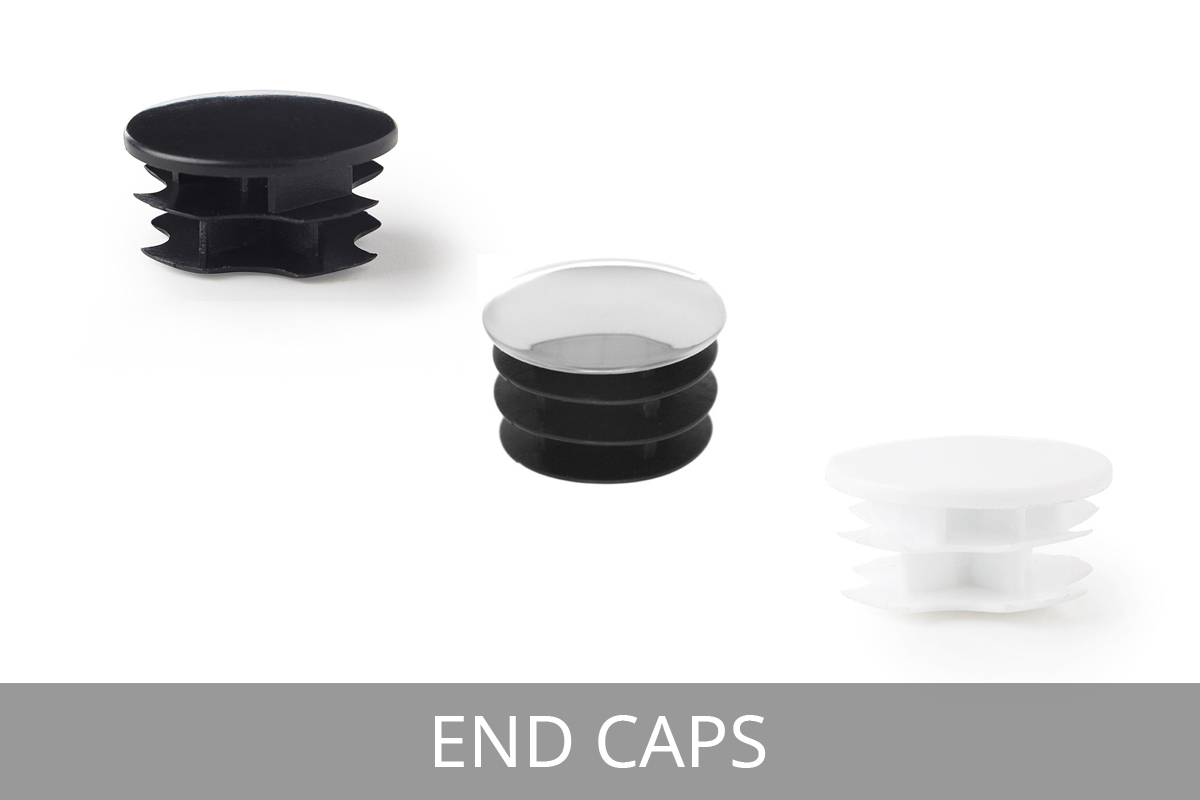
Using a 3mm allen key, tighten up the grub screws on the Support Arms to secure the rails. Finish the Hanging Rail by adding End Caps to the Tubes.
We hope you found this guide useful and successfully assembled your Hanging Rail & Shelf.
If you have any questions, feel free to call us on 01258 650 946 or email sales@shopfittingwarehouse.co.uk and we will be happy to help.
If you have any feedback on this guide, please Email Support and let us know.
Related Knowledge Base Guides
-

Wall Fixings:
Our GuideExplore our guide explaining the different types of fixings and where they can be used.
-
Clothing Rails:
Everything You Need To KnowFind out more about Clothing Rails, from Clothes Racks and Hanging Rails.
-
Clothes Hangers:
For Your BusinessLooking in more detail at Clothes Hangers, the perfect pairing for Hanging Rails.