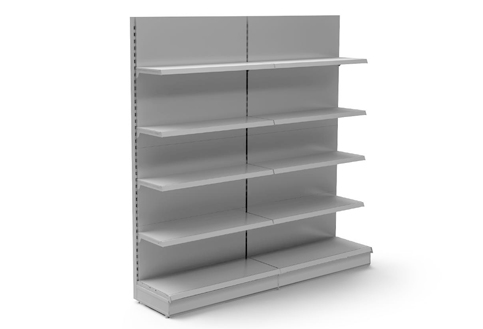
Assembly Guide: Retail Shelving (Wall Shelving)
This guide covers main aspects of assembly for products in our Retail Shelving range, specifically Wall Shelving units:
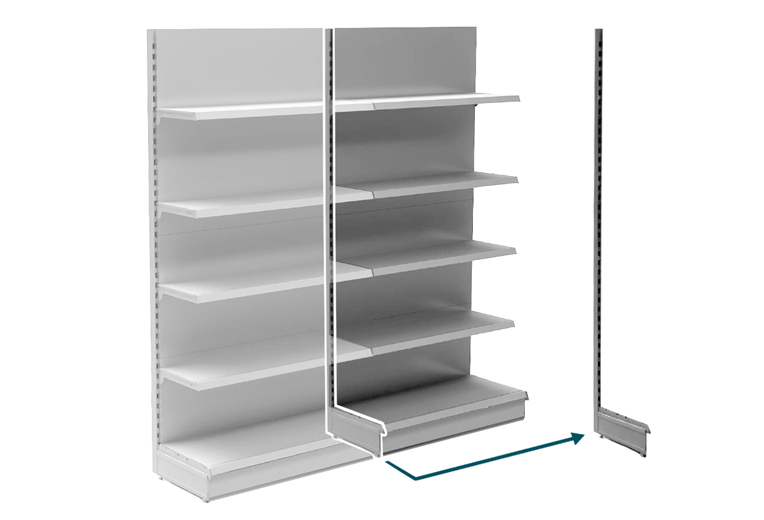
- Wall Shelving - One-sided single units or runs
- Corner Shelving
Shelving Angles: Brackets and shelves can be placed at different angles, depending on the length of bracket. See the section 'Things to note before Assembly' or visit individual product pages for more details.
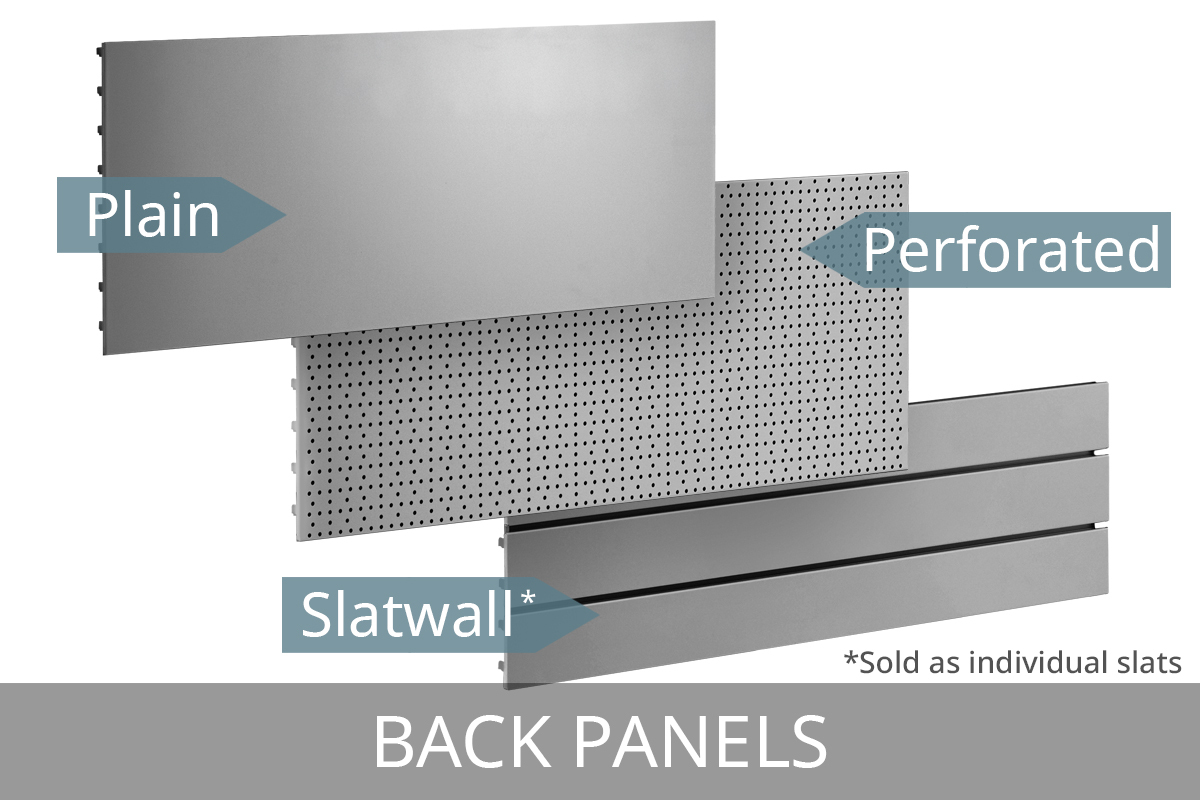
Adjustments: It’s easy to modify your unit. You can reposition the brackets along the uprights to adjust the shelf heights, and you can switch out back panels - for example, replacing a plain panel with a perforated one. A wall shelving unit can also be reconfigured into a gondola unit, and vice versa.
Components/Accessories: Additional components and accessories are available, such as LEDs, Dividers and Risers. We've covered the most common additions (kick plinths and EPOS ticket strips) but other accessories are straightforward to fit. See product pages for more details or contact us for advice.
Important: Do not attempt to assemble the shelving unit without reading these instructions fully.
If you have Gondola Units, while the steps are similar to Wall Shelving Units, please refer to our Retail Gondola Shelving Guide.
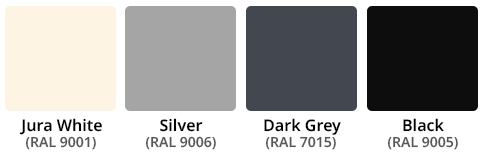
We have a choice of over 30 RAL colours available to order.
If you'd like to discuss a custom unit, please get in touch.
Important Safety Information
- Read through all instructions on this page before beginning any assembly
- If you think that you have received defective parts, please do not use and contact us
- If you are unsure about assembly, please ask our team
- Assemble in a suitable space and on a sturdy and level surface
- Check structure is secure before use
- Do not use any sharp tools
- Do not overload your unit
Tools Required
- Rubber Mallet: optional, but may help secure base legs into the uprights
- 14mm Open-Ended Wrench: to adjust feet height on base legs
- Gloves recommended, but not essential
Considerations
- Only on a run, would you share an upright and base leg.
- Illustrations are merely to help you assemble our modular units.
- Not all components may apply to your unit. Follow the steps relevant to your configuration.
Other Information
- Best assembled by 2 able people
- We cannot be held liable for damage or injury resulting from incorrect assembly
- Assembly will void returns, except if a manufacturing fault is found.
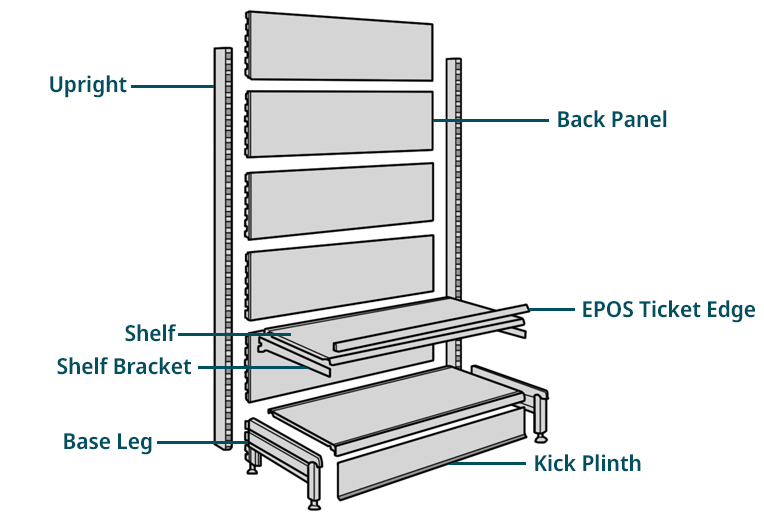
Components
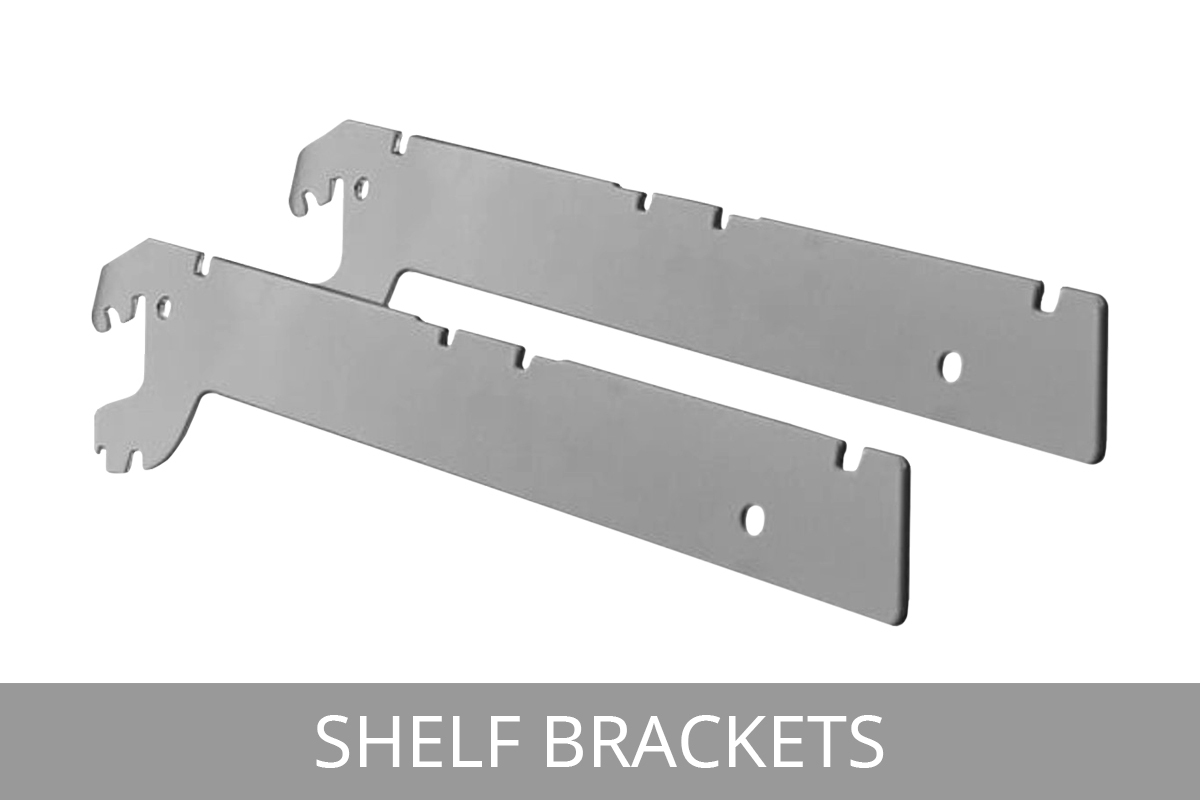
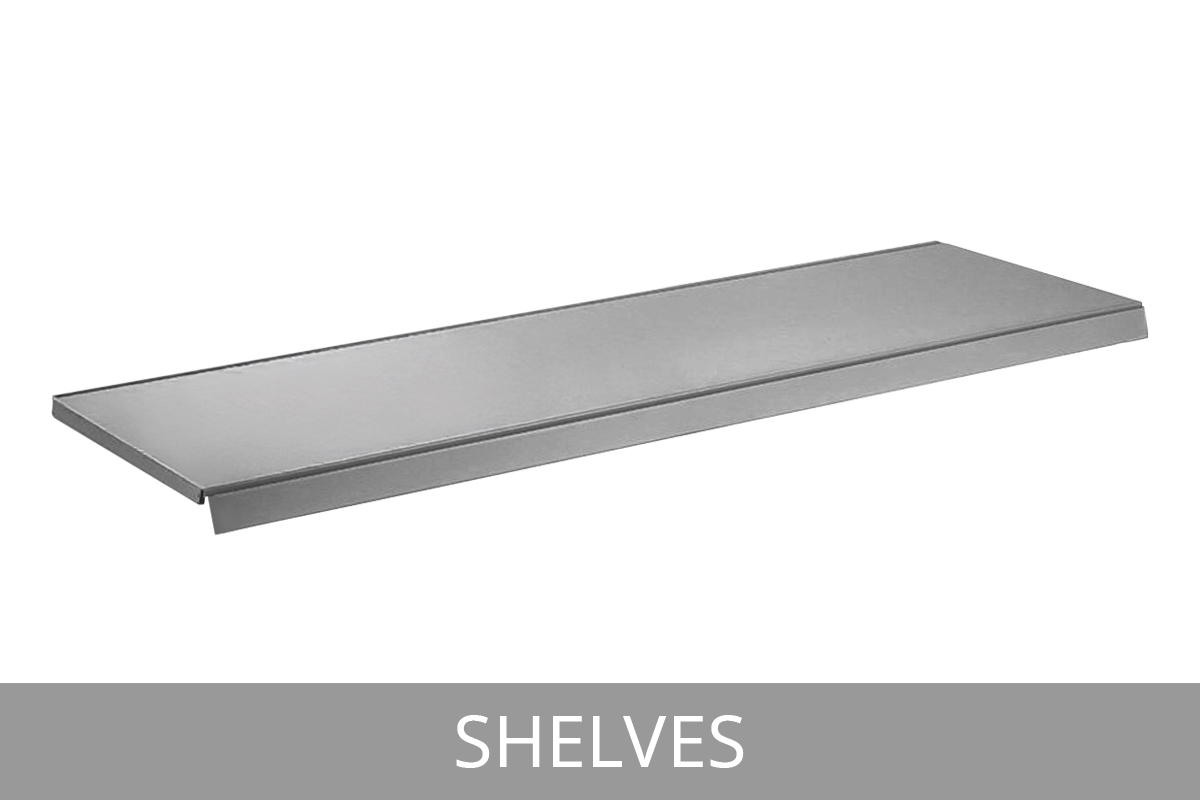
Depending upon which model, or shelving arrangement you have purchased, these are some of the parts included - check your product’s page for a list of individual components on specific kits. Note that if you want to adapt or extend your shelving unit, you can do this by purchasing additional components from this website. If you need help selecting the right items, speak to us.
Things to note before Assembly
Steps may differ (or may not be required), depending on your components...
For example, kick plinths and epos tickets are common extra components, but aren't always used. If they're not required, these steps can be skipped.
... or if you are building a unit from scratch, or expanding an existing unit.
The order may also be different if you are expanding an existing unit. As another example, two units can share a base leg and upright, so you'd just need to build an additional end of run leg and upright (and follow subsequent steps), rather than two.
Brackets and shelves can be placed at different angles, depending on the size bracket used
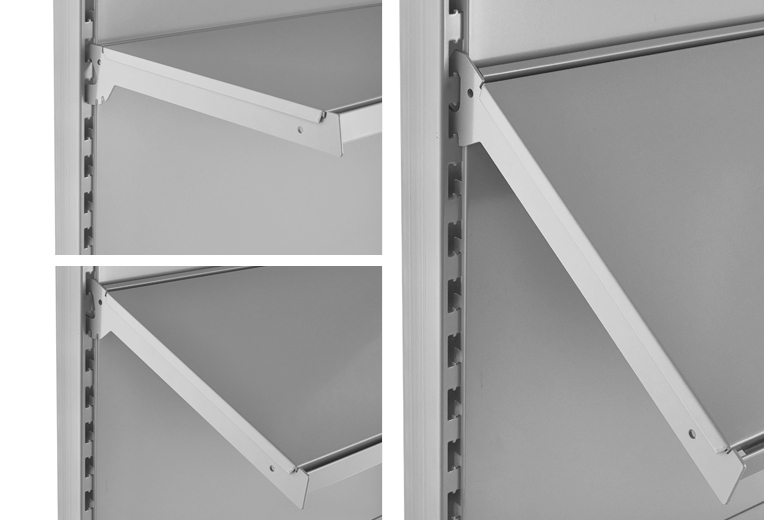
Brackets and shelves can be placed at a standard 0 degree position, a 10 degree angle, a 20 or 35 degree angle BUT this is dependant on the length or bracket chosen. Refer to individual product pages for more info.
Check your components and set them out to make assembly easier
We recommend starting by setting out all components out in front of you, to make finding everything easy.
The type of components and the number you have will vary depending on the unit. You can find detailed information on the product pages.
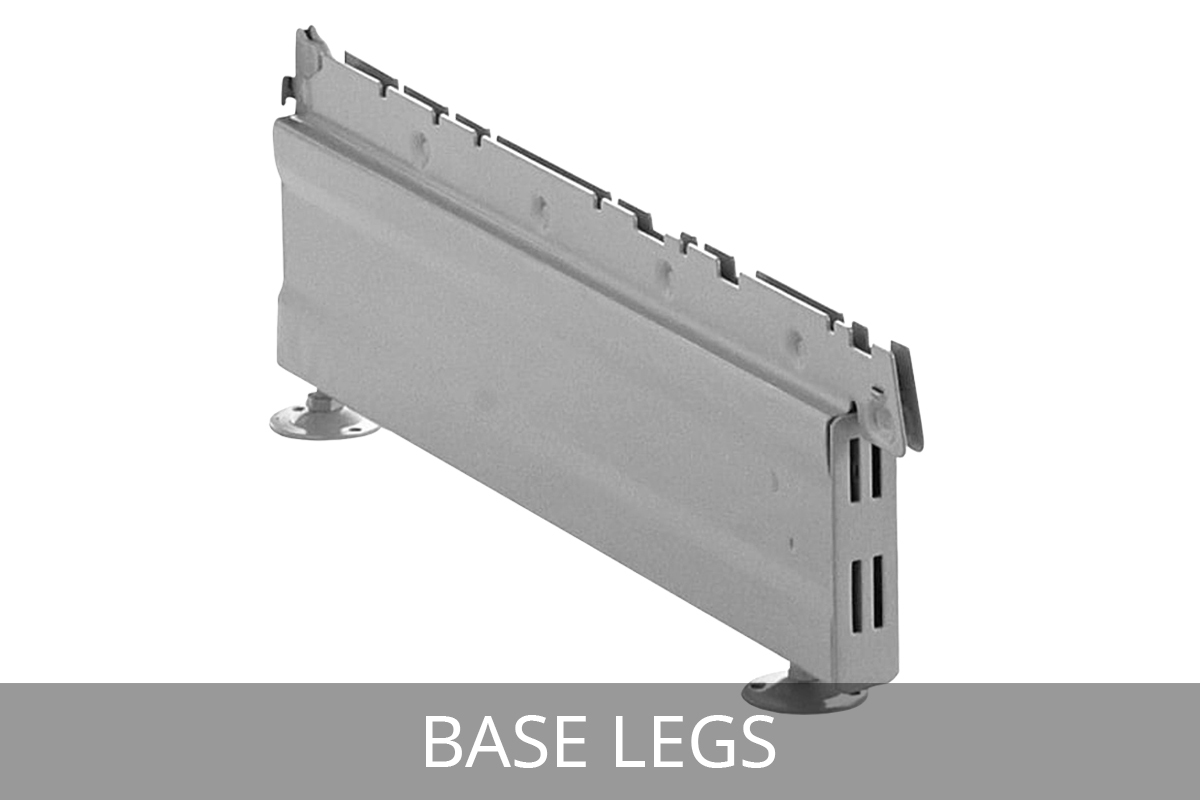
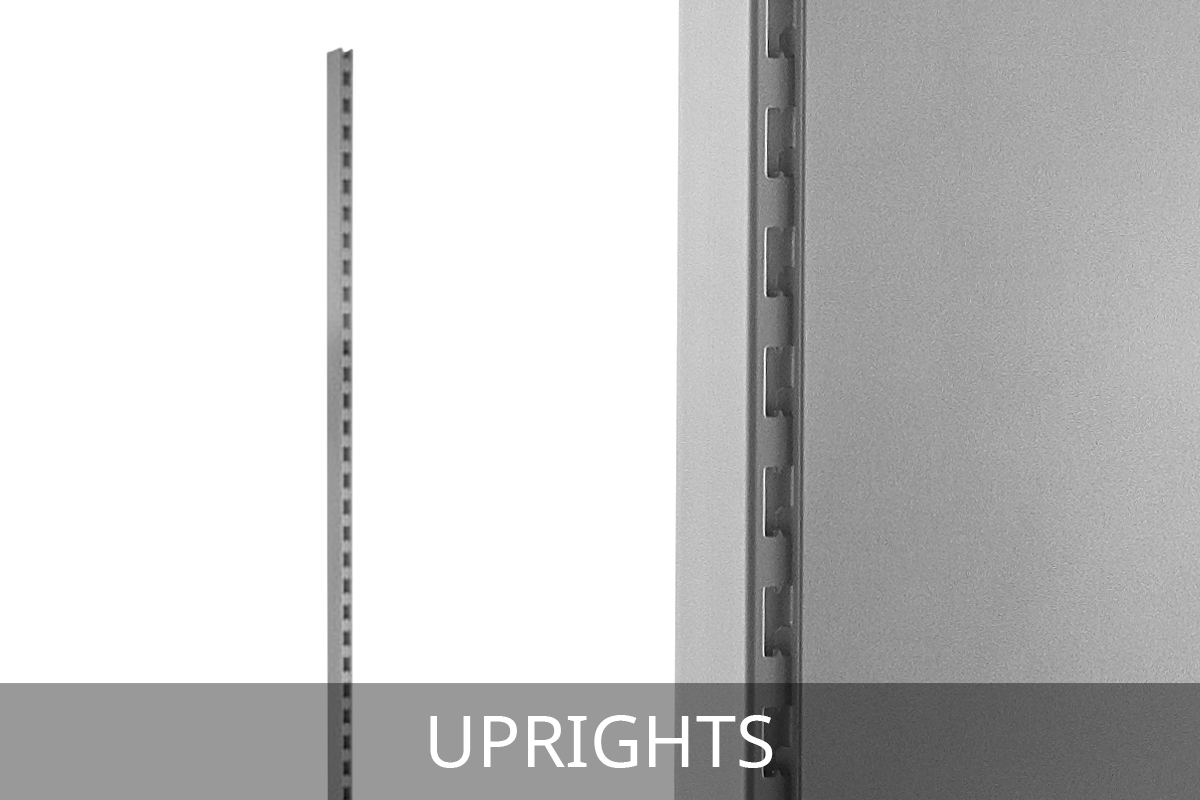
Base Legs & Uprights
1. Insert base leg into the bottom of an upright
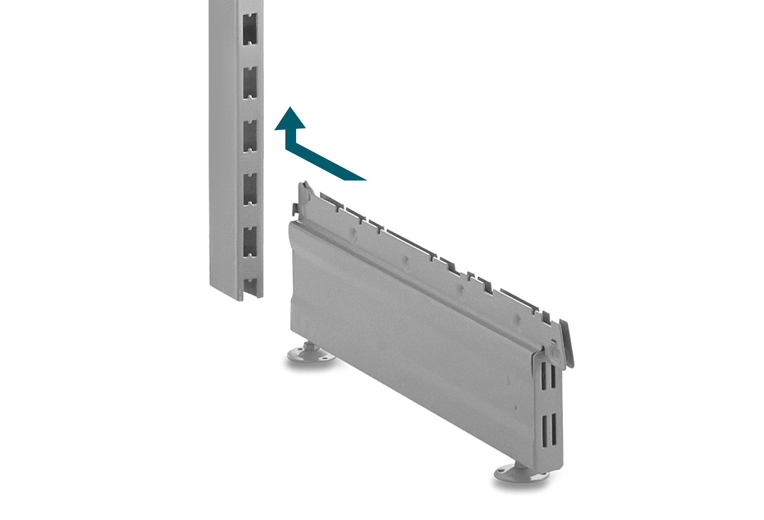
Locate the base leg rear lug and insert into the bottom 'H' slots of the upright, as indicted by the arrow above.
2. Ensure base leg is secured firmly
Firmly wedge the base leg into the upright, using a rubber mallet if needed. Repeat as necessary.
First Back Panel & Adjusting Feet
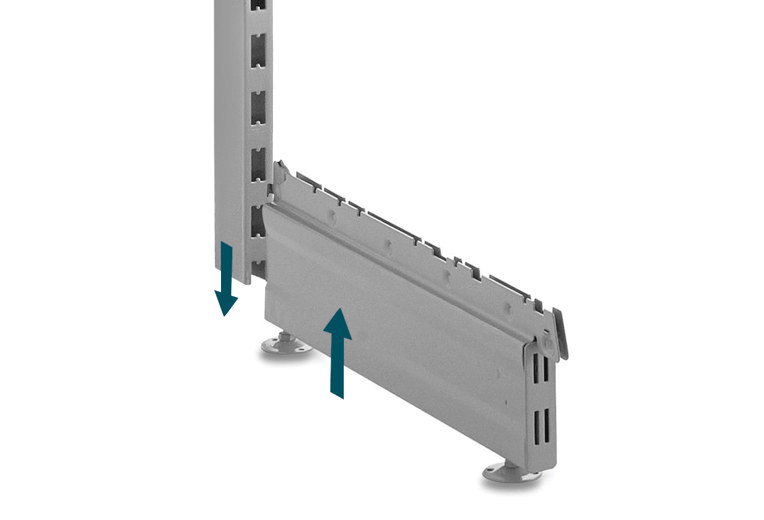
3. Connect uprights with the first back panel
Fit a back panel into the bottom 'H' slots of the uprights. This is approx. 2 cm beneath the upper edge of the base leg.
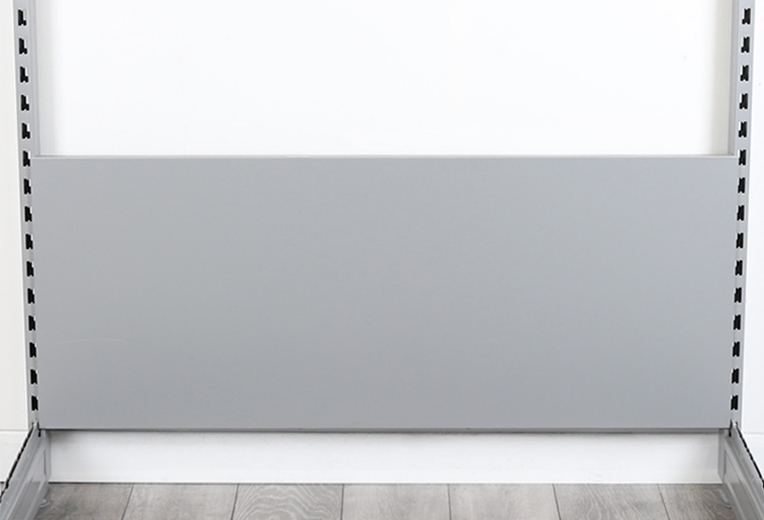
4. Check that the unit is even and level
Have a look at the unit and check that the levels look correct. The foot discs can be adjusted to account for uneven flooring.
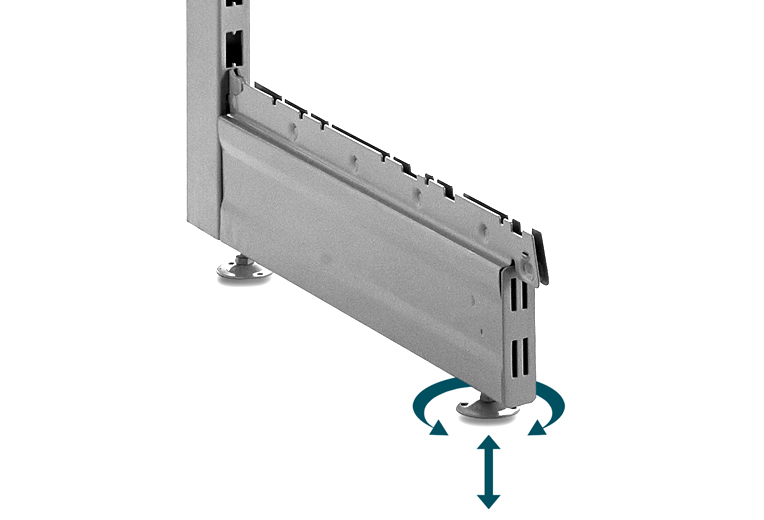
Note: The foot discs can be adjusted as required
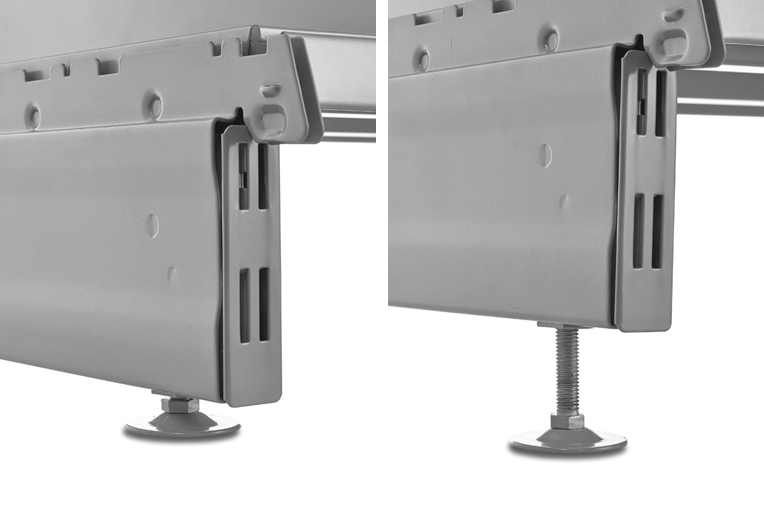
Foot discs can be adjusted with a 14mm open-ended wrench (adjustment range 35mm).
Please note: Base legs are NOT suitable for wall-mounted uprights.
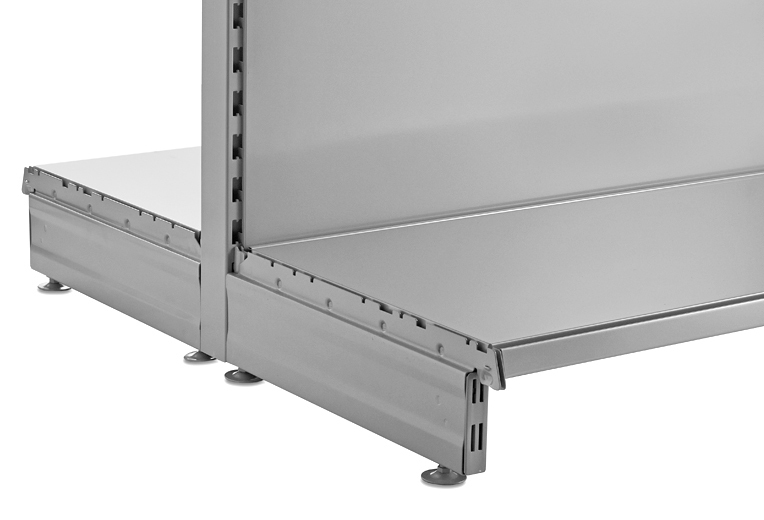
Base Shelf & Back Panels
Note: If you have a kick plinth, this must be fitted first before adding the base shelf. See Step 10.
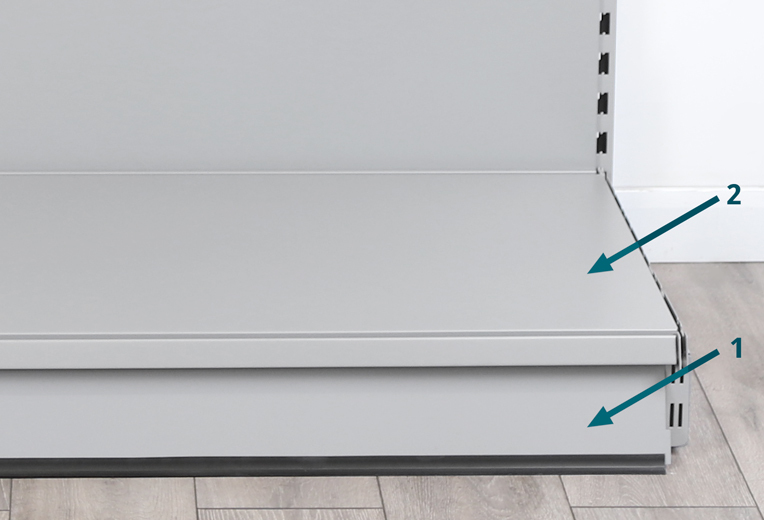
5. Fit the base shelf onto the legs - fit the kick plinth first if available. See step 10.
The base shelf should be orientated so that the larger bent-down edge is to the front.
Note: The base shelf must engage into the slots of the base legs.
Ensure that the sides of the base shelf sit in the slots of the base legs.
6. Finish adding the rest of the back panels to your unit
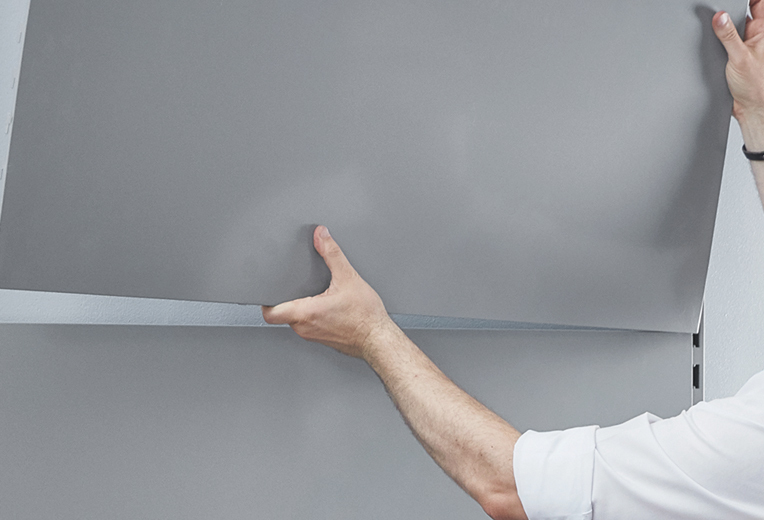
Proceed with inserting the remaining back panels until the main unit is complete.
Brackets & Shelves
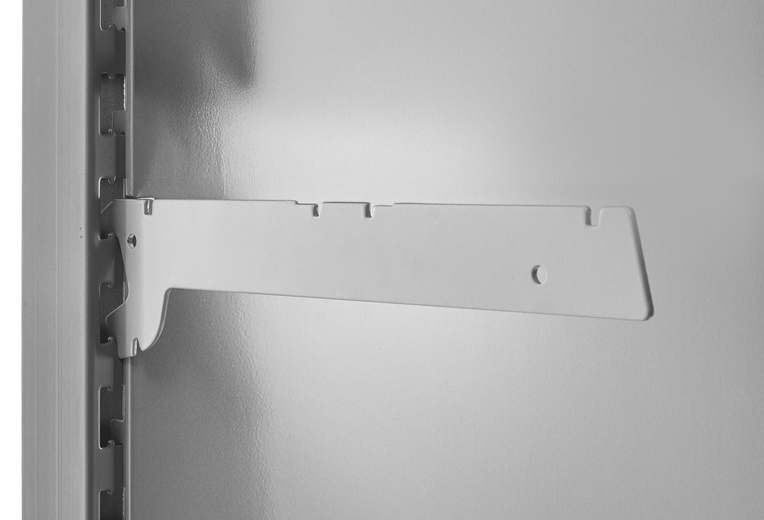
7. Add the first bracket for the shelves
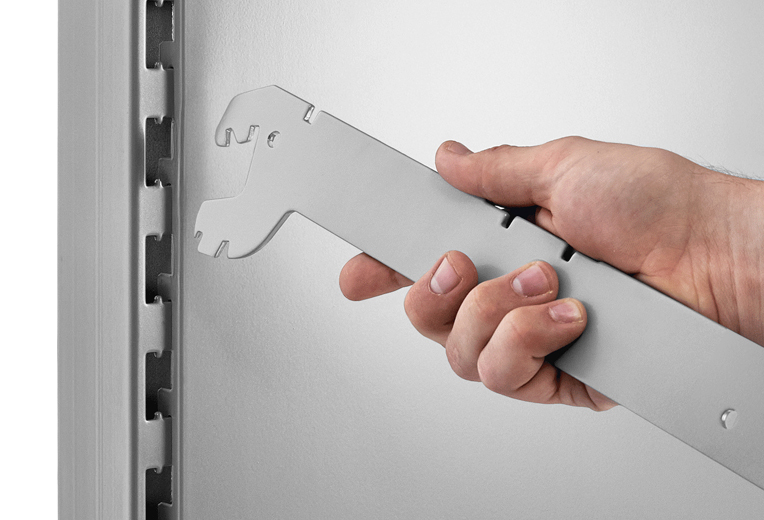
Insert the bracket into the upright at an angle.
8. Secure the bracket in the uprights
Rotate the bracket upwards until it is secured in a horizontal position (or desired angle, if compatible).
9. Repeat on opposite upright and add shelf
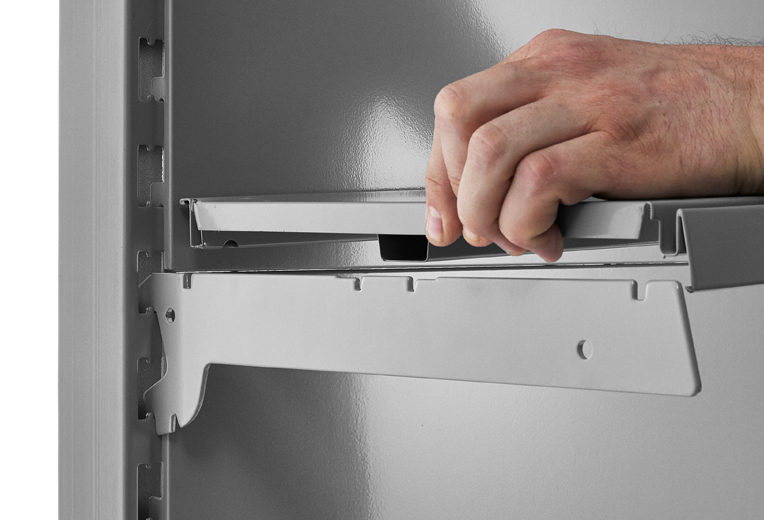
Add the next bracket, the fit a matching shelf on the brackets, with the bent-down edge to the front.
Additional Parts - Kick Plinth & EPOS Ticket Edge/Strip
Kick Plinth
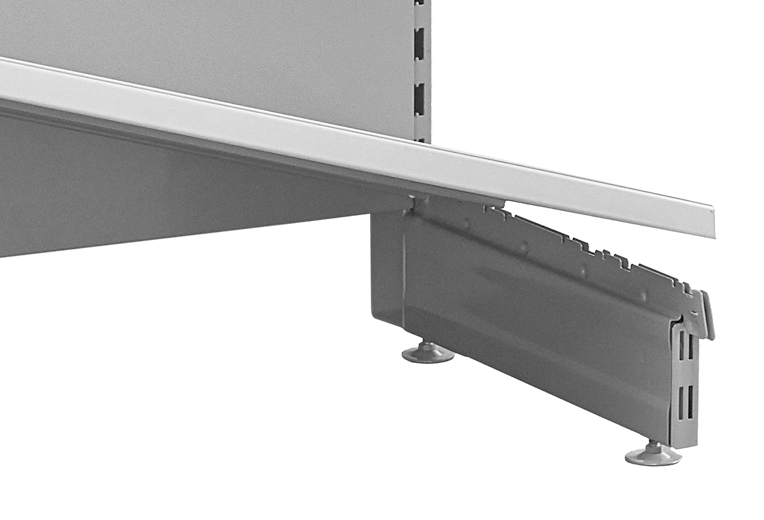
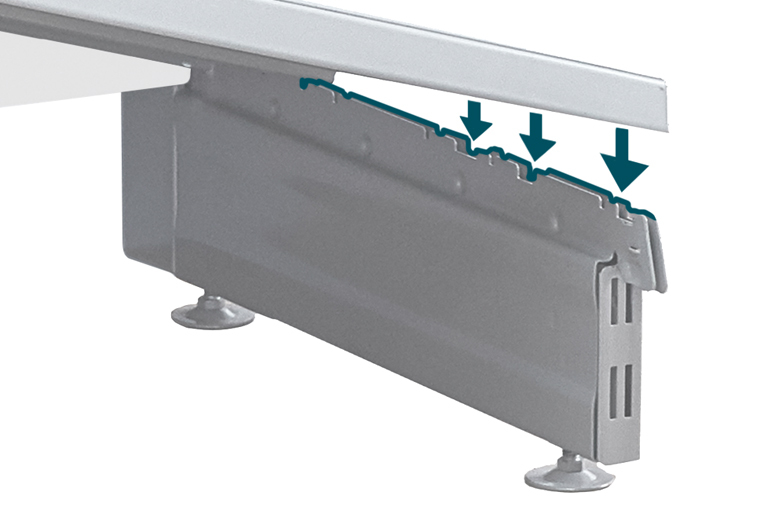
10. Add the kick plinth behind the kick legs, before the base shelf
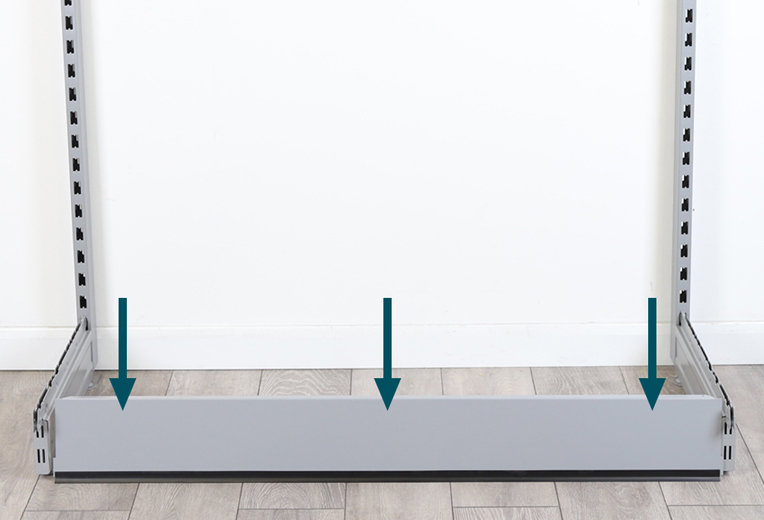
Hook the kick plinth behind the perforated front plate of the base leg, approx. 2cm beneath the upper edge. The base leg must be moved slightly to one side to position the plinth correctly.
Kick plinths need to be added before the base shelf, as the base shelf sits on top of it.
EPOS Ticket Edge/Strip
11. Place the top edge first onto the front edge of the shelf, then secure
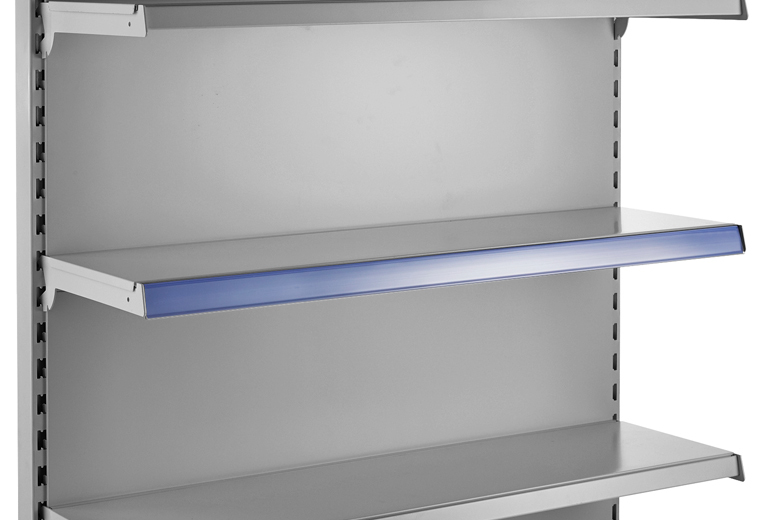
Line up the top edge of the strip onto the front edge of the shelf, and press the bottom edge of the strip until it clips to the front edge of the shelf.
We hope you found this guide useful and successfully assembled your Retail Shelving unit.
If you have any questions, feel free to call us on 01258 650 954 or email sales@shopfittingwarehouse.co.uk and we will be happy to help.
If you have any feedback on this guide, please Email Support and let us know.
Related Knowledge Base Guides
-

Retail Shelving:
Knowledge BlogLearn more in our 'Getting The Best From Retail Shelving' article.
-

Retail Shelving:
Overview VideoView our Overview Videos page for all product video guides.
-
The Psychology of Retail:
Knowledge ArticleAn article looking at how placement can influence purchases.