Assembly Guide: Twin Slot Shelving System
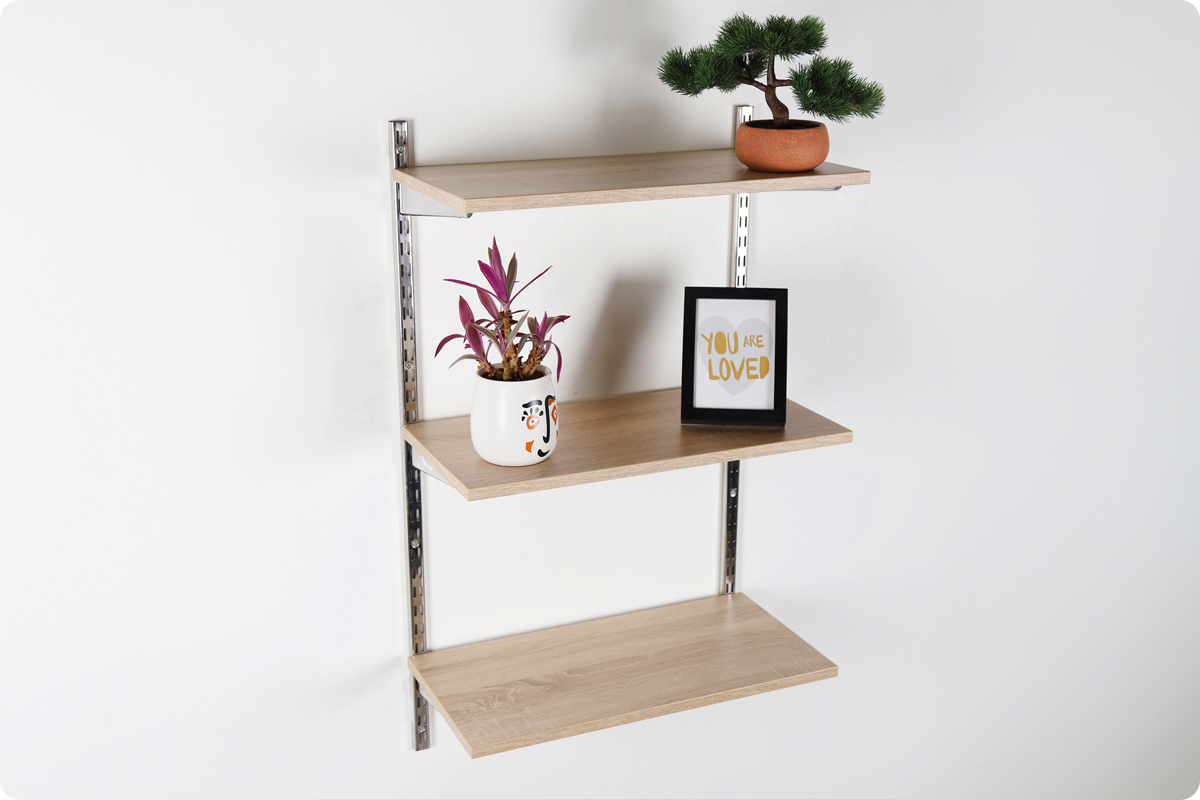
This guide covers all aspects of assembly for products in our Twin Slot Shelving range:
- Shelving Systems
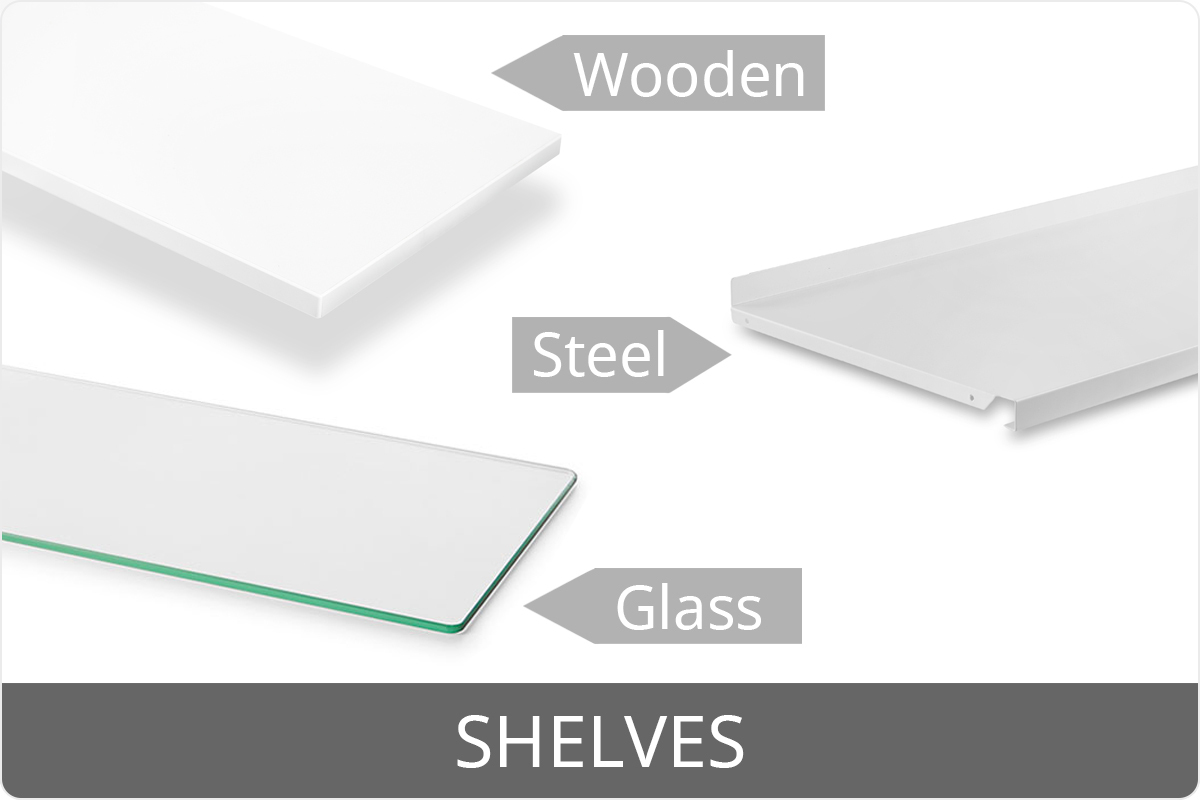
- Wooden Shelving
- Glass Shelving
- Steel Shelving
What you need to know about Twin Slot:
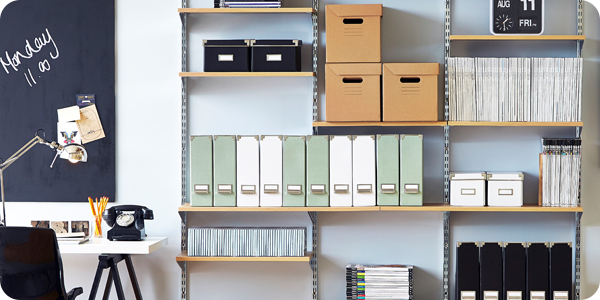
Positioning of Shelves/Rails: The layout shown in the images is just a suggestion, you can position your Shelves and Hanging Rails however you need them. You can also add more Shelves, Rails and Accessories if needed by purchasing the individual components from this website.
Width Between Uprights: The recommended width between the Uprights differs from model to model. The Steel Shelves need to be measured precisely due to the way the shelves slot into the brackets, the Glass Shelves is recommended to overhang the brackets, and the Wooden Shelves can either overhang or fit flush on the Brackets. Check the detailed instructions below for the correct information before measuring up.
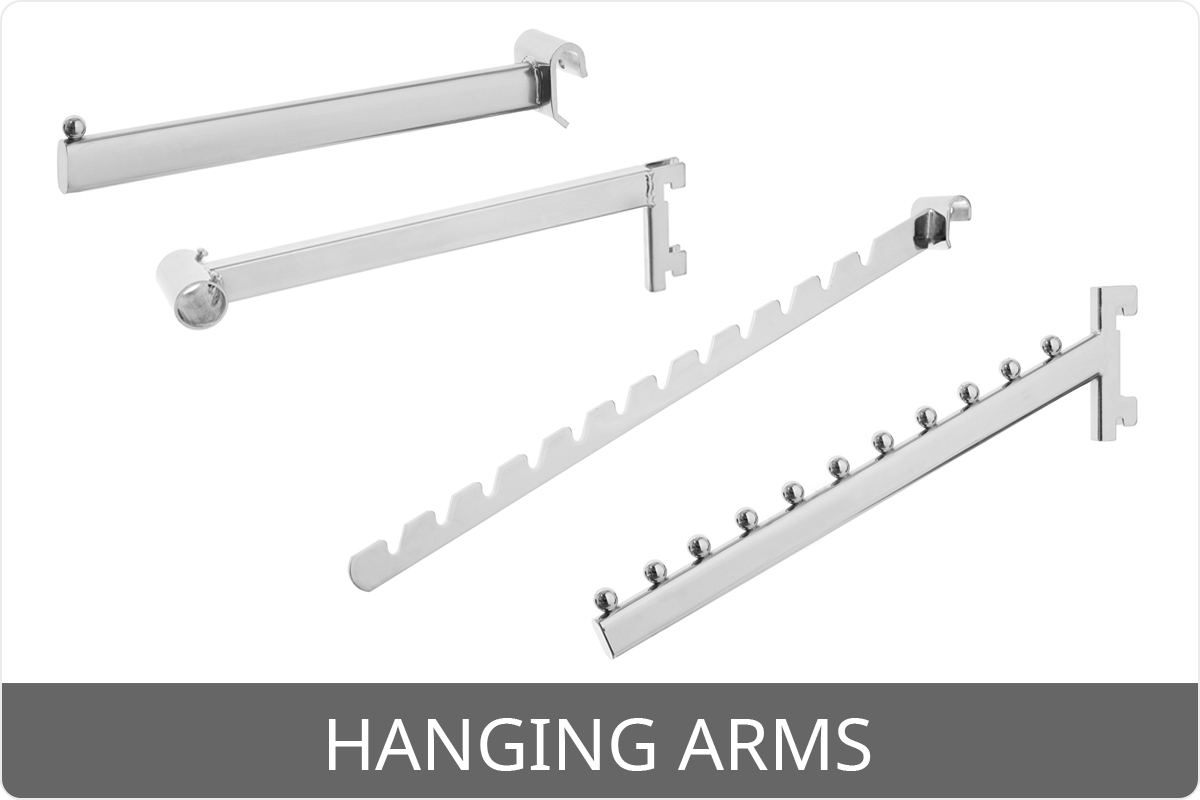
Hanging Arms: To use some of the forward Hanging Arms, you must also have a Back Bar, you will see below that some Hanging Arms have hooks to go in the Uprights, whereas some have clamps that hang on to Back Bars.
Important Safety Information
- Read through all instructions on this page before beginning any assembly
- Before commencing assembly, unpack carefully and check you have all components
- If you think that you have received defective parts, please do not use and contact us
- Assembly will void returns, except if a manufacturing fault is found
- If you are unsure about assembly, please ask our team or a professional
- Your shelving must be fitted to a suitably strong wall surface
- You must use the appropriate wall fixings for your wall*
- Do not use on an uneven or curved wall
- Do not overload your shelving
- Assembly is done at your own risk
Other Information
- We cannot be held liable for damage or injury resulting from incorrect assembly
- Assembly will void returns, except if a manufacturing fault is found.
Tools Required
- Tape measure
- Spirit level
- Power drill
- Screwdriver
- Pencil
- Pilot drill bit
- Masonry drill bit
- Rawl plugs*
- Screws*
-
* Fixings are NOT included. The fixings you require may differ depending on the type of wall you are planning to fit this to. Please consult a professional for further advice if required.
Components in your Box
Depending upon which model or shelving arrangement you have purchased, you will have some of these components in your box - check your product's page for a list of individual components. Note that if you want to adapt or extend your shelving unit, you can do this by purchasing additional components from this website. If you need help selecting the right items, speak to us.
Spacing the Uprights on the Wall
The distance you need to measure between the Uprights differs from model to model. For some models it must be precise, for others it's more flexible and down to preference. As a general rule of thumb, you want to ensure that they are no wider apart than the width of the shelves.
Before you space the Uprights on the wall, consider what shelves you have and the configuration. Take that into consideration when reading the below.
Wooden Shelves
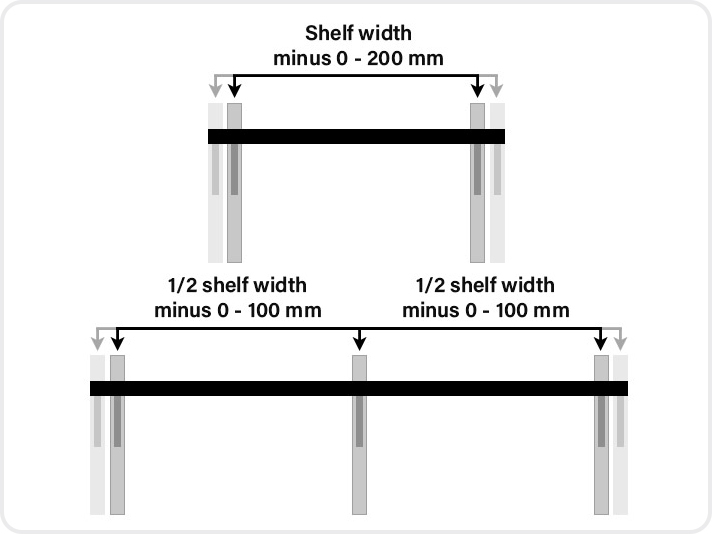
Wooden Shelves can be fitted so they sit in line with the Uprights, or you can choose to have the Uprights spaced slightly closer together so the shelves overhang.
If you choose to have them overhang, space the Uprights so they sit the distance of the shelf width minus 0 - 200 mm. For wider shelves where they are 3 Uprights, space them so that they are a distance of 1/2 the shelf width minus 0 - 100 mm.
Glass Shelves
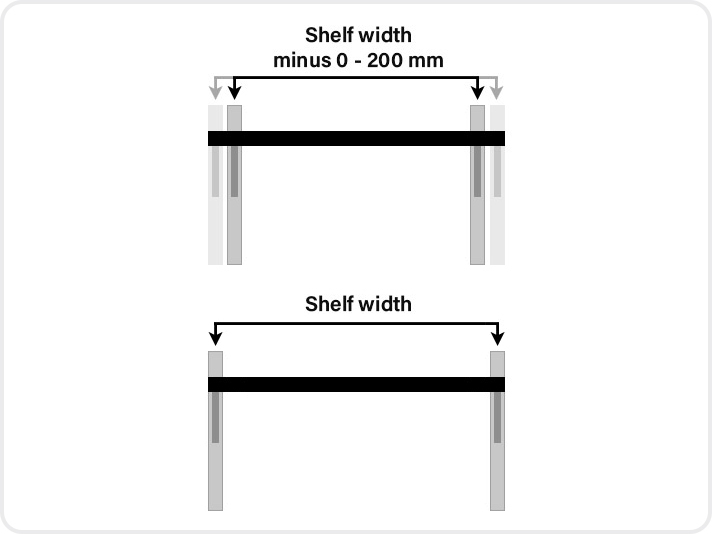
Glass Shelves can be fitted so they sit in line with the Uprights. However, you may prefer for the Uprights to be spaced a bit closer together so the shelves overhang.
Since the Glass Shelves just attach to the Brackets/Support Arms using suction cups, we do recommend that allowing for an overhang creates a more secure configuration.
Steel Shelves
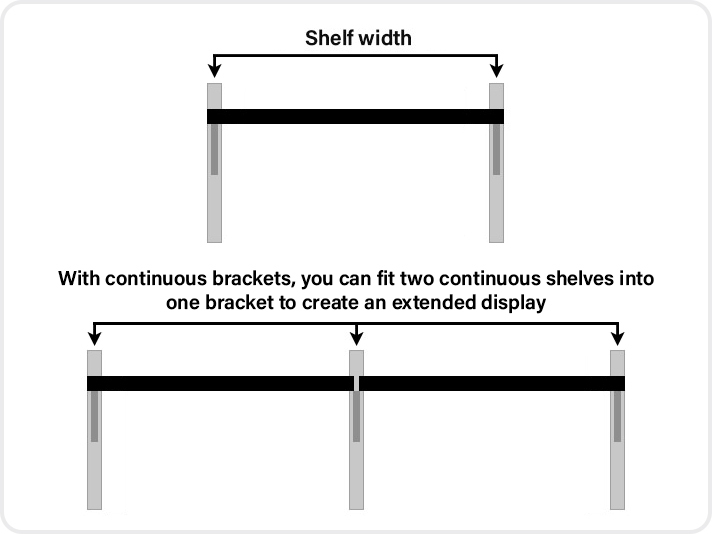
Steel Shelves are designed to slot into the Brackets. For a neat finish, we recommend spacing the Brackets and Uprights so the shelving lines up, instead of overhanging.
This is especially important if you are using Continuous Brackets for creating a extended display, as two Continuous Shelves can fit into one Bracket.
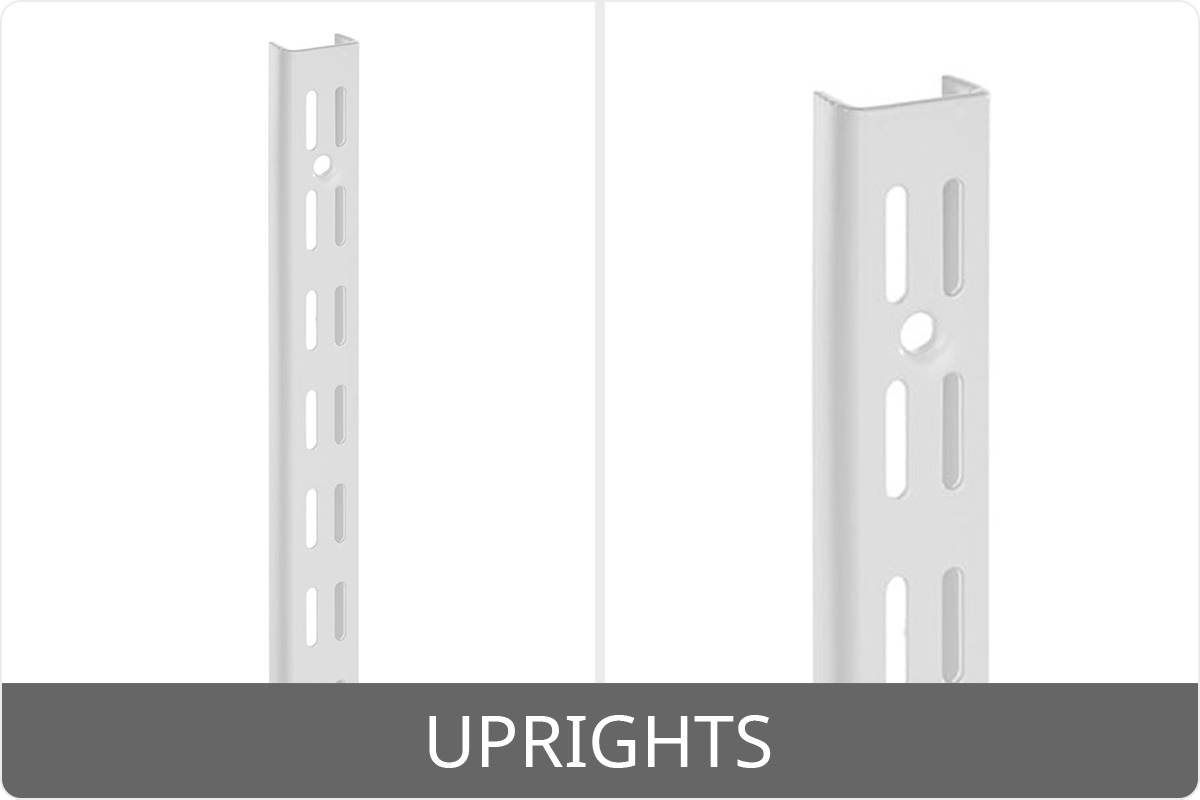
Fitting the Uprights to the Wall
The Uprights screw into the wall and support the shelving or hanging rail assemblies. The shelving should be fitted to an appropriate wall surface because stud wall and similar structures have limits to the load they can support and therefore it is up to you to determine whether the wall can support the load of the shelving and contents.
If you are unsure, please refer to our ‘DIY Guide to Fitting Twin Slot Shelving on Different Walls’ or contact us directly for advice.
1. Measure and plan where to put the Uprights
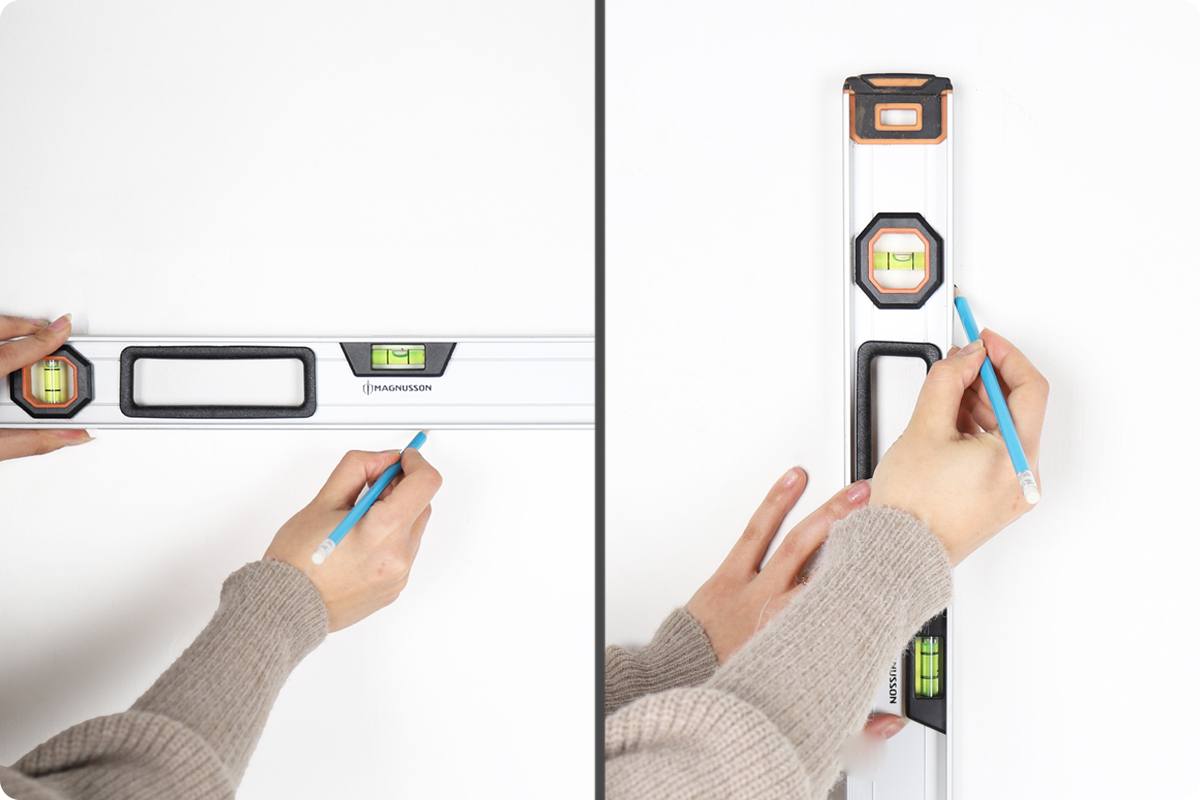
Plan vertical and horizontal location of where you want the shelving to go on the wall. To centralise precisely, mark the centre point then measure out from there, otherwise roughly plan where the two (or more) Uprights should go.
2. Mark the position of the first Upright
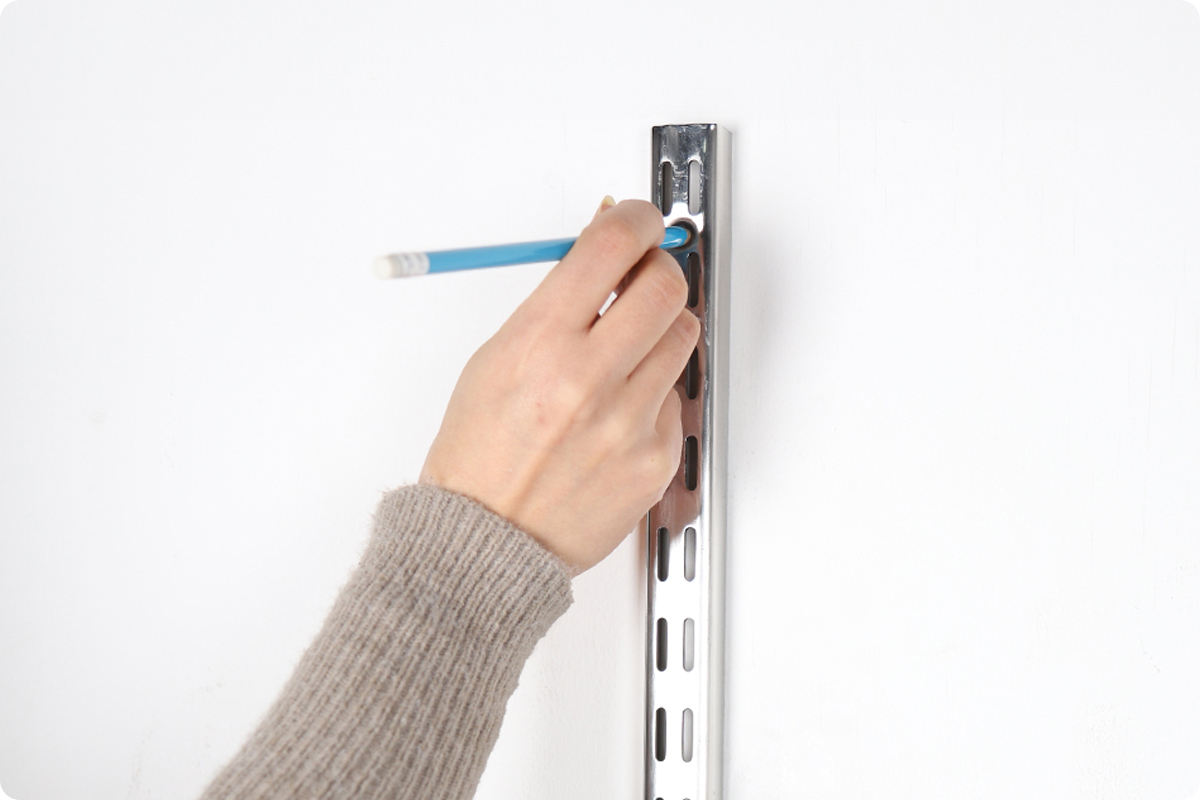
Using a spirit level, mark a vertical line on the wall, then place the Upright on the wall at the desired height, lined up with your line and pencil mark the hole centres of the fixing holes.
3. Screw the first upright to the wall
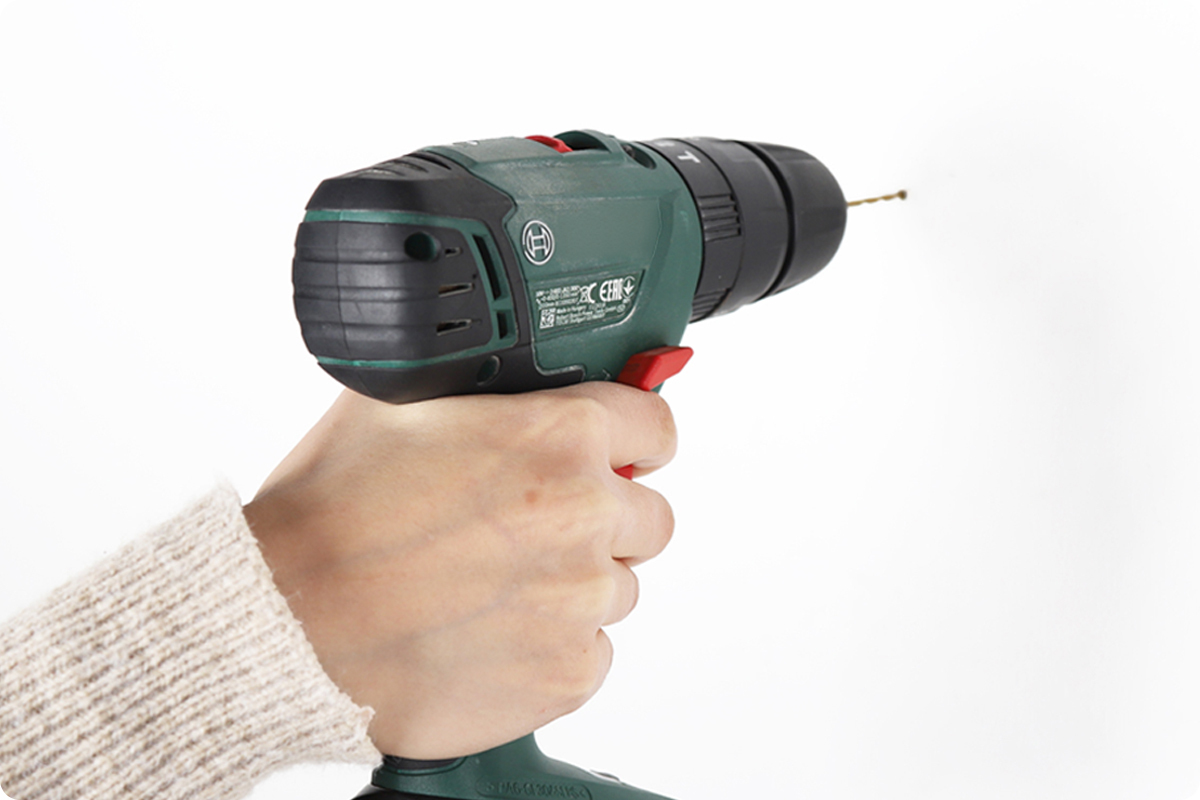
Now drill appropriate holes for your wall fixings or screws and fit the Upright to the wall securely.
4. Measure & mark the other Upright(s) level
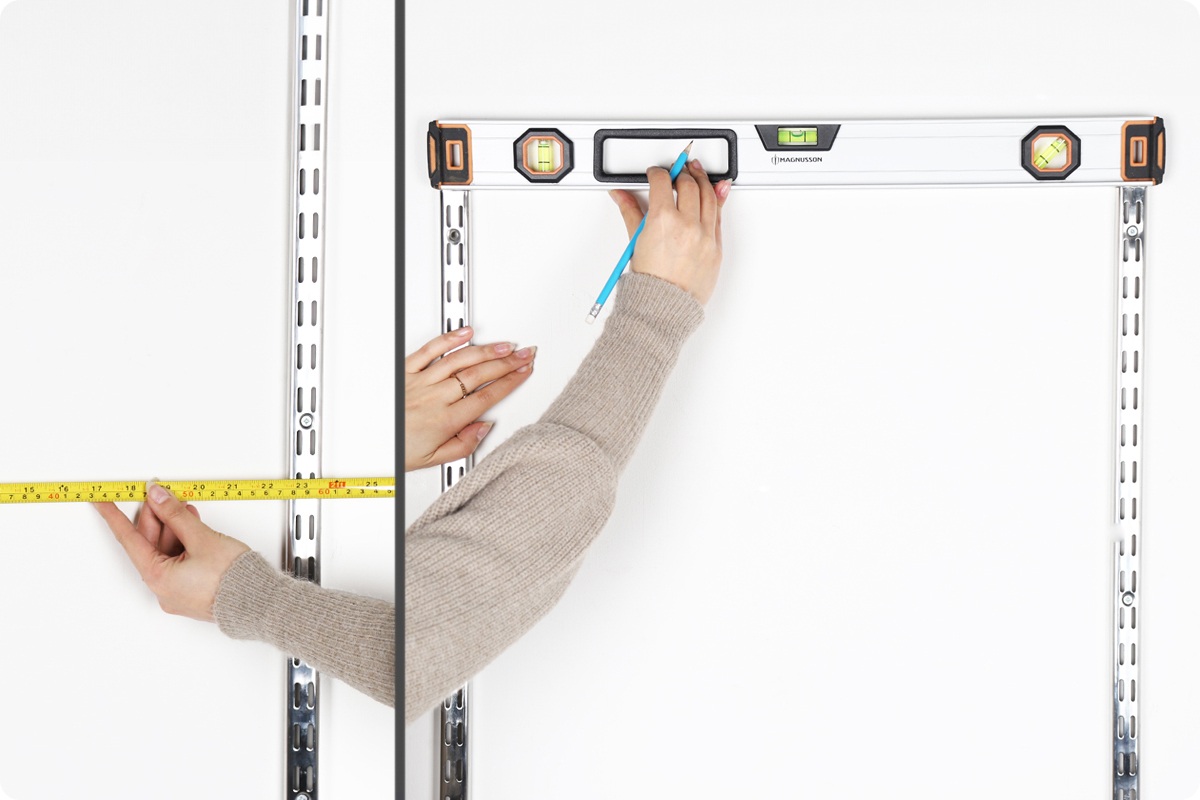
Measure the width to the next Upright, then place the Upright on the wall and use the spirit level to make it level with the first one.
5. Screw the top of the Upright(s) to the wall
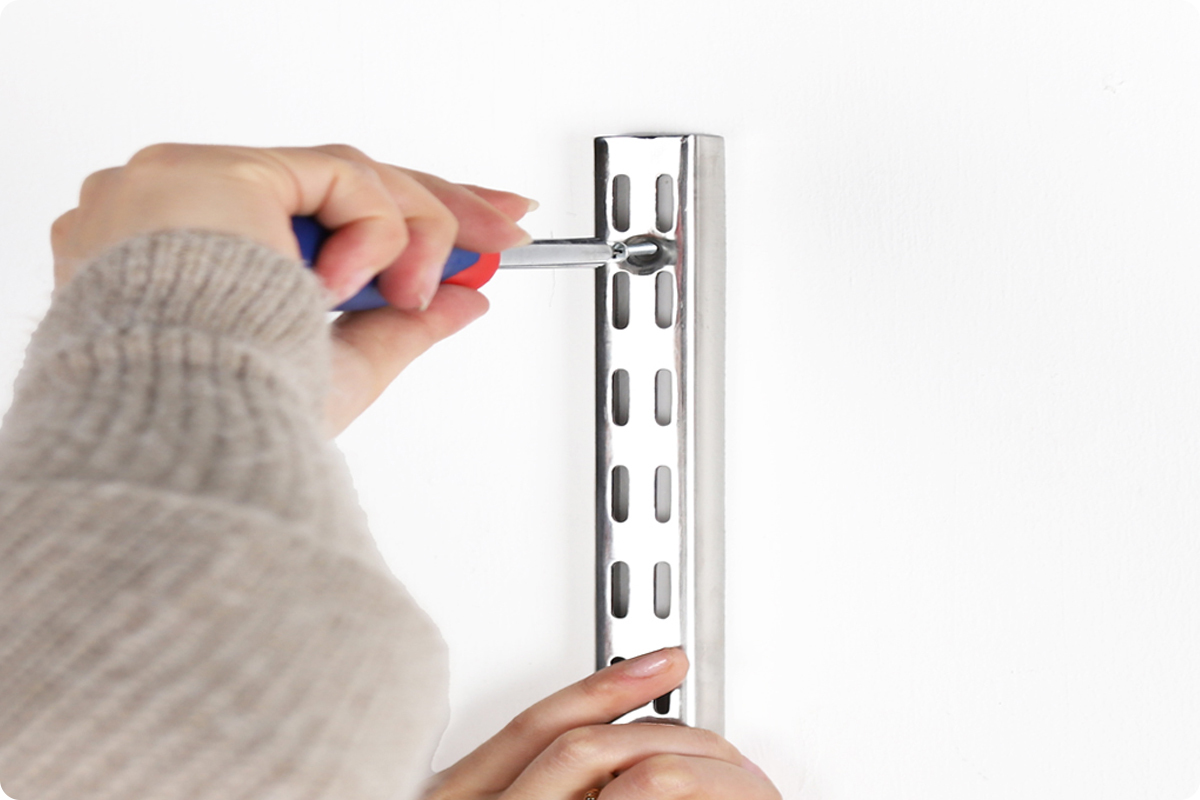
Use the pencil to mark the hole centre of the top hole, then drill the appropriate holes for your wall plugs and screw the upright to the wall, do not screw it tight to the wall just yet.
6. Screw the rest of the fixing points
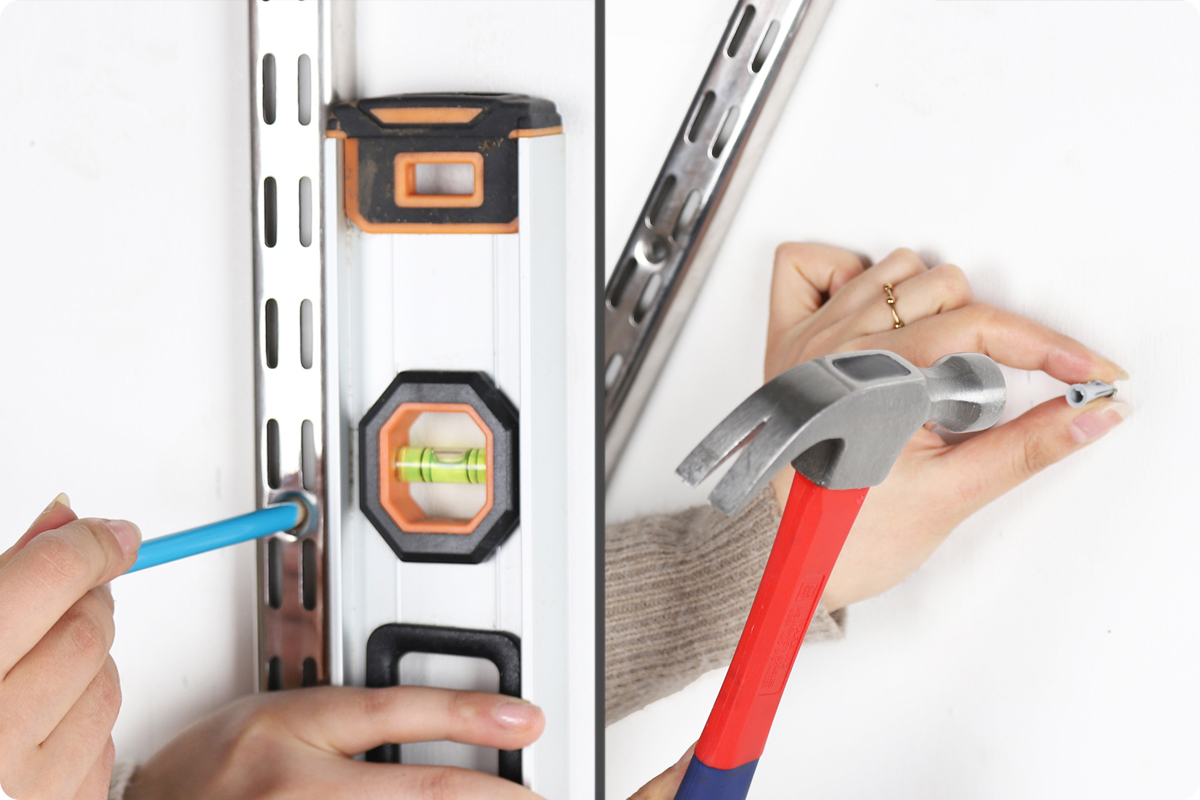
Mark the hole centres of the rest of the fixing holes, then swing the Upright to one side and drill the holes required. Then screw the Upright securely to the wall.
Fitting Shelves
The process of fitting Wooden, Glass and Steel Shelves is different, because the Brackets are different for each type of Shelf.
1. Wooden Shelves - Fitting Brackets
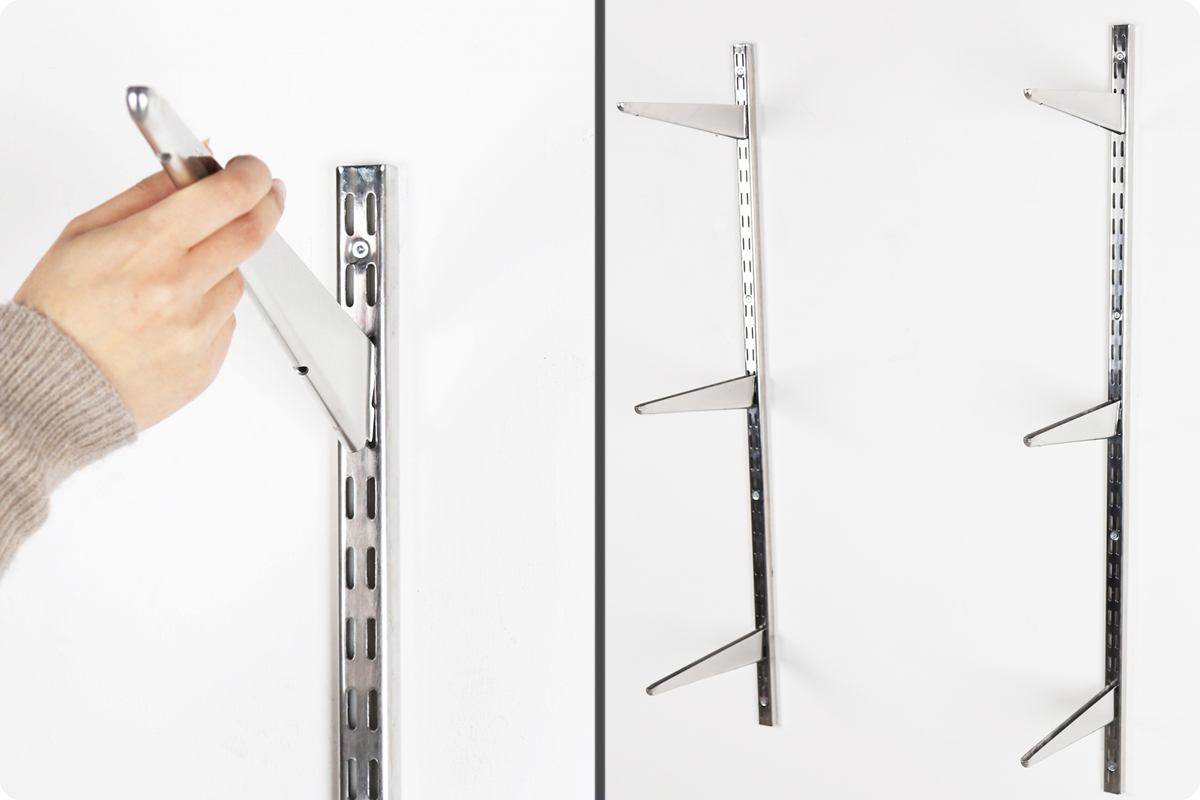
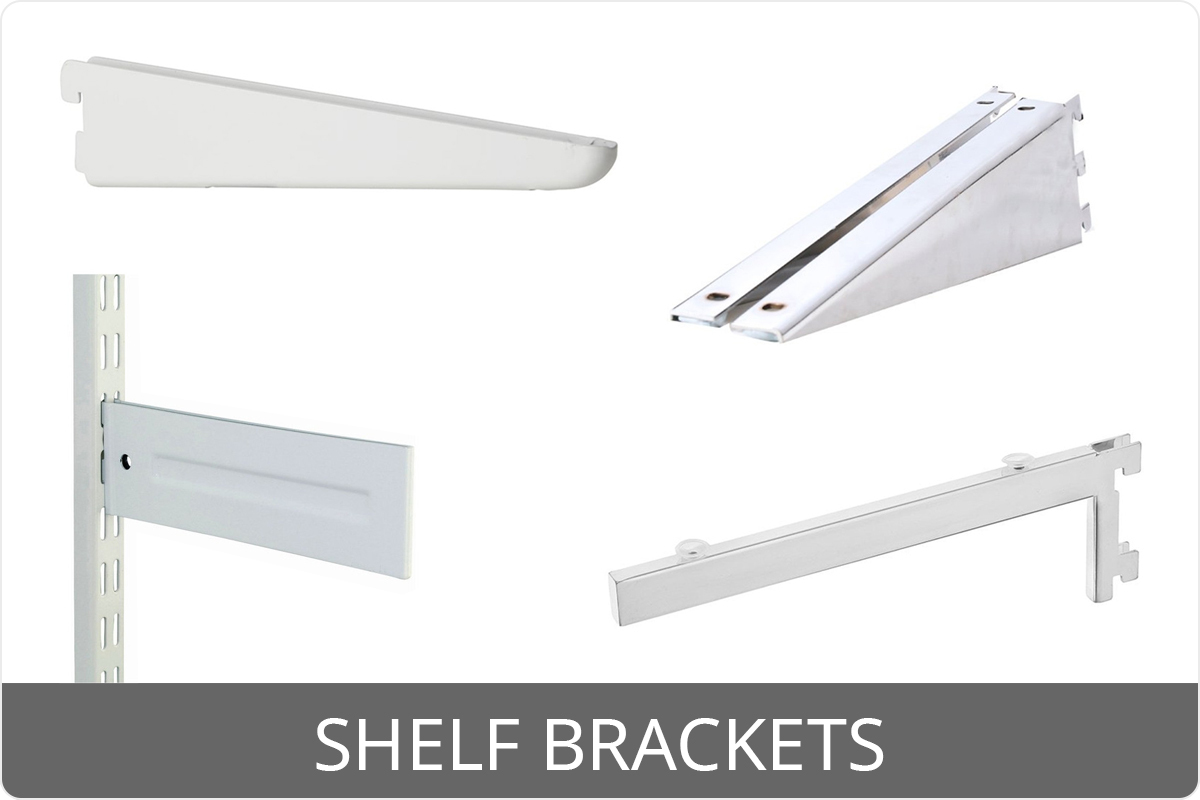
Lift and drop Brackets into place, making sure they're set at the same height on the Uprights.
2. Wooden Shelves - Marking screw holes
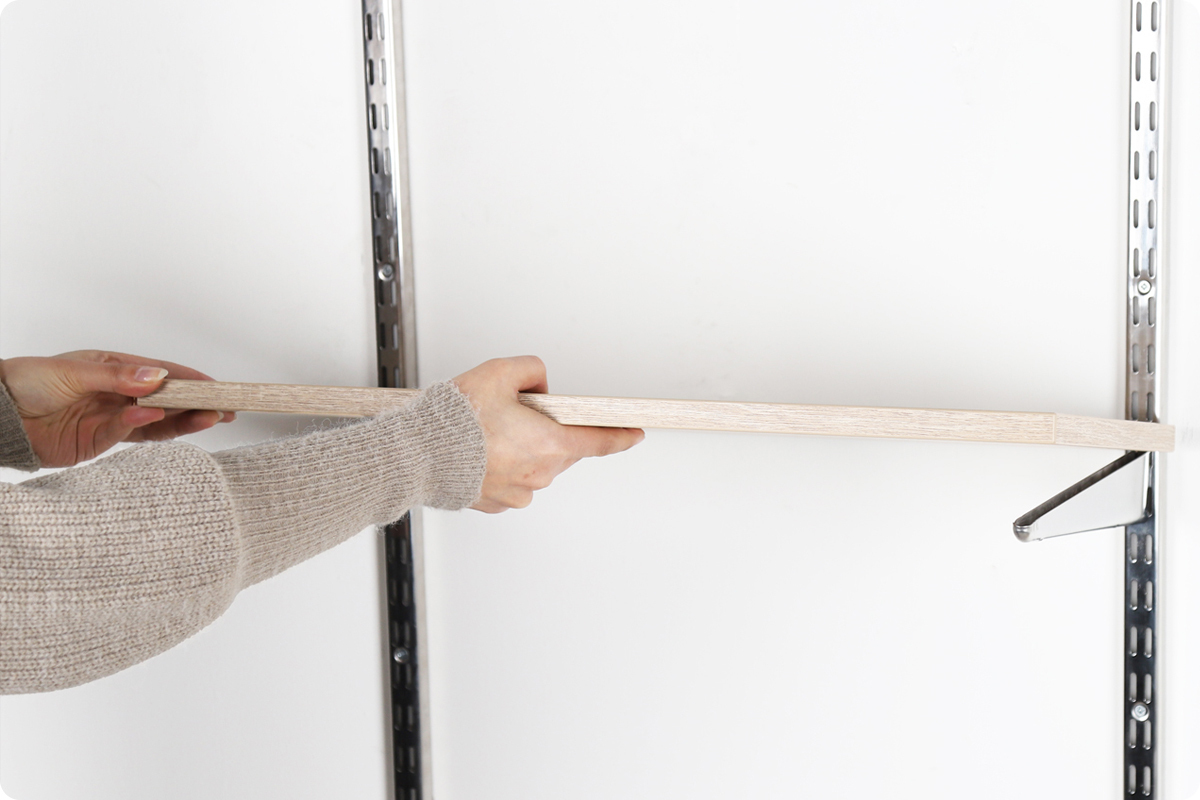
Place shelf onto Brackets. Line up the Bracket with the edge of the shelf or, if your shelf is going to be arranged so it sits wider than the Brackets, ensure shelf is spaced equally so the distance they overhang on both sides match.
3. Screw Shelves in place
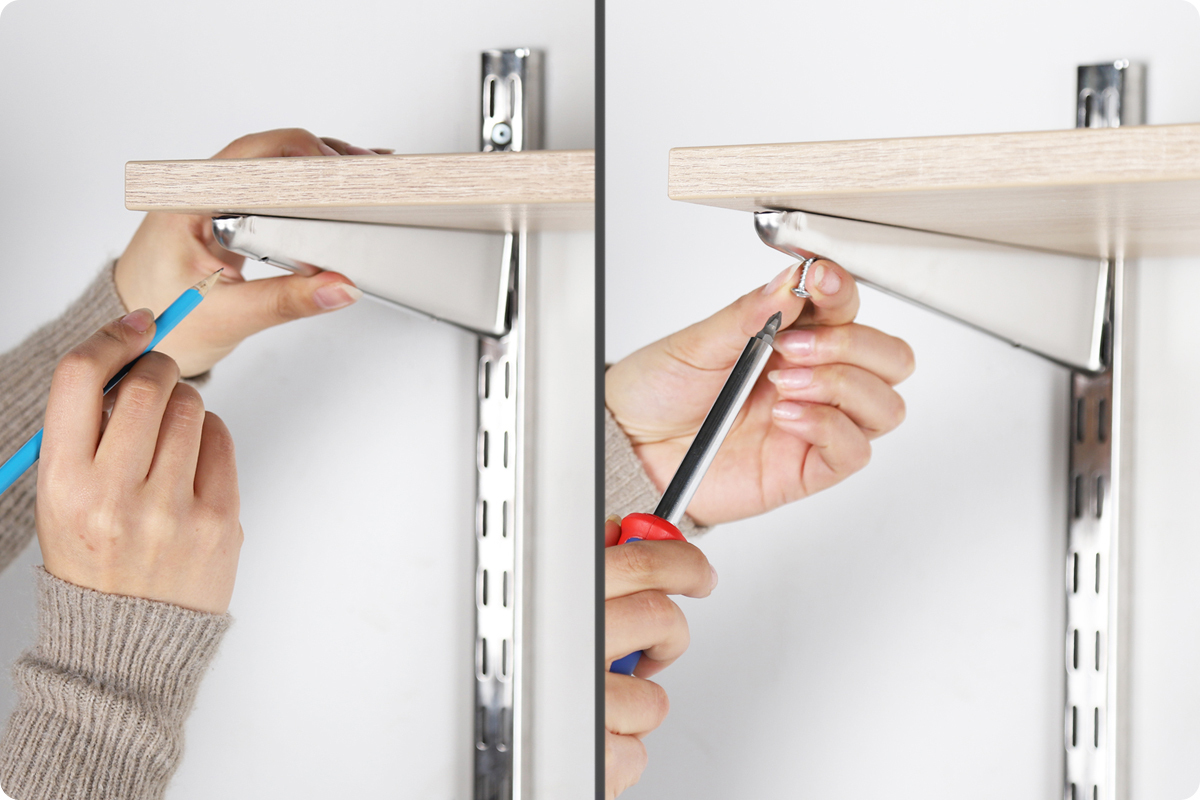
Mark corner holes with a pencil. Drill small pilot holes, do not drill completely through your shelf. Steady your shelf to screw into the pilot hole.
1. Glass Shelves - Fitting Brackets
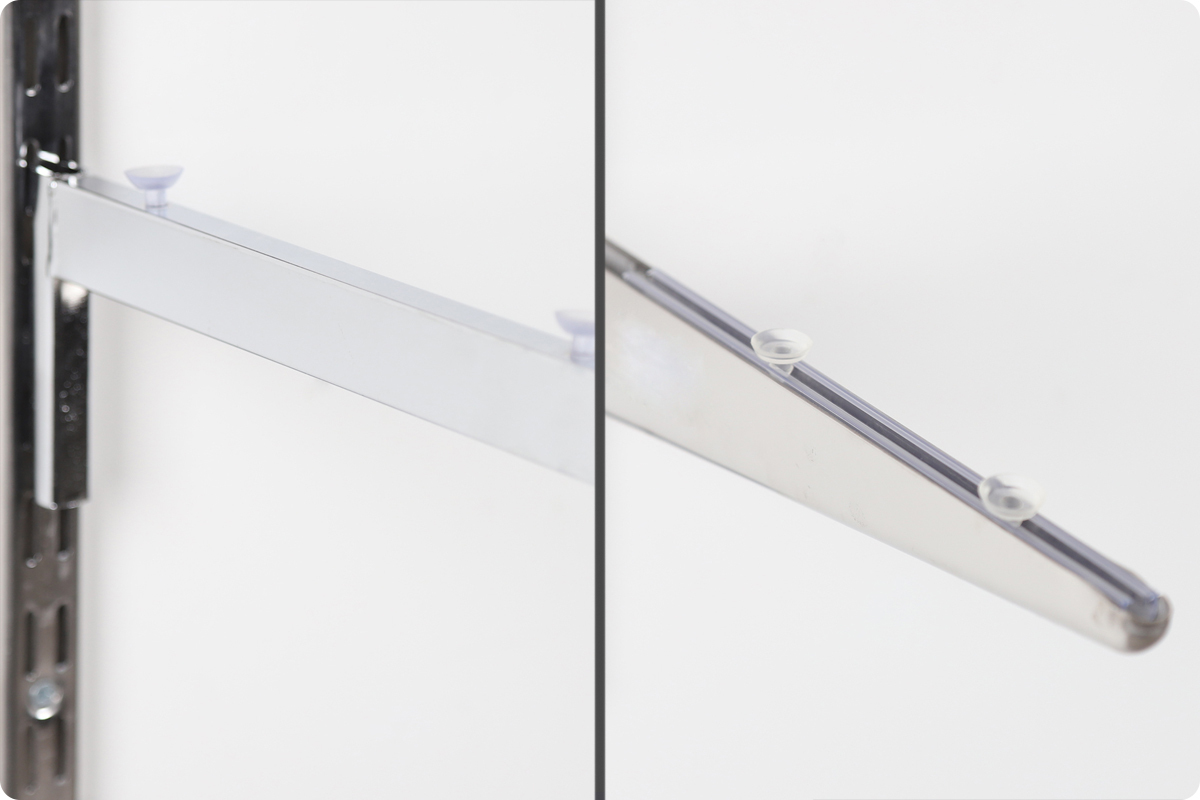
Lift and drop Brackets* into place, making sure they're set at the same height on the Uprights.
* If using U-Brackets, make sure that you have Clear Inserts for use with Glass Shelves.
2. Glass Shelves - Fitting Shelves
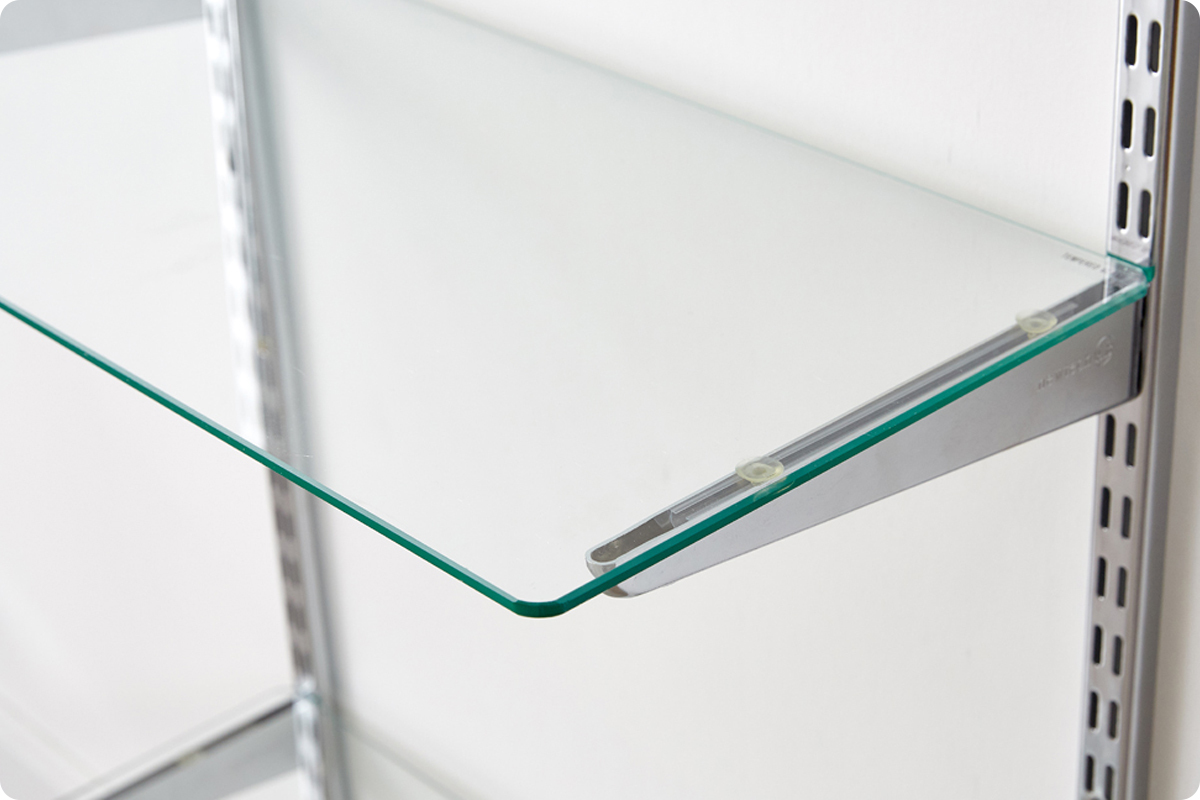
Make sure that the shelf is spaced equally so the amount they overhang on both sides match. Secure shelf to the suction cups on the Brackets.
1. Steel Shelves - Fitting Brackets
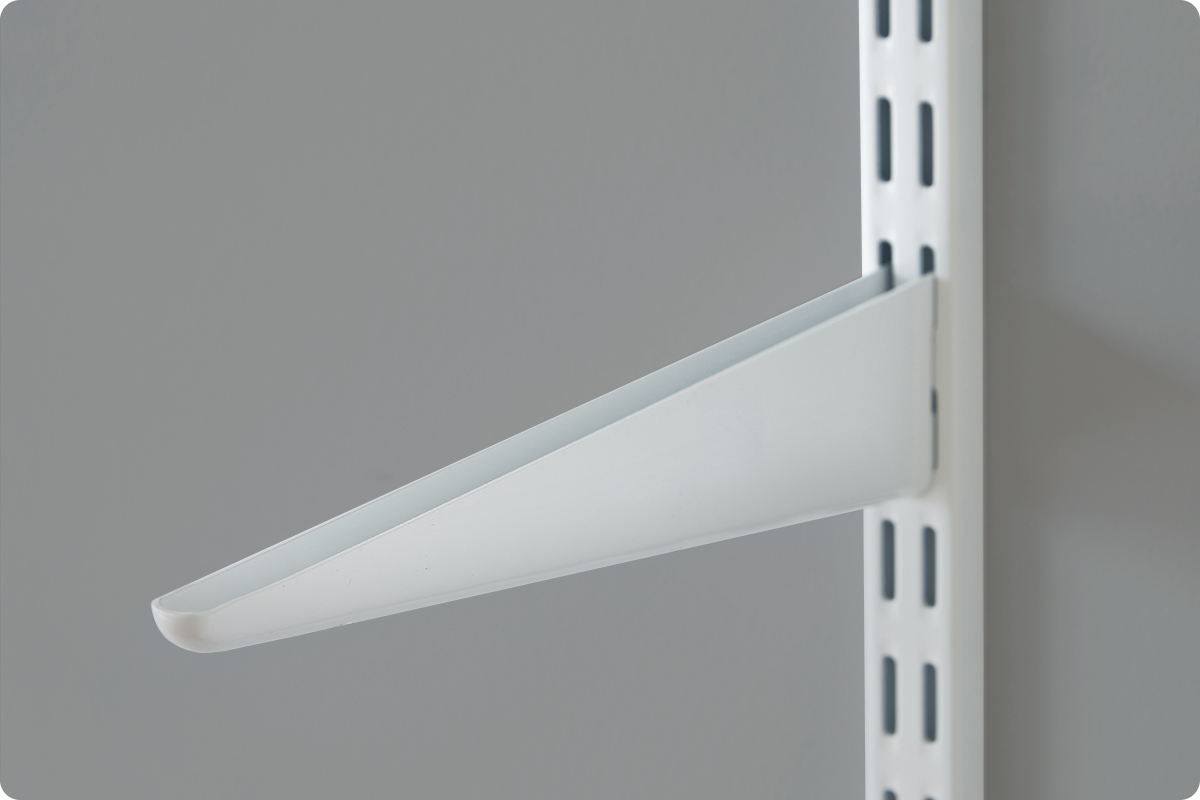
Lift and drop Brackets into place, making sure they're set at the same height on the Uprights.
2. Steel Shelves - Fitting Shelves
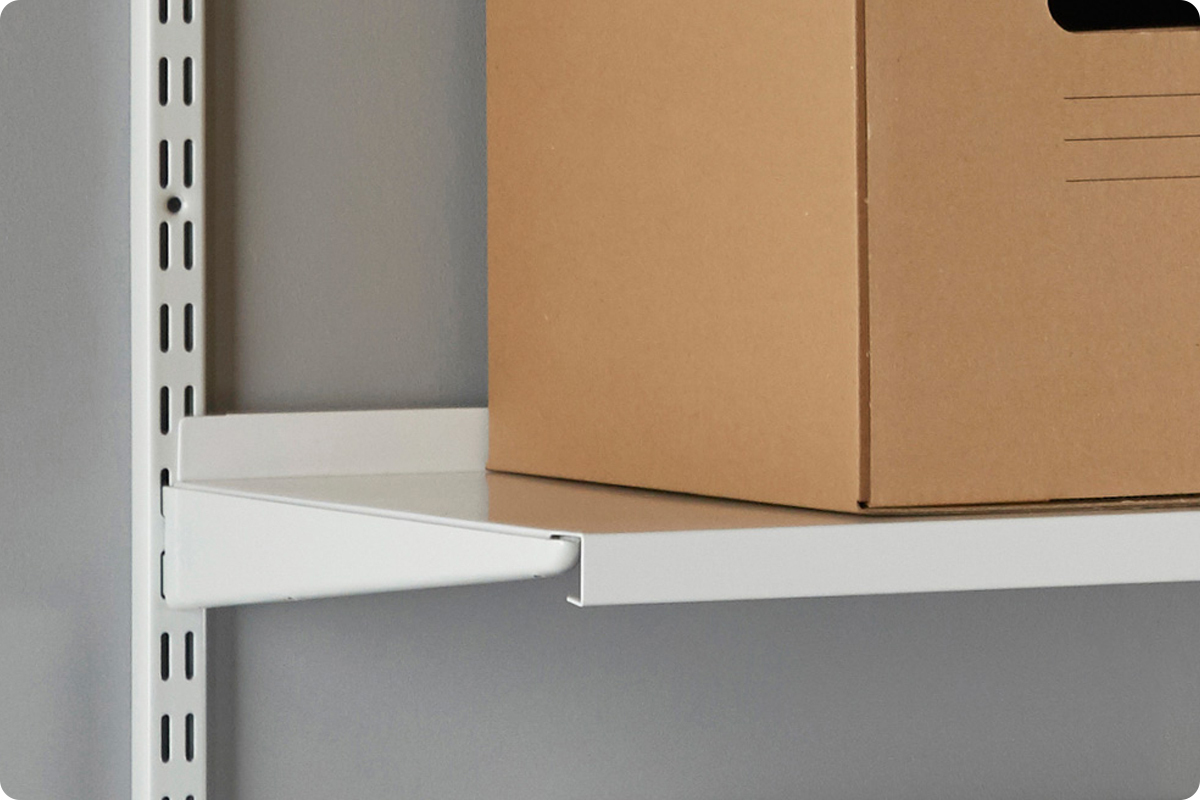
Slot the Steel Shelf into the Brackets.
1. Fitting Wooden Shelves with Shelf Ends
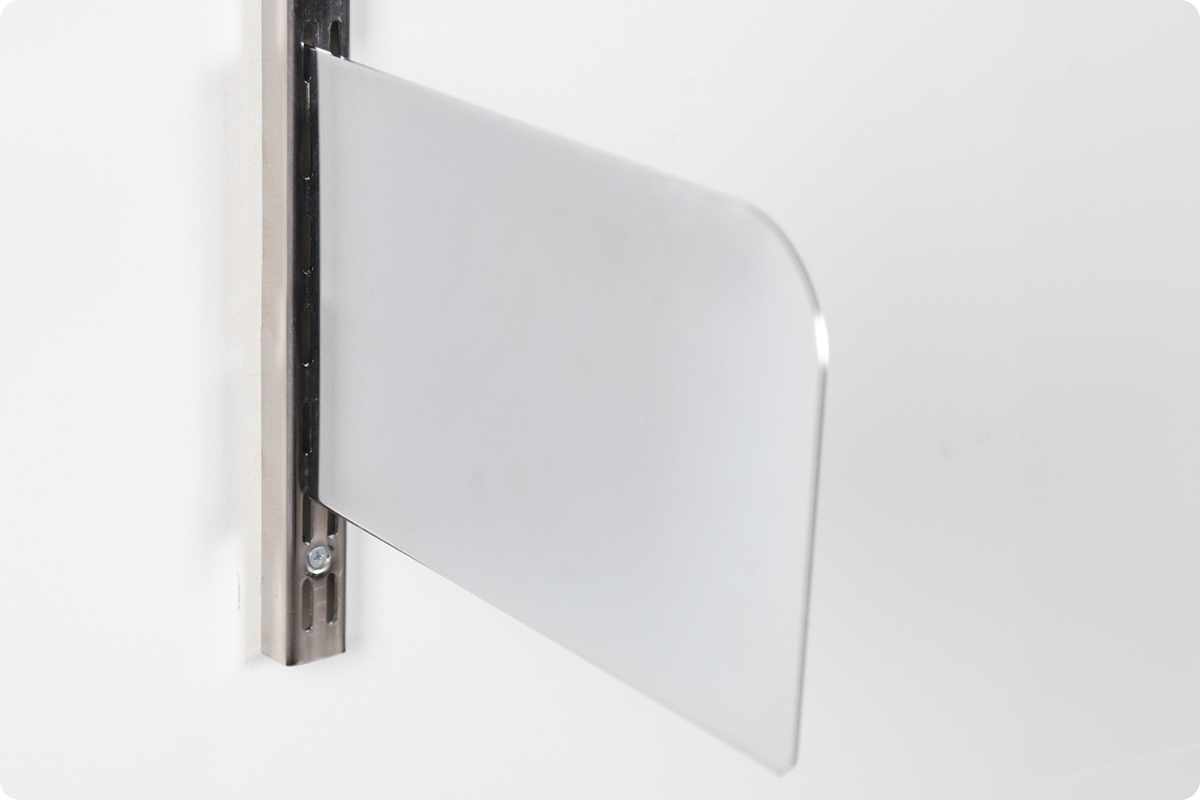
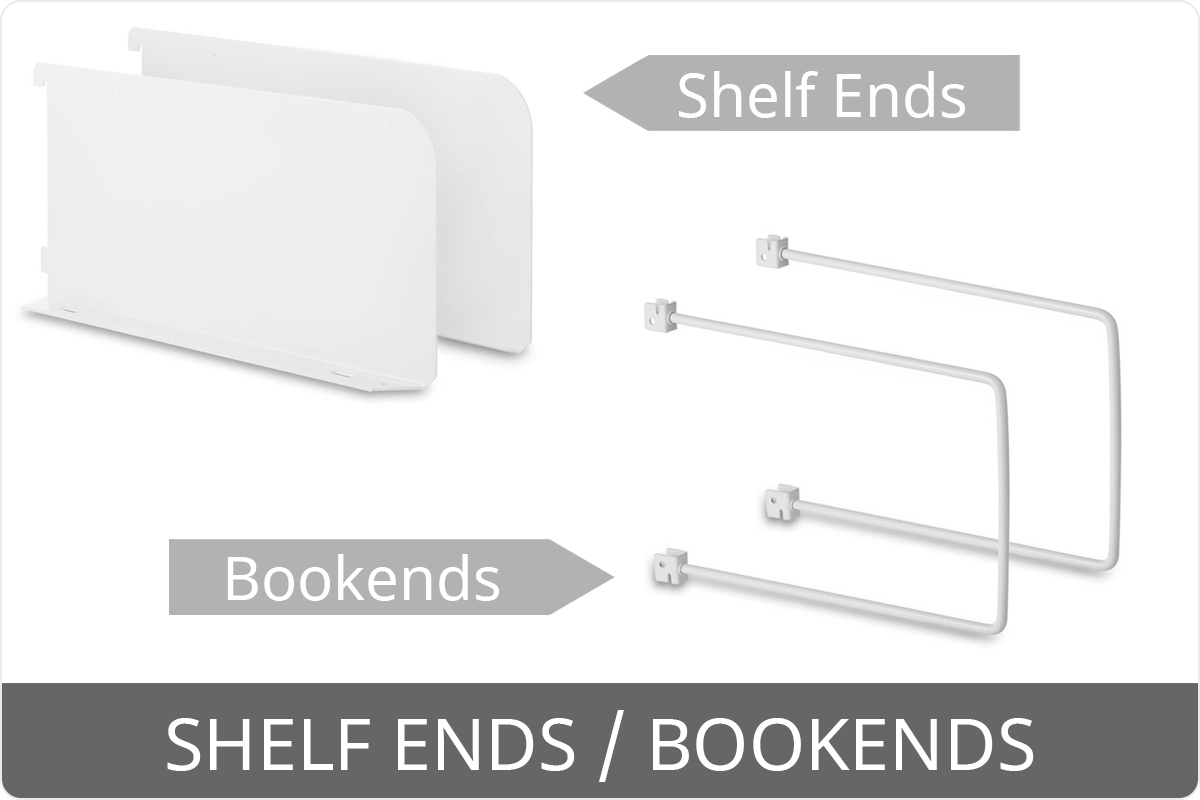
Lift and drop Shelf Ends* into place, make sure they're set at the same height on the Uprights. Slot the Wooden Shelves in.
*Shelf Ends are used in place of Brackets.
2. Affixing Wooden Shelves to Shelf Ends
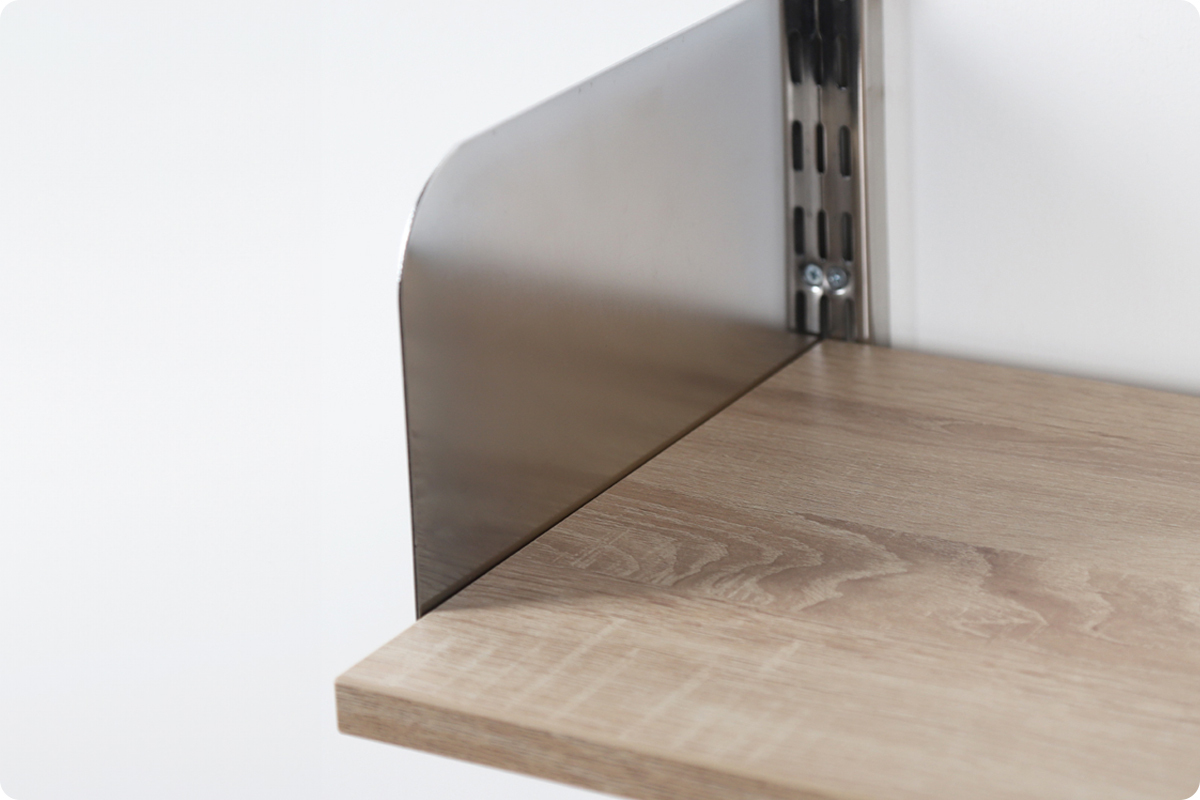
Line up the Shelf Ends as needed and mark holes with pencil. Drill small pilot holes into shelf, do not completely drill through the shelf. Steady the shelf on the Shelf Ends and screw into the pilot holes to secure.
Fitting Accessories
There are a few accessories available to pair with Twin Slot Shelving.
Bookends
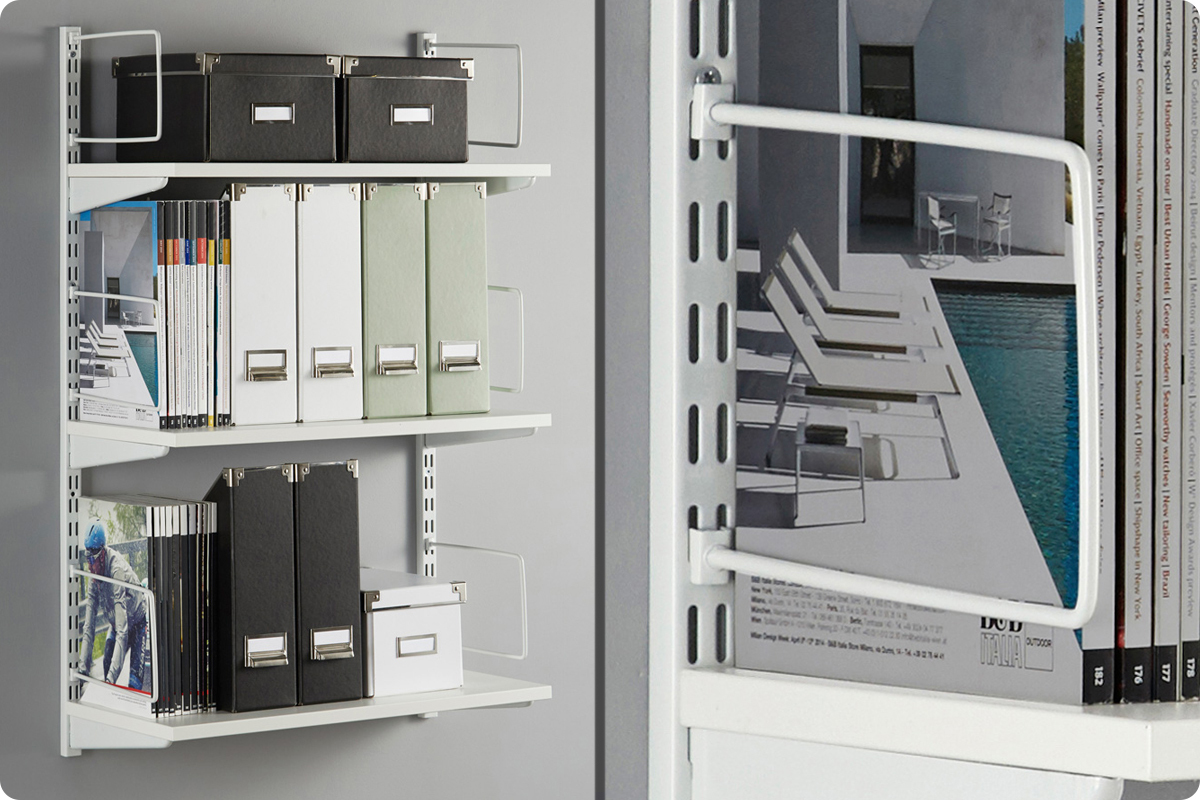
These easily slot into the Uprights directly and sit above the Bracket and Shelves.
Hanging Rails / Back Bar
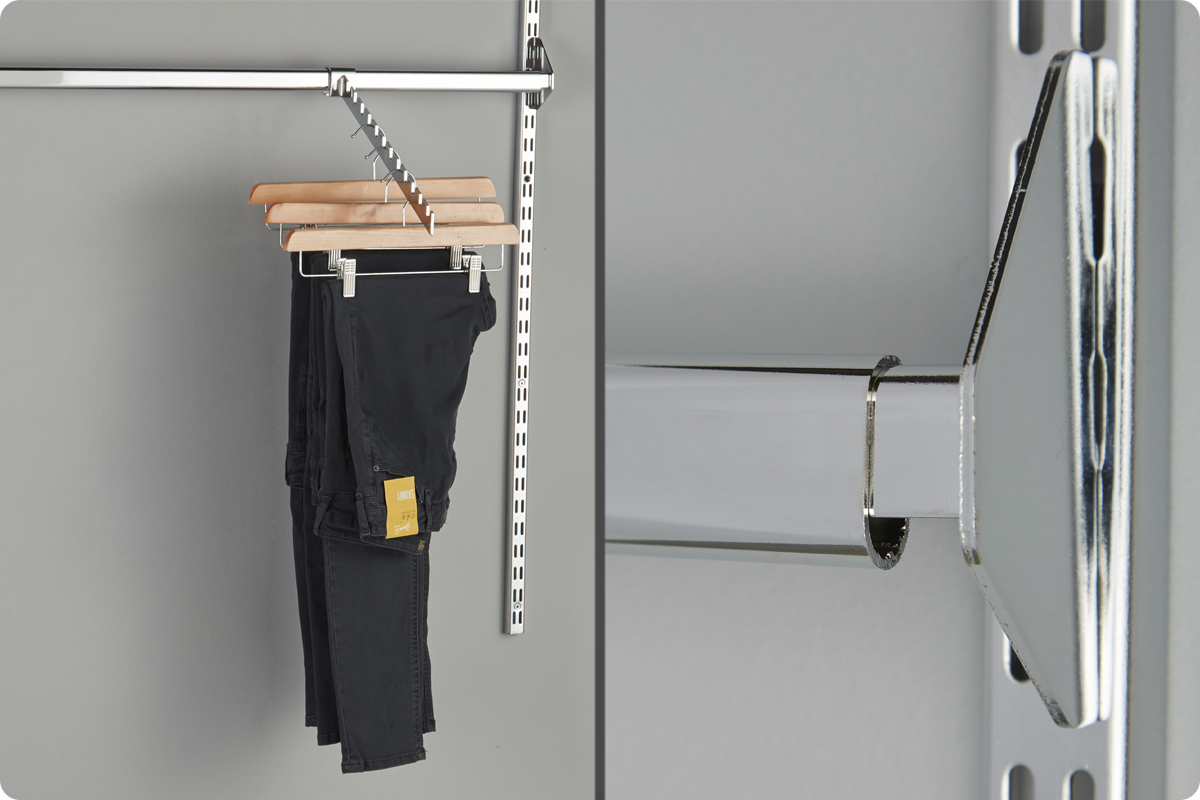
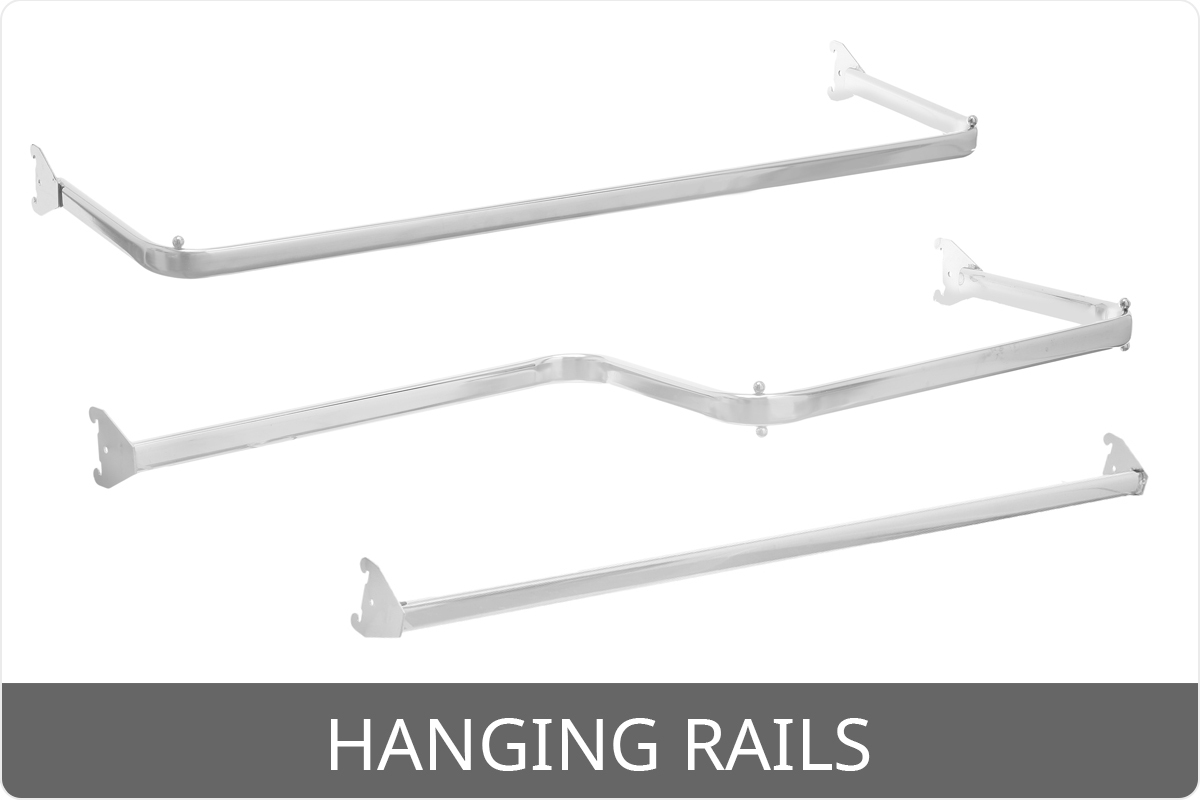
Hanging Rails are fitted firectly onto the Uprights (in the same way as the Brackets).
Display Arms
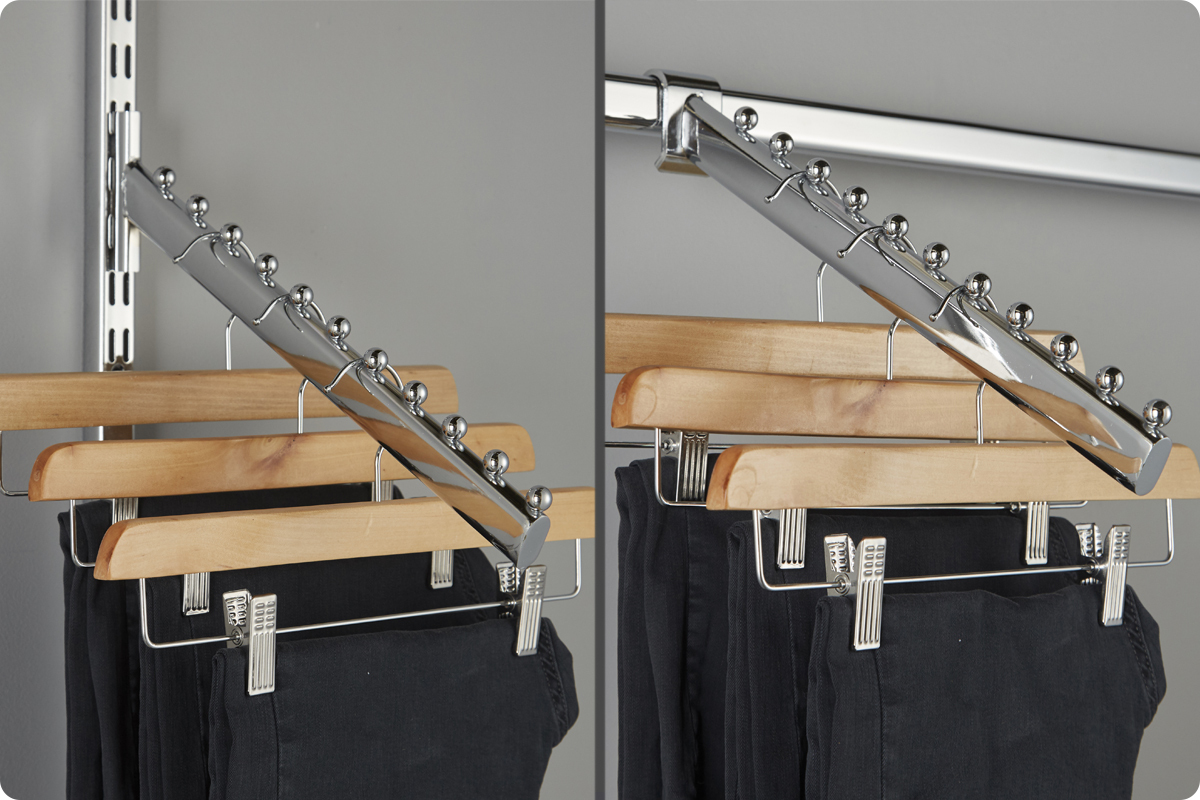
Arms are fitted onto either the Uprights or onto a Back Bar.
Shelf Stiffener for Steel Shelves
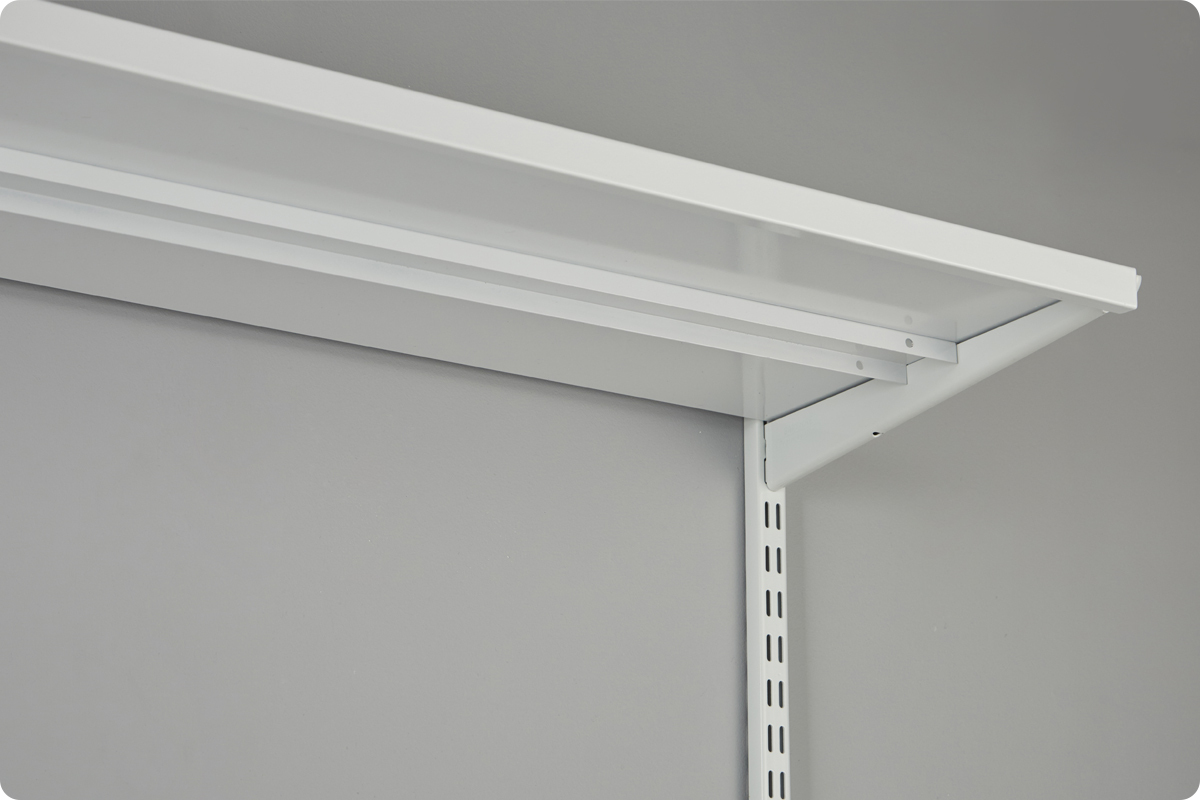
This slots underneath the shelf* to provide extra support.
* For 1000 mm Steel Shelves
We hope you found this guide useful and successfully assembled your Twin Slot Shelving.
If you have any questions, feel free to call us on 0800 834 782 or email our customer service team on sales@shopfittingwarehouse.co.uk and we will be happy to help.
If you have any feedback on this guide, please email us and let us know.
