Fitting Guide: Decorative Wall Panels
This guide covers all aspects of assembly for products in our Decorative Wall Panels range:
- Acrylic Panels
- PVC Panels
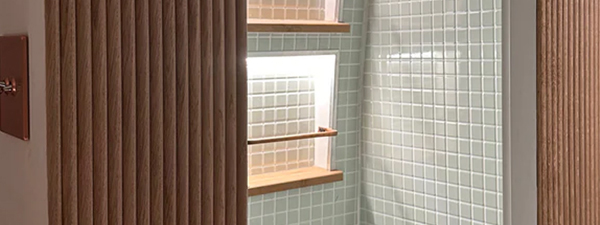
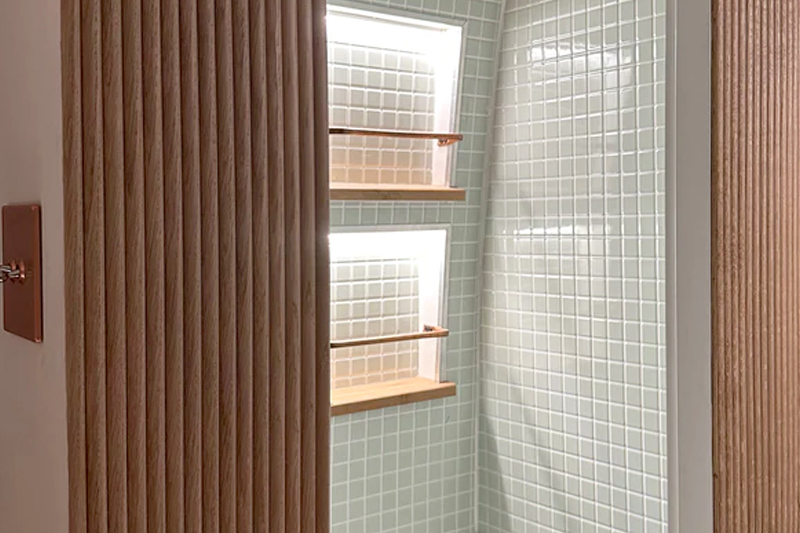
Pattern: Panels may be fitted vertically or horizontally. However, in the case of our decorative wall panels, since the tile design height and width may be different, we recommend fitting adjoining panels in the same orientation.
Panel Conditioning: Panels must be stored flat for a minimum of 12 hours and fitted at their approximate service temperature or a minimum ambient temperature of 18ºC. At no time during storage, installation and after fitting, should the panels be subjected to extreme temperatures. We recommend not keeping them left rolled for extended periods, as this may affect how easily they can be flattened for use.
Important Safety Information
- Read through all instructions on this page before beginning any assembly
- If you think that you have received defective parts please do not use and contact us
- If you are unsure about assembly, please ask our team
Materials Required
- Adhesive (290 ml tube or 600 ml barrel gun sausages) – MS High grab, gap fill adhesive. To ensure good adhesion.
- Silicone (300 ml) – Anti-fungal Colour matched, or Clear for joints, corners and finishing seal.
- Seal Tape* (20m or 50m) – Double-sided, high strength joint sealing tape.
- A) To assist positioning of panels
- B) To create flat and level joins between panels
- C) To create a waterproof ‘backing seal’ to the joint
Depending on wall surface, these may also be required
- Backing Strips (50 mm wide x 2500 mm long) to be used:
- A) Flat – adhered at panel joins on un-level walls, such as brick or block work, before fitting panels to ensure a level waterproof join between the panels.
- B) Folded into a 90 degree angle – then adhered to either internal or external corners which are out of line, before fitting panels and to avoid scribing (cutting the panel to fit the wall). Or for extra joint waterproofing.
- Edging Strips. Used at external corners around windows or boxing in of pipework (where you might have an exposed cut edge of the panel).
Tools Required (D.I.Y)
- Fine tooth hand saw
- Stanley knife or Jigsaw cutter (for PVC)
- Hand adhesive and sealant gun 300ml
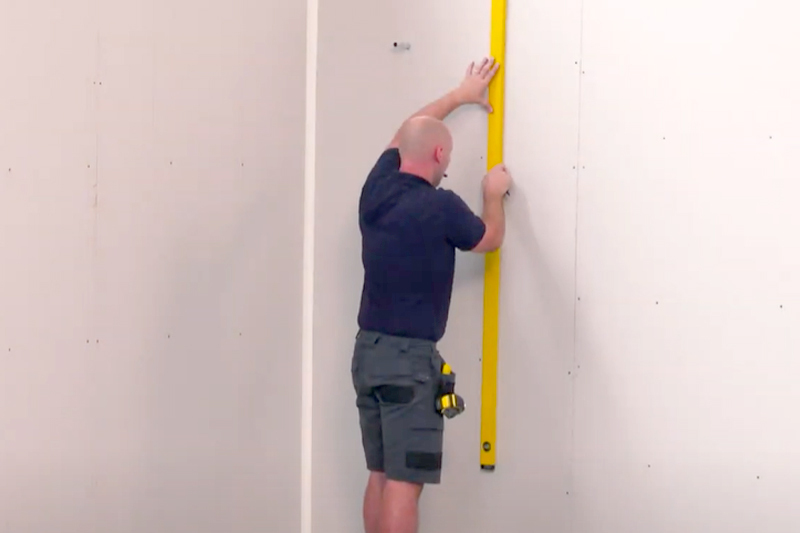
- Spirit or laser level
- Long straight edge & surface marker
- Small block place or wood scraper
- Sand paper
- Extending paint roller
- Gloves for handling sharp panel edges
- Additional: For plug sockets, etc. – a drill and jigsaw
Tools Required (Professional)
- Hand or powered track saw
- Hand or powered 600ml sausage gun
- Vertical and horizontal laser
- Extending paint roller
- Thermo-former or grooving tool. If required
- Additional: For holes/plumbing – a power drill & hole saw
Step One: Wall Preparation
Please Note: Tanking compound or waterproof backing panels are not required.
The panels can be fitted to any reasonably level surface including existing tiles. New plaster or block-work must be dry and coated with PVA.
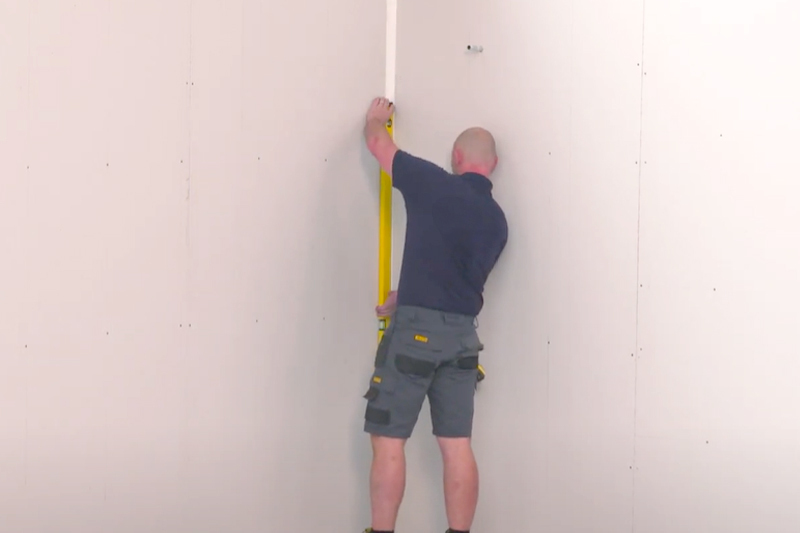
Corners
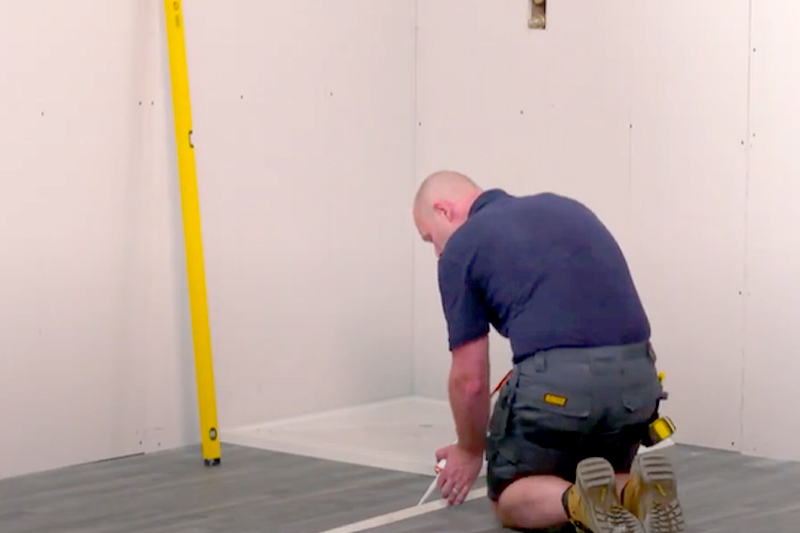
To keep both Tile and Patterned panels perfectly in line, External and Internal corners should be plumb vertical.
If not:
Backing Strips (50 x 2500mm) should be fitted to avoid the need for extra care in trimming and scribing the panels to fit the walls.
Glue Backing Strip into Corner
For an Internal corner, before folding to the required angle, apply Seal tape to the front face of the backing strip, but do not remove the front gold cover strip until Step 4 (Final Fixing). For both Internal and External corners, apply gap fill adhesive to the back of the strip and to both walls to fill any gap. Use a level and also packing strips if required. Allow the adhesive to set while you continue to the next step.
Step Two: Setting Out Multiple Panels on One Wall
Marking Out Your Panel
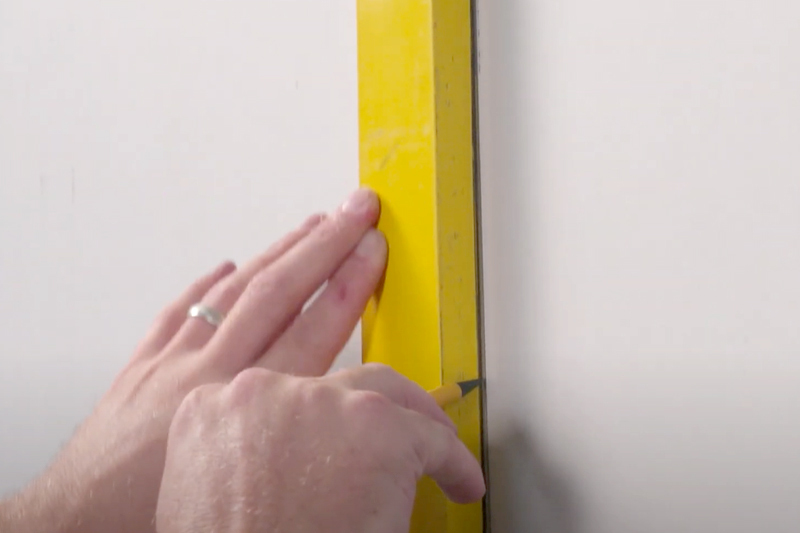
To ensure your tiles or design panels are evenly balanced across the wall, establish the centre point of your main wall. Mark this centre line plumb vertical on the wall and take all measurements from this. Then mark the position of both vertical edges of this central datum panel. Always fit this panel first ensuring that it is fixed plumb vertical and horizontal.
Draw Edge of Next Panel
Then working left and right from the outside edges of your datum panel, draw on the wall surface the position of the outside edge of your next panel. Assume end panels will be reduced in width to fit into internal corners.
Work Around Room (If Not Balancing Design)
Alternatively, if you are not concerned about the final cut tile or end of the panel / design balancing across the wall, then you can start in the corner with a plumb level panel and work around the room.
Backing Strips
For corner showers and installations where backing strips have been fitted the corner panel can act as a datum panel as it will be plumb. Shown above, is an example of how a panel can be fitted using backing strips.
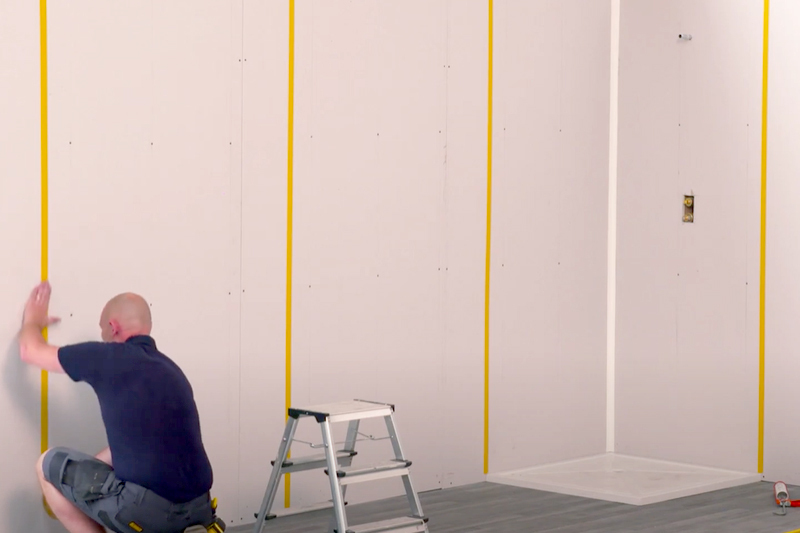
Seal Tape
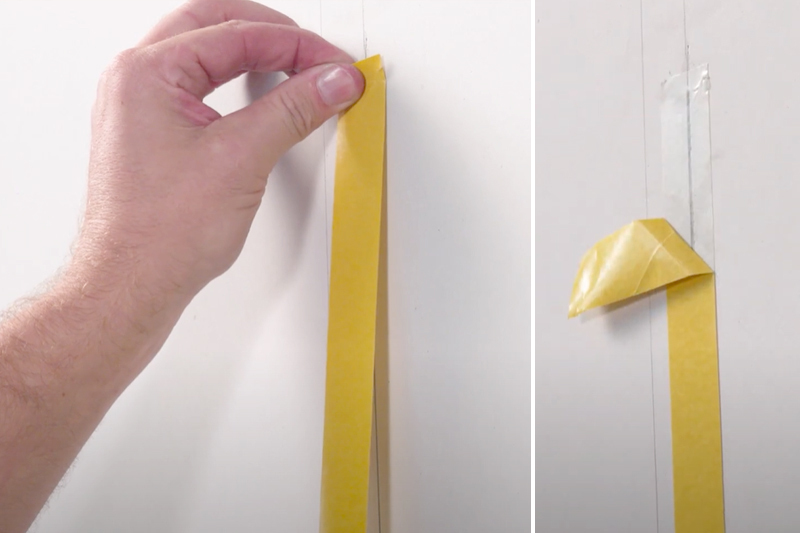
Apply the seal tape 50/50 over the centre of each of the vertical lines you have marked on the wall. Peel back a short length of the gold covering on the face of the tape at the top and bottom to see the marked line when fixing and allow removal later.
Step Three: Trimming/Scribing All Panels
Important: Panels must not be fitted too tight between each wall. A small gap must be left between panels of 2mm and 3-4mm in the corners and at the top and bottom (unless in a shower or bath area where they can rest on the lip). This is to allow for a small amount of expansion. For panels with a continuous design, you can butt the panels up along the wall but allow extra room in the corners and between the panel and ceiling. These gaps will later be filled with sealant (see Step 5).
Important: Panels must be cut face up.
Cutting - Acrylic Panels
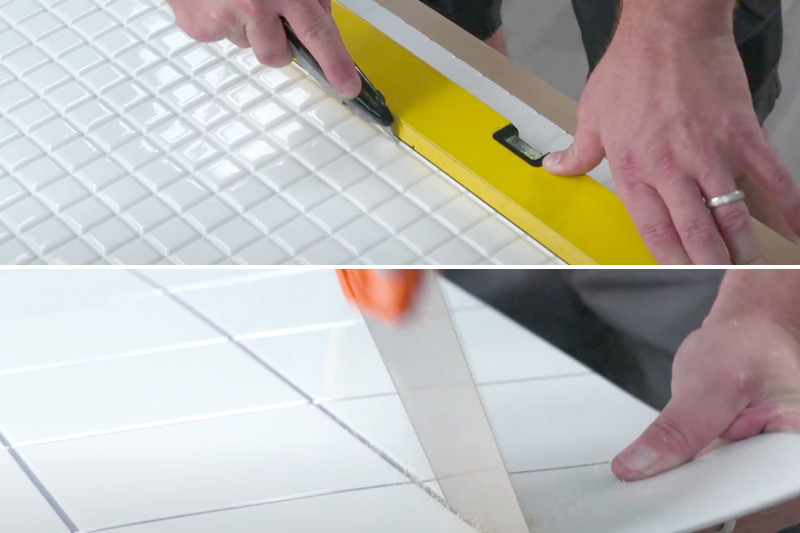
Acrylic Panels: Mark the line on the face of the panel. Use a straight edge and sharp Stanley knife and scribe along the line using light then medium pressure for a total two or three passes. Then, supporting the panel close to the line, exert downward pressure to snap off the excess material.
Cutting - P.V.C Panels
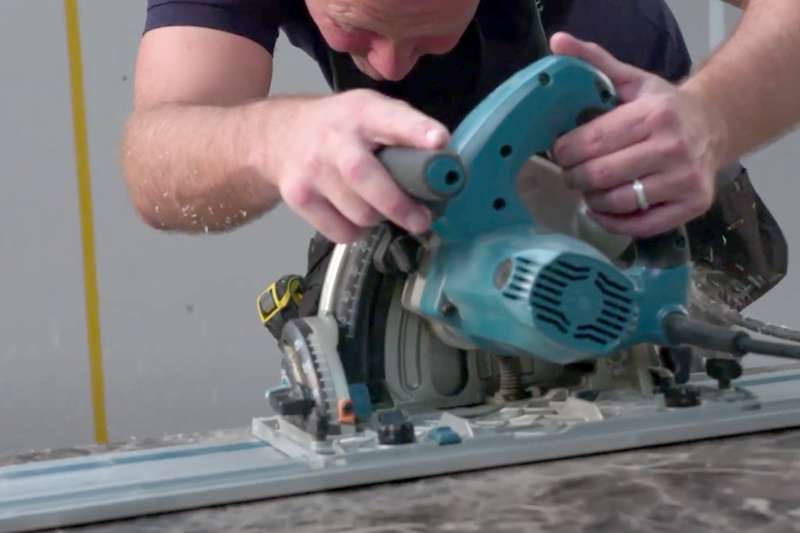
P.V.C Panels: Should be cut with a fine tooth hand, jig or circular saw. A track mounted saw is ideal. Edges can be further trimmed with a small block plane, wood scraper or sand paper.
Cutting Holes
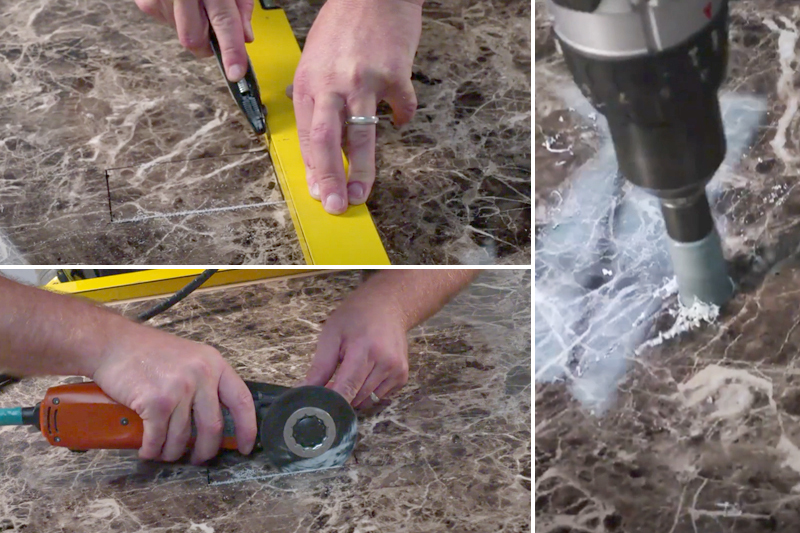
Holes can be cut easily, using methods outlined before (using a sharp Stanley knife for Acrylic and a fine tooth hand, jig or circular saw).
Step Four: Fixing Panels
Shower or Bath: The panel should rest on the top of the flat edge or at the bottom of the rounded edge of the Shower Tray or Bath. It is advisable to put a large bead of silicone on the edge of the bath or shower tray to bed the panels down in.
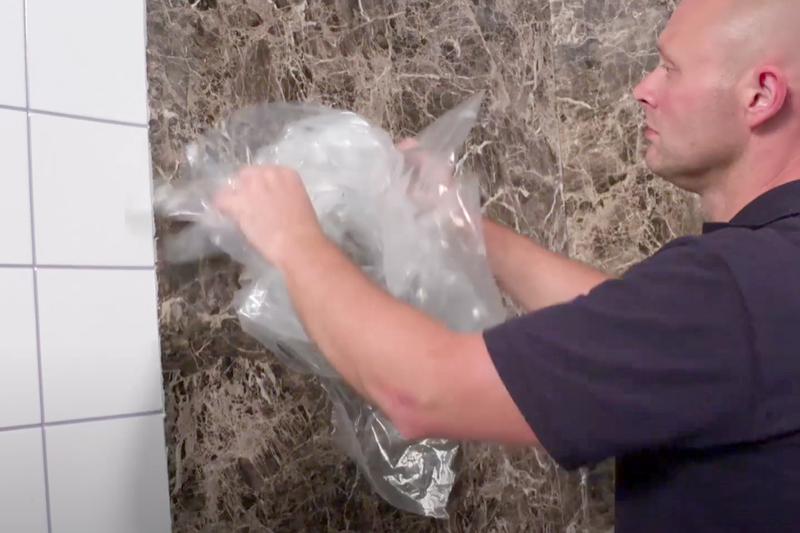
Before fixing a Tile panel peel back a small amount of the clear removable protection film from all four edges so sealant can be applied later. Then peel back the top of the seal tape and fold to the side to allow easy removal later. Important: Some panels do not always have this removable protection film. Please check for labels or with our help line; do not try to peel back the coating as it will not be replaceable under the guarantee.
1. Adhesive
Apply the adhesive in vertical lines approximately 60mm apart from the top to the bottom of the panel. DO NOT DOT AND DAB or pool the adhesive in one place. Adhesive is best applied to the panel. Where space does not allow, it can be applied to the wall.
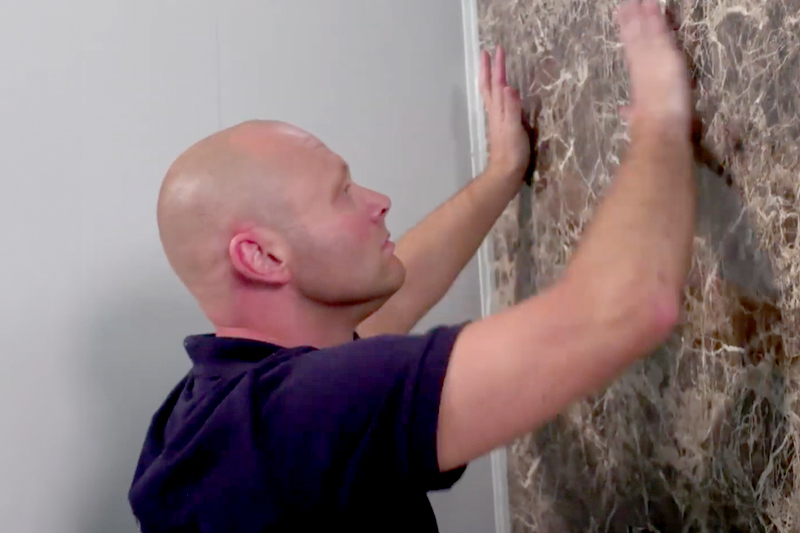
2. Apply the panel
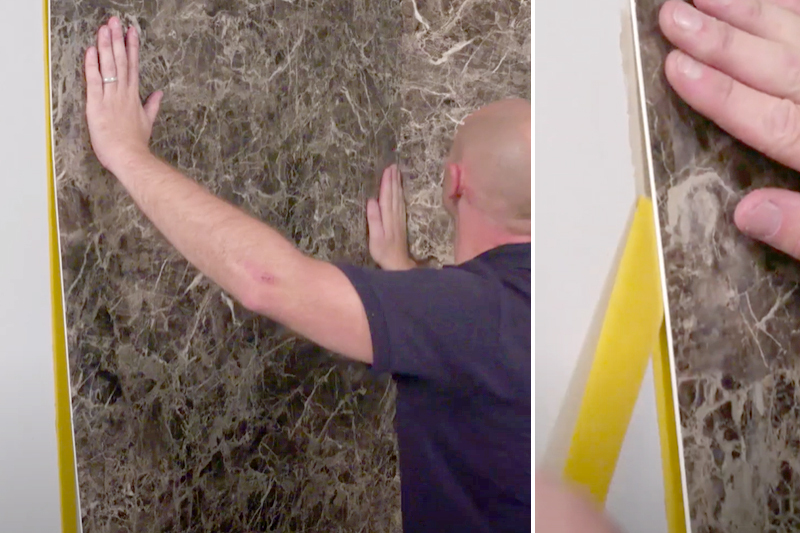
Push the panel onto the wall and ensure you have good contact all over. Once you are happy with the position of the panel then pull the tape cover away from behind the panel and then push the panel onto the tape around its perimeter. If you can’t reach the top of the panel use an extendible paint roller to ensure good contact all-over. NB: If you do not ensure full contact across the whole panel it might cause a flexible gap that will affect the quality of the finish.
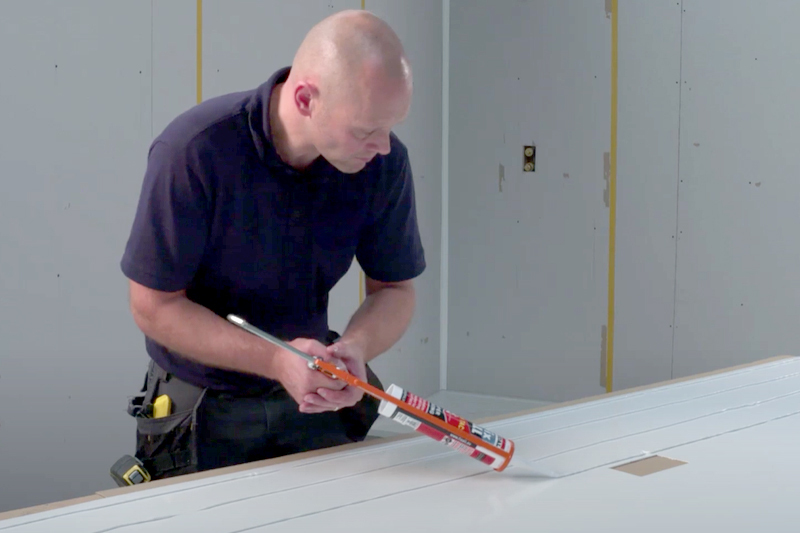
3. Sealant bead
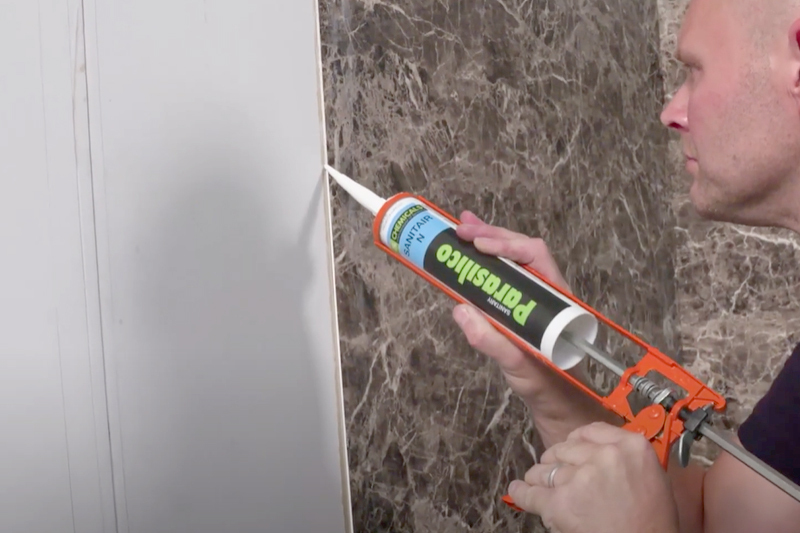
Before fitting the next panel run a small 3mm bead of sealant down the joint of the Seal tape and the outer edge of the panel.
4. Next Panel
Fit the next panel to the wall in the same way as the first working from the base and aligning the edge with the first panel and onto the sealant. Remove any excess sealant from the face of the panel using a sealant tool or a wipe.
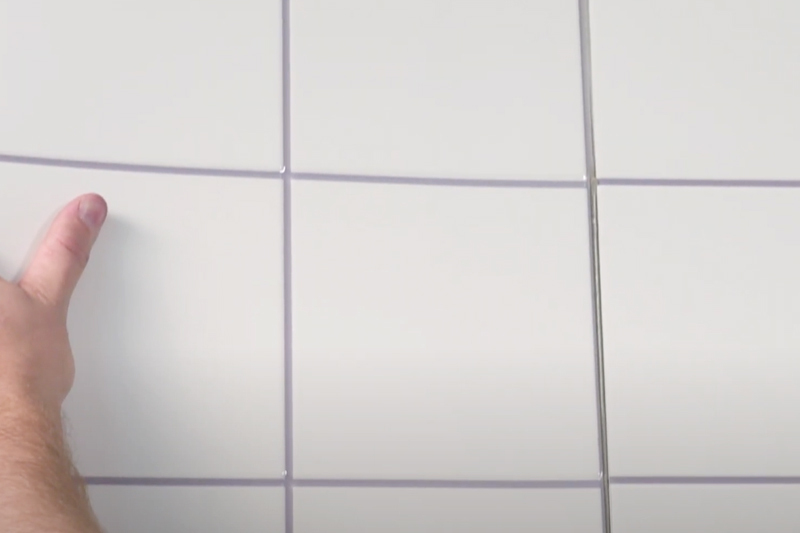
Remove Excess Sealant
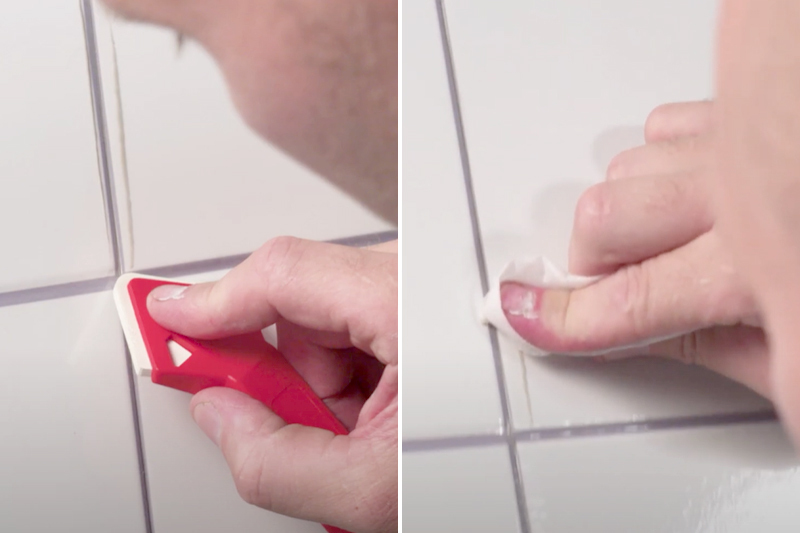
On tile panels, for best appearance use a clean finger and water in a spray bottle to remove sealant to the base of the tile groove (radius) but ensure no gaps appear in the seal. Remove all excess sealant when first applied before it starts to set, using either a sealant tool or wipe.
Tip for Tiles
To ensure you have an even gap from the top to the bottom insert a 2mm nail, screw or tile spacer between the panels in a few places after the silicone has been applied. Once the adjoining panel has been pushed onto the wall remove the spacers and smooth / remove the silicone.
Leave 3mm Gap Around Panels
Important: Do not forget that a 3mm gap must be left around the panels at the top, bottom and in the corners to allow for expansion and contraction during seasonal changes in temperature (except for in the shower or bath area, where they can rest on the lip). Do not fit the panels tightly across the room or they will expand and come free from the wall. You must also allow the panels to cure fully on the wall before engaging air conditioning or heating changes.
External Corners
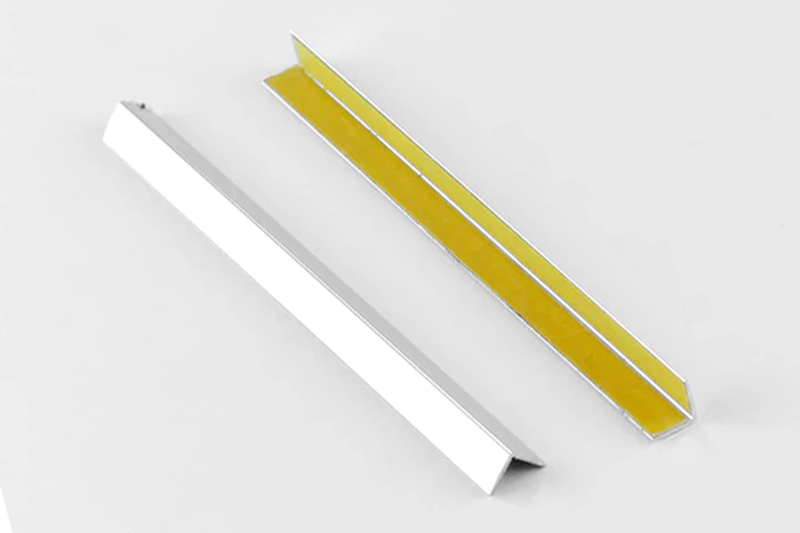
Edging Strips (30 x 3000mm) can be used to cover the cut edge of the panels when fitting around a window or where boxing in has been used to conceal pipe-work etc. Alternatively, right angle aluminium edge strips or 6mm tile trims can be used.
Tile Panels can be used on outer edge
For tile panels you can also use the moulded rounded outer edge of the panel instead of an edge strip. The rounded edges fit perfectly together (one behind the other) making a neat finish. Backing strips can be used to ensure the corner is plumb first.
Step Five: Final Seal
Seal Corners & Gaps
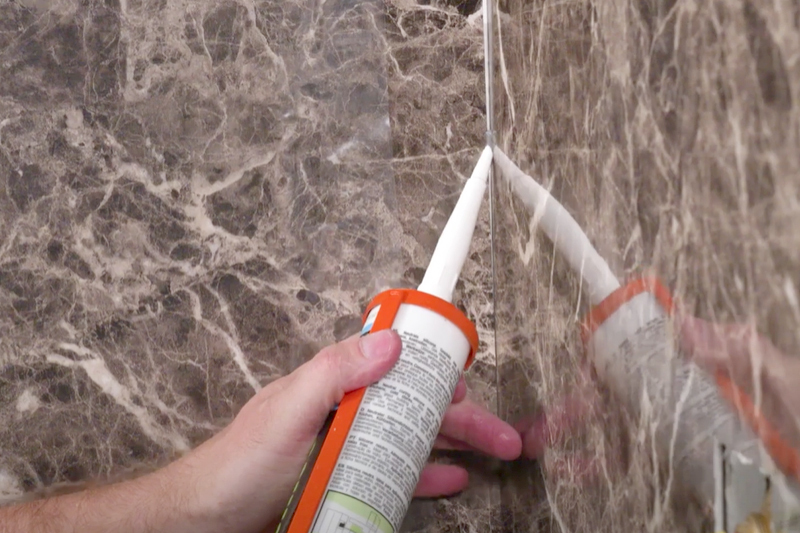
Silicone along the full length of internal corners and at the base and top of the panel. Take care to ensure any gaps have been filled between the panels. Shower controls and pipework should be sealed by silicone before face plates are fixed over the panel.
Remove Excess Sealant & Protective Film
Remove all excess sealant when first applied before it starts to set.
Finally, remove the remaining clear protective film from the body of the panel.
We hope you found this guide useful and successfully fitted your Decorative Wall Panels.
If you have any questions, feel free to call us on 01258 650 954 or email sales@shopfittingwarehouse.co.uk and we will be happy to help.
If you have any feedback on this guide, please Email Support and let us know.
Related Guides
-

Decorative Wall Panels:
FAQsHave more questions? View our dedicated FAQs within our Help Centre.
-
Display Panels:
With the Wow FactorLearn more on how to use Slatwall and accessories.
-
Knowledge Base:
Information & ArticlesYour resource for all things shelving, storage and displays.